
If you do complex formulations and workings using Microsoft Excel, you might surely be using the lock cells feature to prevent your formulas or functions in your worksheet intact and unaffected when other cells are edited, or you do not want important data to have tampered when you collaborate with your colleagues.
If you are new to Excel on your Mac/Macbook, you may want to know how it is done! Let's find out in below easy steps.
- Step 1: Open the spreadsheet on your Mac.
- Step 2: Now select the cell or cells that you want to lock.
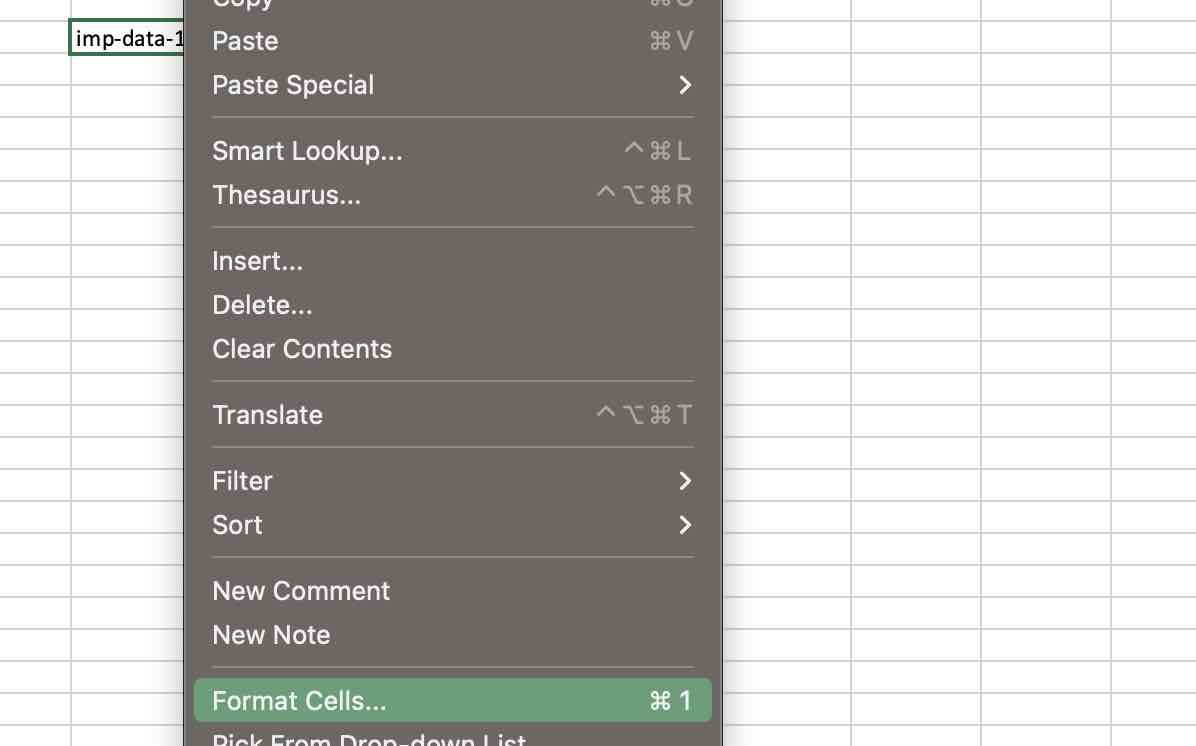
- Step 3: Control-Click (Right-click) and select Format Cells..
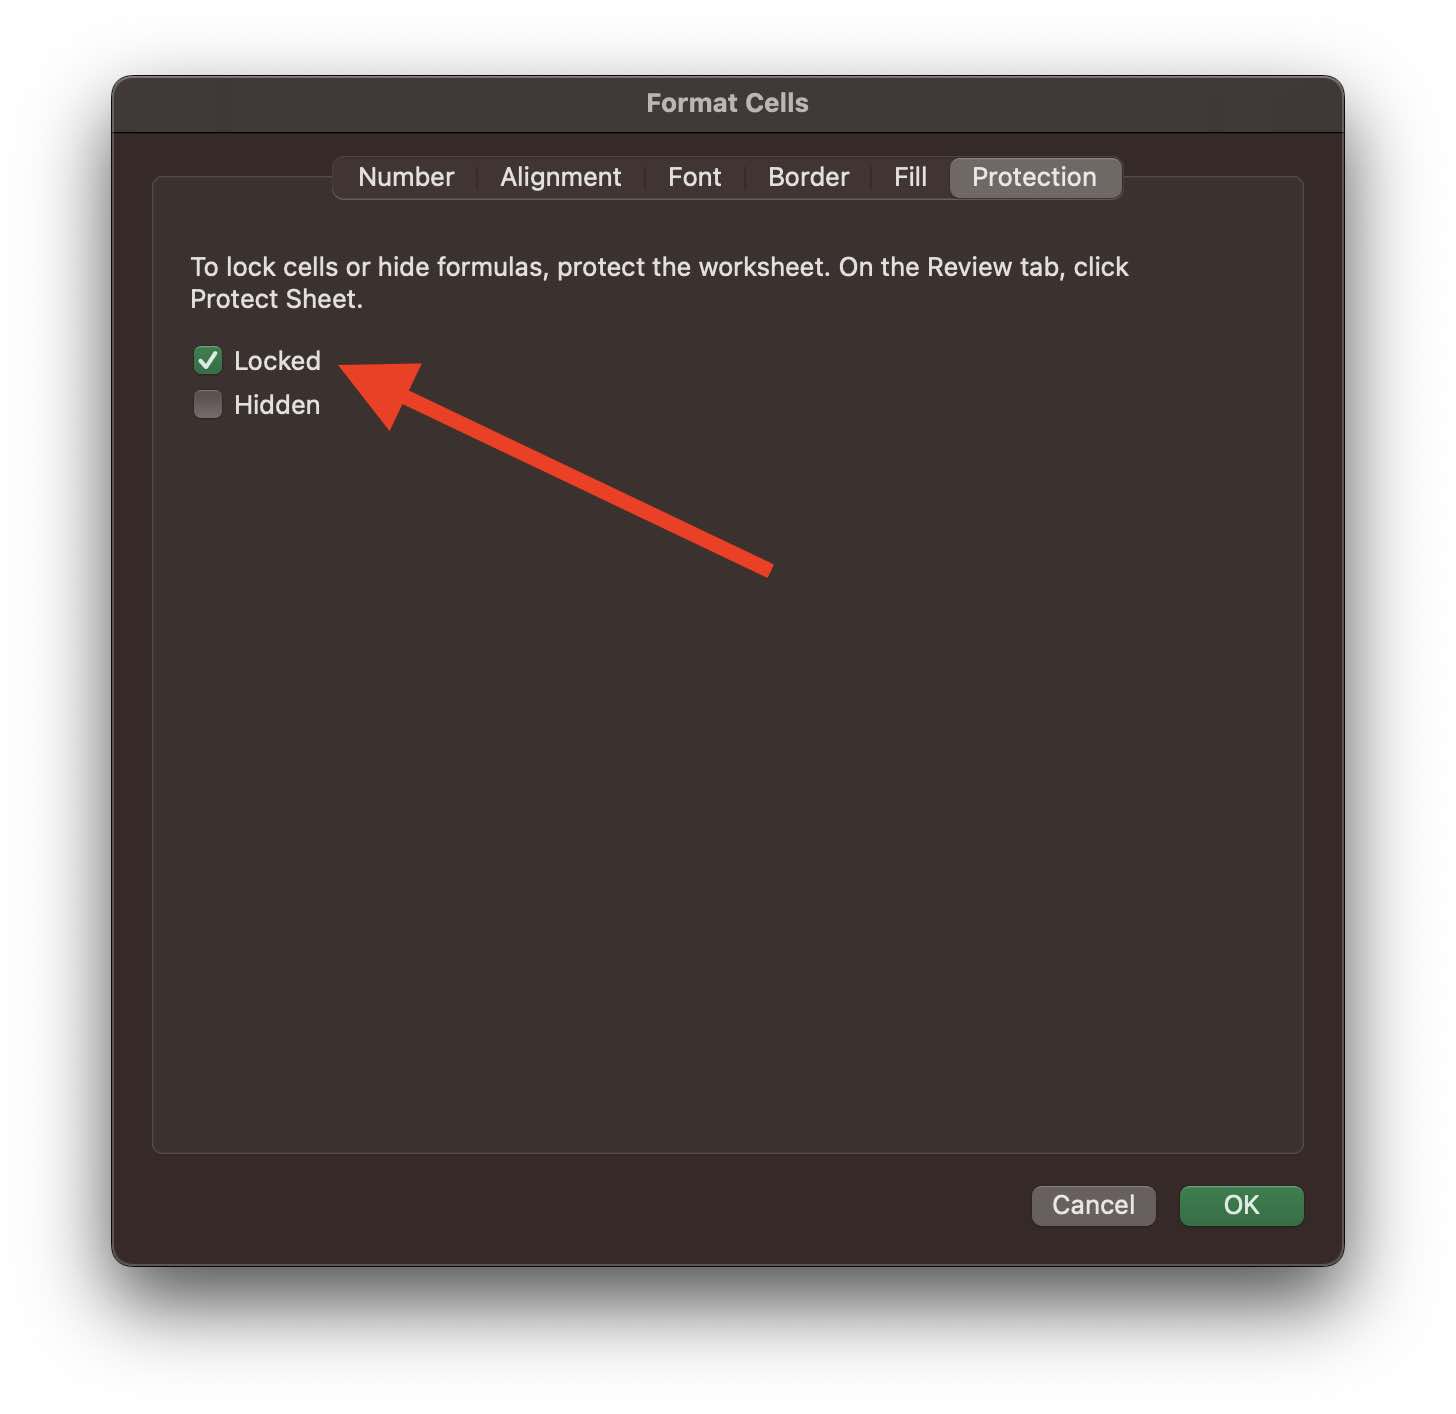
- Step 4: Now make sure the the Locked checkbox is selected. Closed the Format Cell dialog.
- Step 5: Now on the Ribbins, select Review tab.
- Step 6: Click on Protect Sheet.
- Step 7: Now:
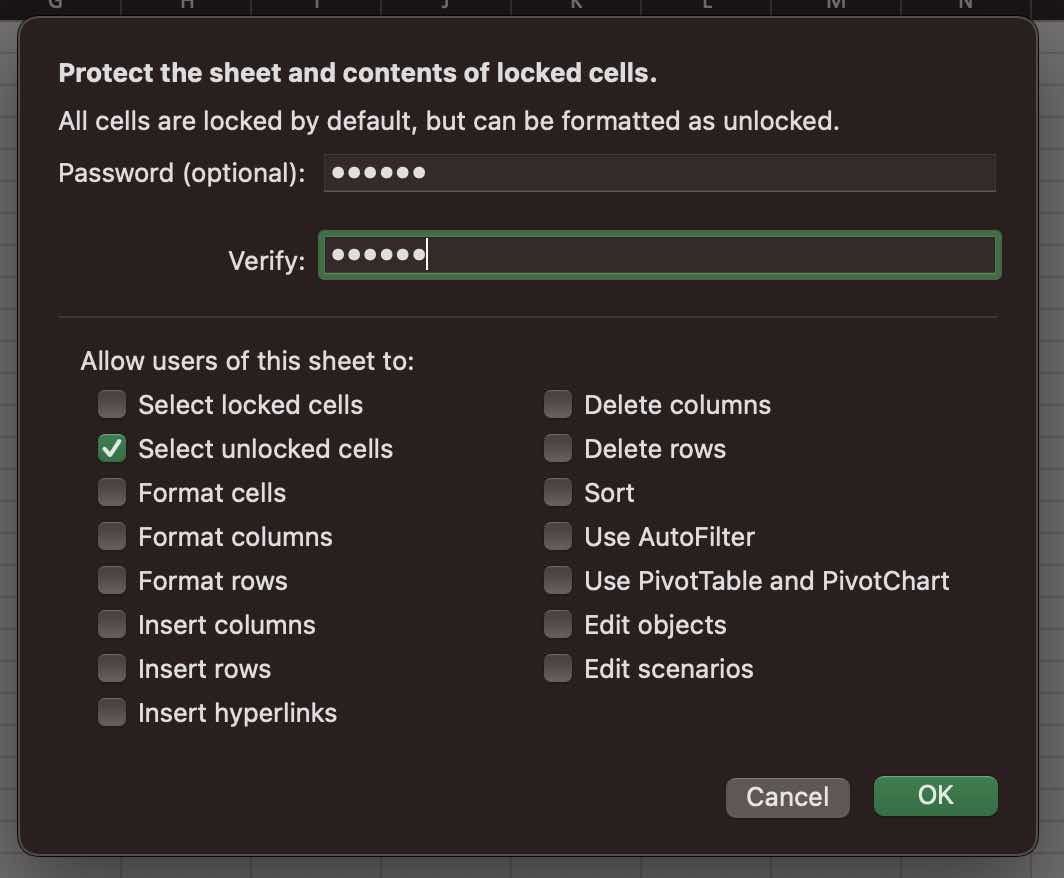
- Step 7: Now enter the Password and Verify it.
Provide Feedback For This Article
We take your feedback seriously and use it to improve our content. Thank you for helping us serve you better!
😊 Thanks for your time, your feedback has been registered!
Comments & Discussion
Facing issues? Have questions? Post them here! We're happy to help!