
If there is a specific website that you visit often on your Safari Web Browser on the Mac and you want to have customized settings set for it, well there are some advanced settings that you must try.
How to customize a website settings and permissions on Safari App for Mac
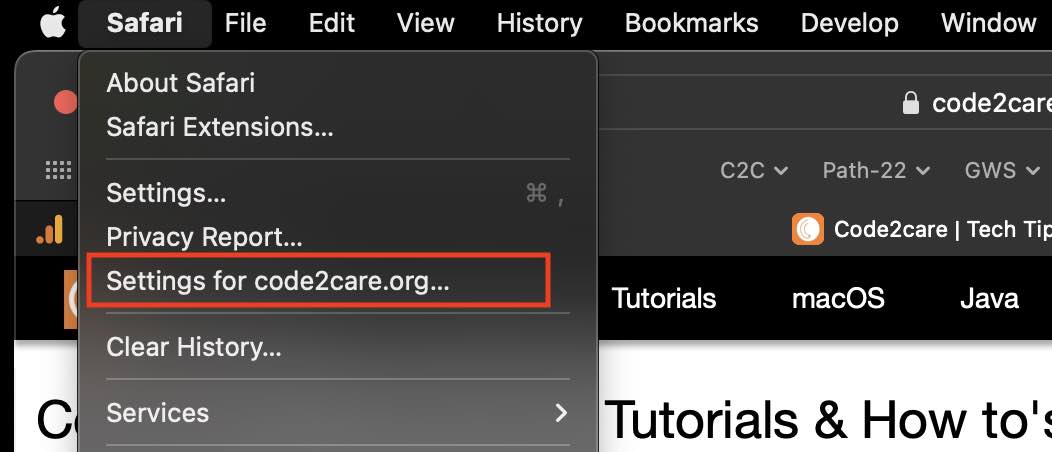
- Open Safari App,
- Be on the website that you want to customize.
- On the Menu go to Safari -> Settings for website-domain...,
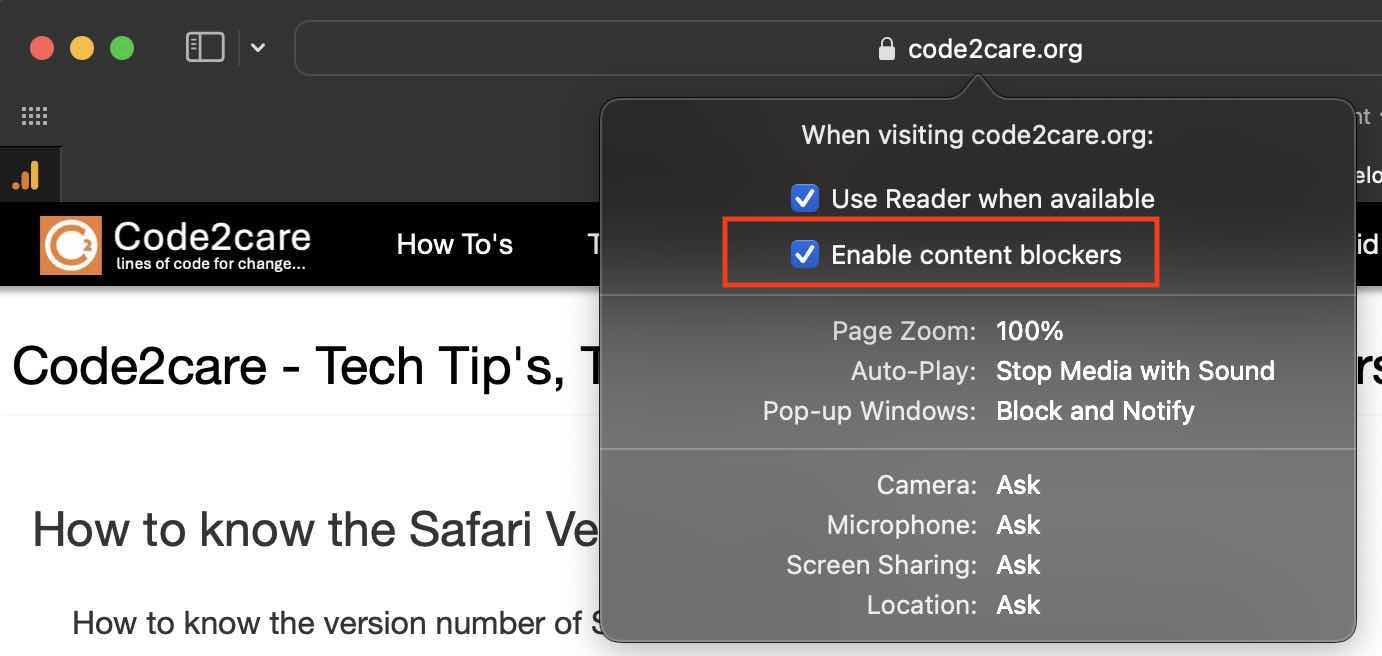
- Now you will see an overlay dialog where you would see all the options to customize.
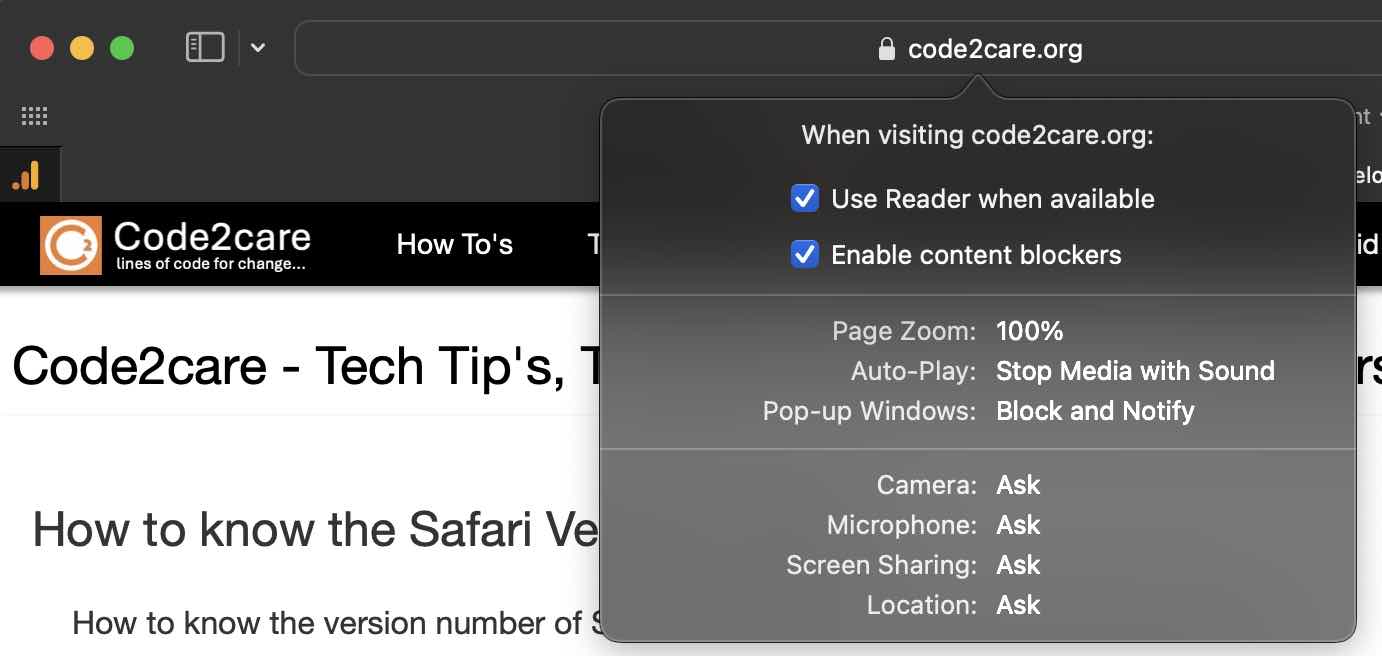
List of Options available:
- Use Reader when available: This is a great feature to turn on news websites, this reduces all the clutter that you see around an article and lets you reet it immersively.
Not just that, you can also set custom fonts for this mode as well as custom background and text size.
You can check or uncheck this option anytime to toggle the reader's mode.
- Enable (or disable) content blockers: If you have installed an extension that blocks ads on Safari for Mac, this is the option that you can disable (enabled by default) to unblock ads throughout the website.
- Page Zoom: Some websites have a text size that is unreadable at times especially if you have set a very high resolution on your Macbook with a very small overall font size. In such cases, this option comes in handy to see a customized Zoom for a web domain and have everything zoomed in or out as per your needs.
- Auto-Play: There are a lot of websites these days that play videos or audio automatically when you visit them. Websites like - Facebook, Youtube, and Instagram do that.
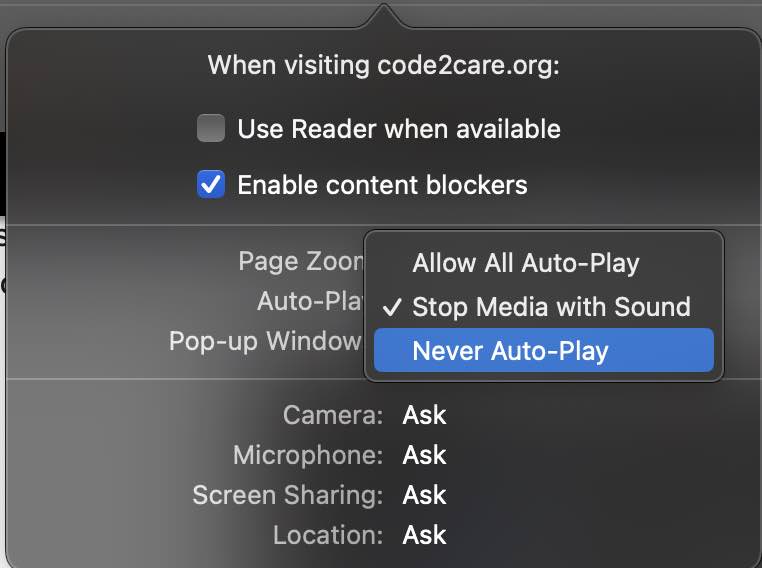
When you switch the option from "Allow all Auto-Play" to "Never Auto-Play" not only the sound but also videos such as Instagram reels, Youtube Shorts and Facebook videos will not automatically start unless you click the play button.
- Pop-up Windows: There are websites that show shady popup windows, whereas there are some genuine websites such as Windows 365 that open up documents in a new tab of a popup window. By default, all pop-up windows are disabled in Safari with the option "Block and Notify".
There are 3 options that you can choose from,
- Block and Notify (default)
- Block
- Allow
- Camera: You can control if you want to allow or deny your Mac Camera access to a website using this option. The default setting is ask
- Microphone: You can control if you want to allow or deny access to the Mac microphone to a website using this option. The default setting is ask
- Screen Sharing: You can control if you want to allow or deny Screen Sharting option to a website. The default setting is ask
- Location: You can control if you want to allow or deny location access to a website using this option. The default setting is ask
You can check or uncheck this option anytime to toggle this mode.

You can set values from 50% -> 75% -> 100% -> 115% -> 125% and so on to up to 300%

Provide Feedback For This Article
We take your feedback seriously and use it to improve our content. Thank you for helping us serve you better!
😊 Thanks for your time, your feedback has been registered!
Comments & Discussion
Facing issues? Have questions? Post them here! We're happy to help!