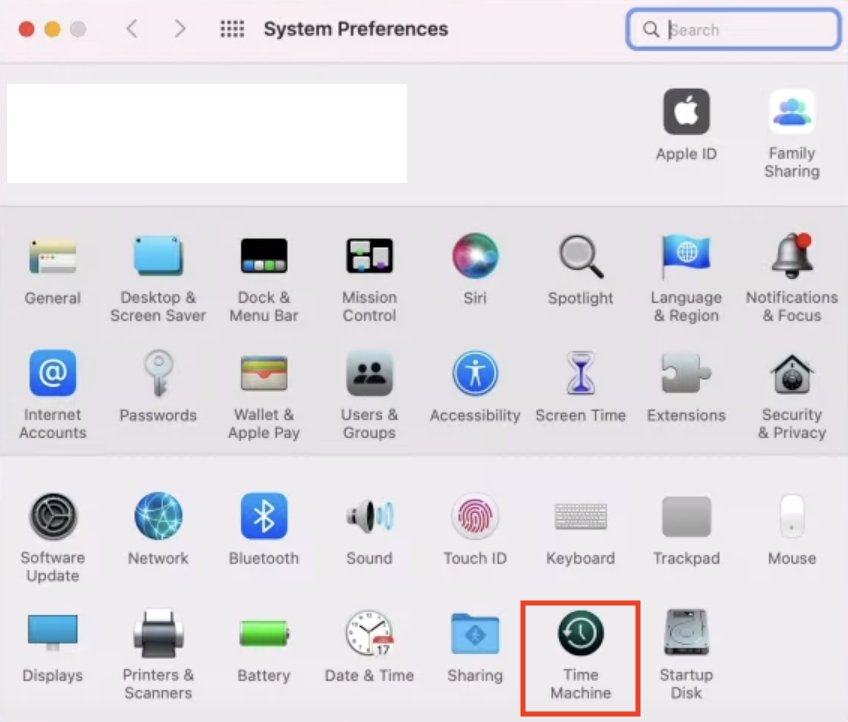
Time Machine lets you take a backup of your Mac, when turned on it automatically takes a backup of your personal data, including apps, music, photos, email, and documents. This is something that is really helpful to be sure that you do not lose any of your important data by accident or overwriting.
Apple Support handle on Twitter tweeted about making sure to take up a backup of your important files and projects before you update to macOS Ventura which will be released today, 24th October 2022.
Before you update to macOS Ventura, make sure to back up all your important files, projects and photos.
— Apple Support (@AppleSupport) October 20, 2022
The easiest way to back up your Mac is with Time Machine. Learn how by watching our video on YouTube: https://t.co/VCcUhq3yft pic.twitter.com/akjSaQLkKa
How to take a backup of Mac using Time Machine

- Make sure you have an external storage device connected to your Mac (like an SSD Harddisk)
- Go to Apple menu , select System Preferences...,
- Select Time Machine,
- Click on "Select Backup Disk..." and choose the external disk connected,
- Optional: You can also encrypt your backup by selecting "Encrypt Backups" and setting a password
- Select Use Disk
- The backup will start and would take some time to complete (hours depending upon the number of files you have its size)
- You will see a notification "Backup complete - Time Machine has finished backup to your backup drive"
If you already have a backup external device setup, connect it to your Mac and click on Back Up Now on the Time Machine icon on your Apple Menu bar.
Apple macOS Ventura 13 comes out today at 10 AM PT, make sure you take backups of your #Mac before the update.https://t.co/xGjHwYrbic#apple #macOS #macOS #Ventura #Macbook #M1 #M2 #AppleSilicon #Diwali #Release #SoftwareUpdate #iOS16
\— Code2care (@Code2care) October 24, 2022
Facing issues? Have Questions? Post them here! I am happy to answer!
Rakesh (He/Him) has over 14+ years of experience in Web and Application development. He is the author of insightful How-To articles for Code2care.
Follow him on: X
You can also reach out to him via e-mail: rakesh@code2care.org
- How to show line numbers in Nano on Mac
- How to install Jupyter Notebook on macOS Sonoma
- How to Disable Remote Management using Mac Terminal
- Test internet speed using macOS Terminal command
- Docker Desktop needs privileged access macOS
- Google Search Hot Trends Screensaver for Mac OS X
- How to do calculations in Mac Terminal
- How to make TextEdit the default text Editor on Mac
- How to Show Full Website Address on Safari for Mac (Ventura/Sonoma)
- The Zsh Shell - Mac Tutorial
- Opening mac Terminal
- How to change the name of your Mac running on macOS Ventura 13
- How to find the Battery Cycle Count on macOS Ventura
- How to set an emoji as Zsh terminal prompt in macOS
- How to access Trash Folder using Mac Terminal Command
- macOS Ventura XCode Command Line Tools Installation
- Hide Bluetooth icon on Mac Menu Bar macOS Ventura 13
- How to run .sh file in Mac Terminal
- Terminal Command to get the list of available shells in macOS
- How to see Storage Information on macOS Ventura
- How to Go To /usr/local/bin on Mac Terminal?
- How to do screen recording on Mac
- How to Find File and Directory Size in Mac Terminal
- Open .bash_profile File in TextEdit using Terminal
- Remove Now Playing icon from macOS Big Sur Menu Bar
- Keyboard shortcut to close tab in Notepad++ - NotepadPlusPlus
- [Tutorial] Write And Run Python Code In Notepad++ Editor - NotepadPlusPlus
- How to Add Notepad Shortcut to Desktop on Windows 11 - Windows-11
- Fix - SharePoint Online List column JSON formatting for person group field displays [object, Object] - SharePoint
- How to Exit a File in Terminal (Bash/Zsh) - Linux
- Spring Boot CRUD Examples using JDBCTemplate - Java
- [Fix] Spring Boot: java.sql.SQLSyntaxErrorException: Unknown database - Java
- [Mac] To open Eclipse you need to install the legacy java se 6 runtime - Mac-OS-X