
One of the best things about Mac is that you do not need any external app to do a screen recording, the built-in Screenshot app has the option to record your macOS screen wonderfully for free!
Let's take a look at how to do a screen recording,
Using Screenshot App
- Record Entire Screen: If you want to record the entire desktop screen of your Mac.
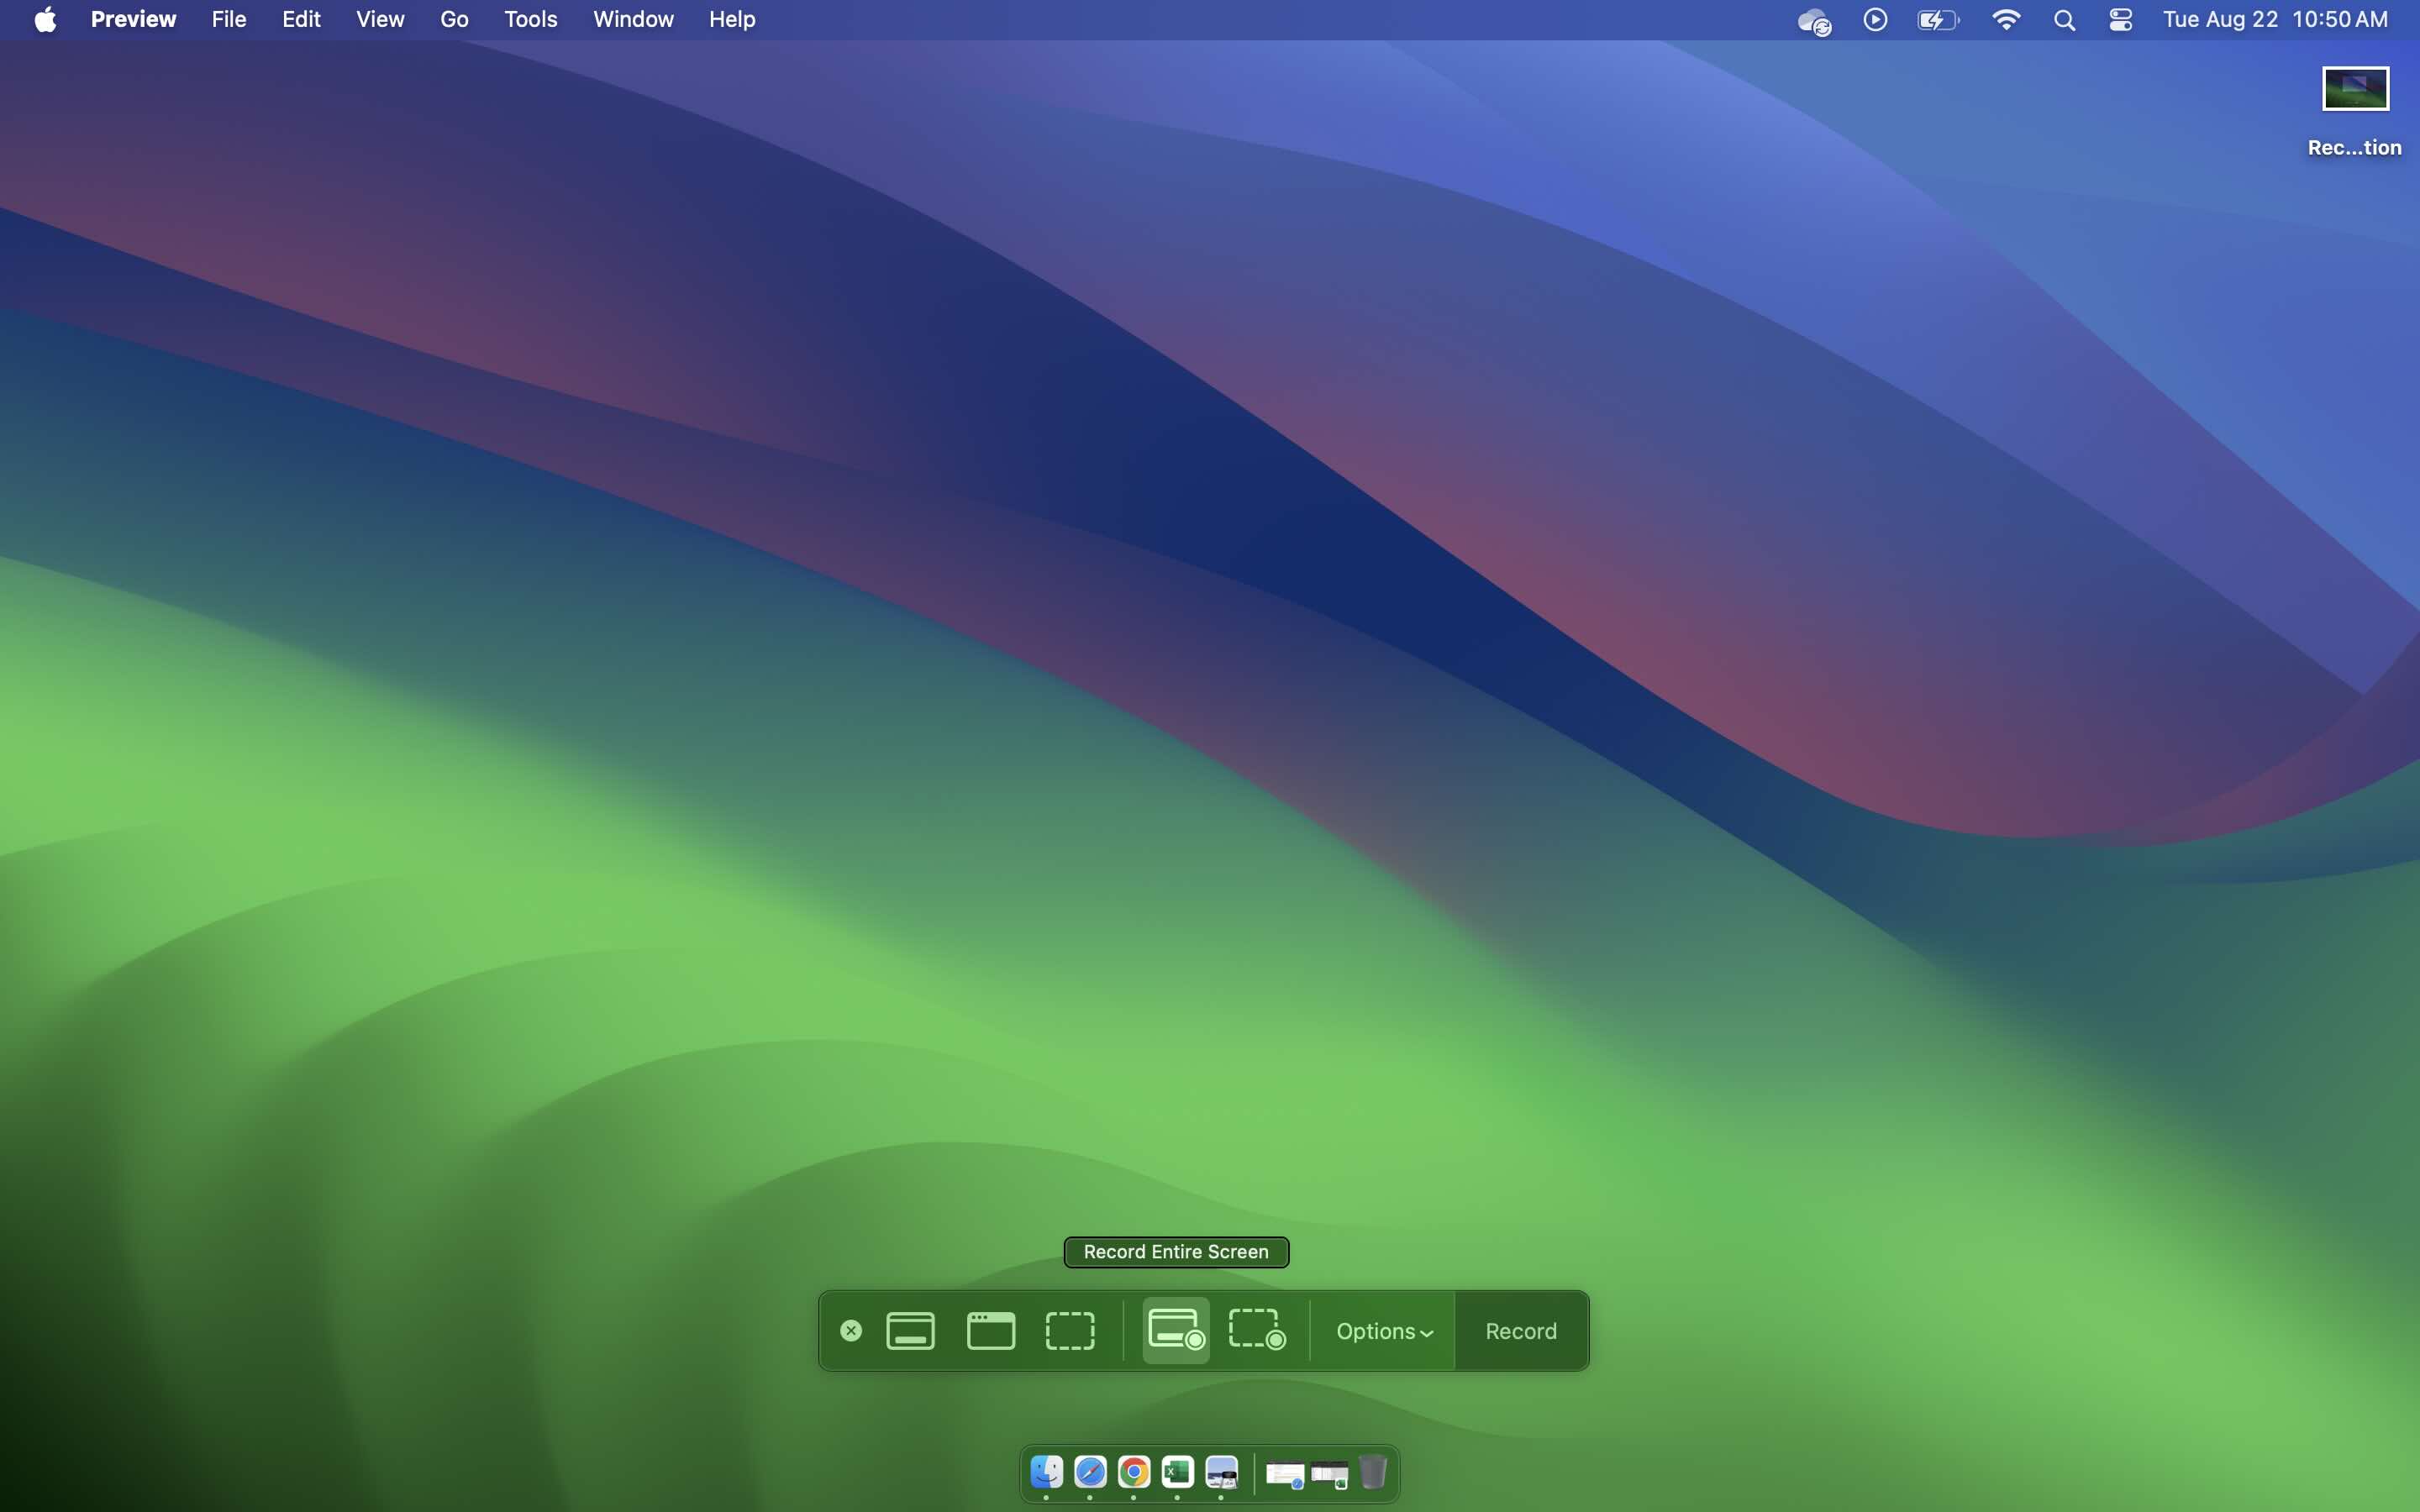
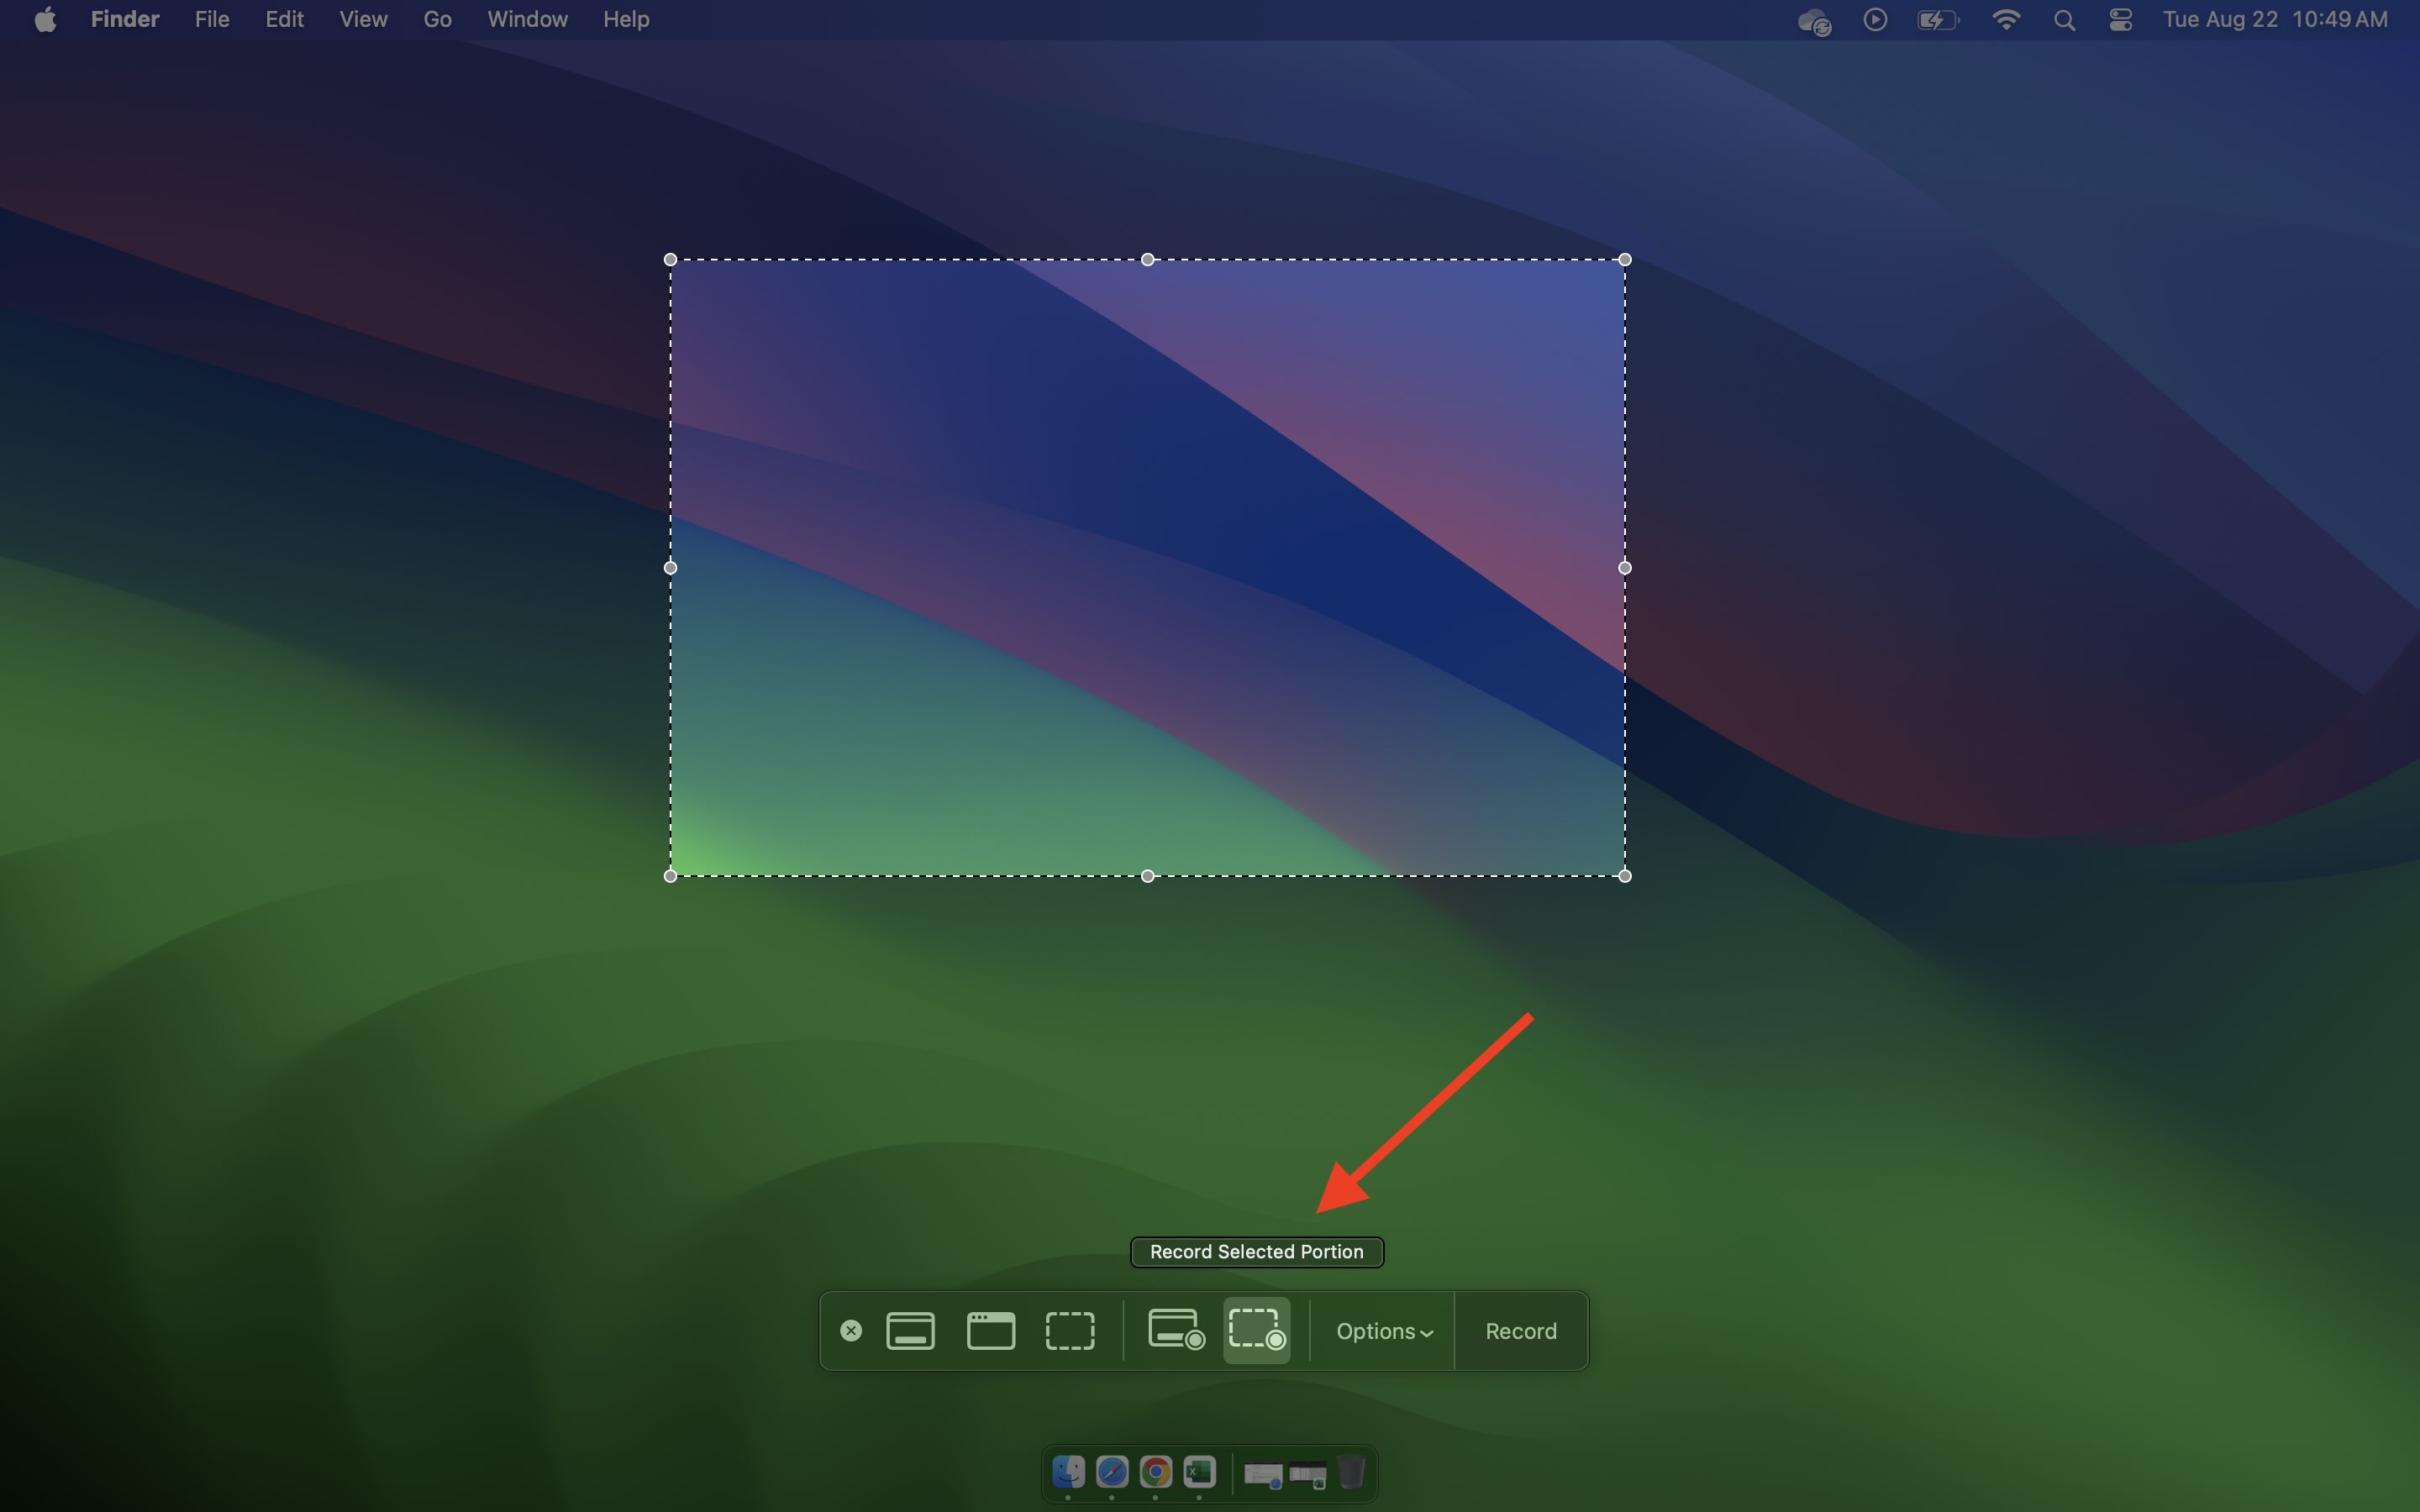
- Record Selected Portion: If you want to record a cropped section of the screen.
Step 1: Open Spotlight Search (press F4 on your Macbook or Command ⌘ + Spacebar) and type Screeshot and open the app.
Step 2: Now make sure to select either of the two options:
Step 3: Now press the record button, and the recoding will start.
Step 4: To stop the recording, you can press the stop button as you will see on the right side of the macOS menubar as shown in the below screenshot.
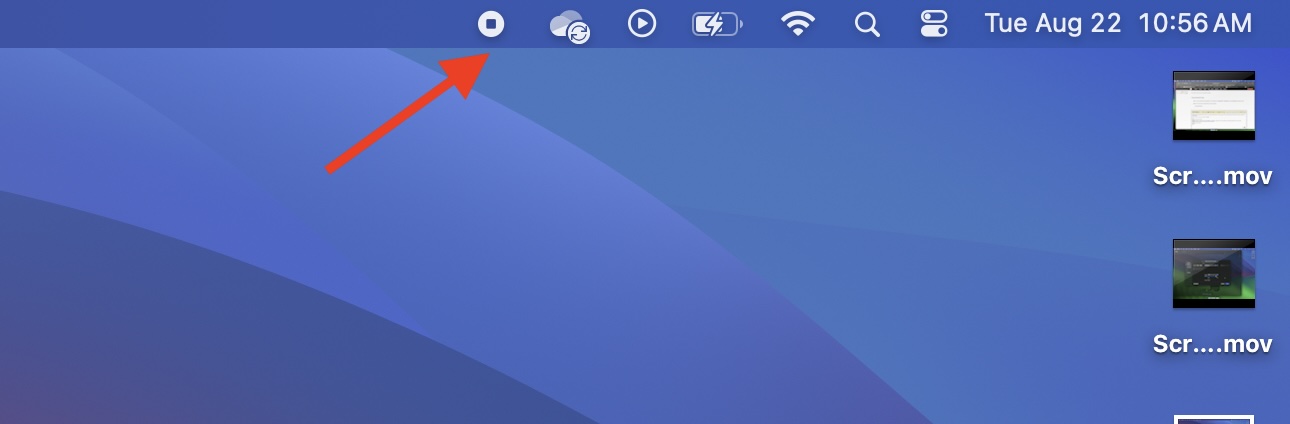
As you can see in the above image, by default when you stop the recording the recorded video is saved on the Desktop with a name like Screen Recording 2023-08-22 at 11.00.36 AM.mov
There are certain options that you can choose from by clicking on the Options dropdown.
Save to: To choose where you want to save the screen recorded files.
Desktop
Documents
Mail
Messages
QuickTime Player
Other Location...

Timer: If you want to add a delay before the recording starts.
None
5 Seconds
10 Seconds

Microphone: If you want to record your voice or the system sound while recording.
None
MacBook Air Microphone

Options:
Show Floating Thumbnail
Remember Last Selection
Show Mouse Clicks
Related Questions and Answers:
Is there any shortcut to record the screen?
Yes, you can press Command ⌘ + Shift + 5 keys and it will open the screen recording screen.
What is the extension of the screen recording file?
The recoding file will have a .mov extension. If you want the file in other video formats such as mp4, avi, or mkv you will need to make use of tools to convert it.
Is there a shortcut to stop screen recording?
Yes, you can make use of the shortcut - Control ^ + Command ⌘ + esc to stop the recording.
Can we record audio with the screen recording?
Yes, under Options make sure to select Microphone to record audio.
Provide Feedback For This Article
We take your feedback seriously and use it to improve our content. Thank you for helping us serve you better!
😊 Thanks for your time, your feedback has been registered!
Comments & Discussion
Facing issues? Have questions? Post them here! We're happy to help!