This Tutorial should not take more than 10 minutes to follow and complete.
In this Tutorial, we will see step-by-step how to install Python on Visual Studio Code and execute the "Hello World" program to test!
Step 1: Prerequisites
- Make sure you have Python 3 Installed on your device.
- Make sure you have Visual Studio Code Installed on your device (Windows/Mac/Linux)
Tutorial: Installing Python using Brew
Step 2: Downloading VS Code Python Extension
- Open VS Code,
- Now Open Palette using Keyboard shortcuts:
For Windows: Ctrl + Shift + P
For Mac: ⌘ Command + Shift + P - Now Type and select > Extensions: Install Extensions
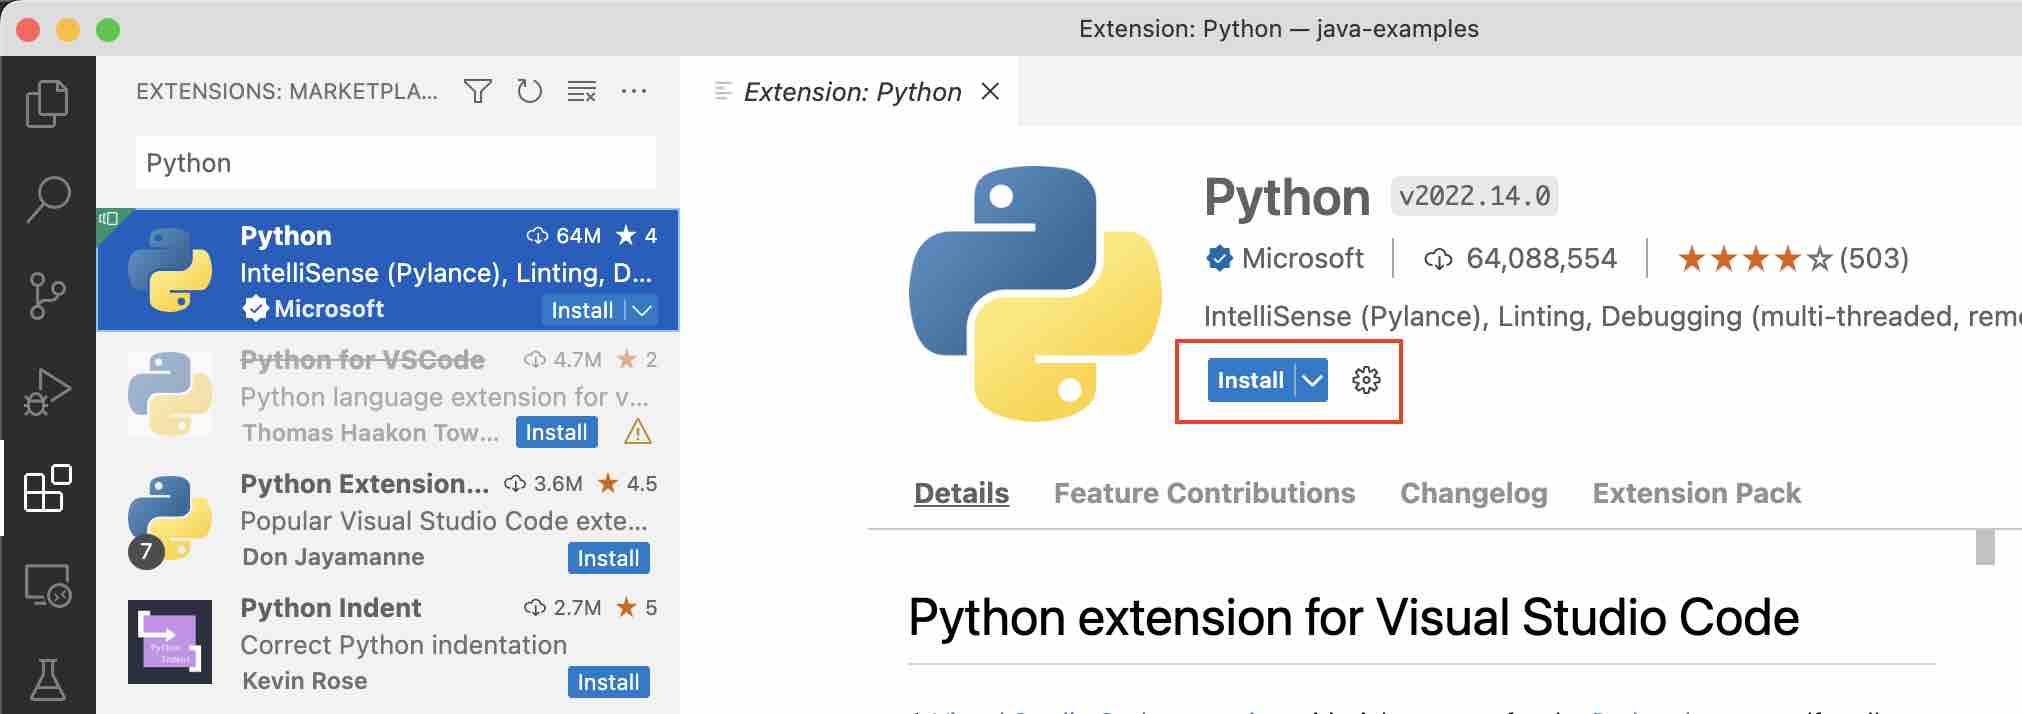
- Now Search for Python and click install.

- And you are all set to get started with Python Programming in VS Code!
Step 3: Testing using Hello Python! Program
- From the Menu select File -> New File
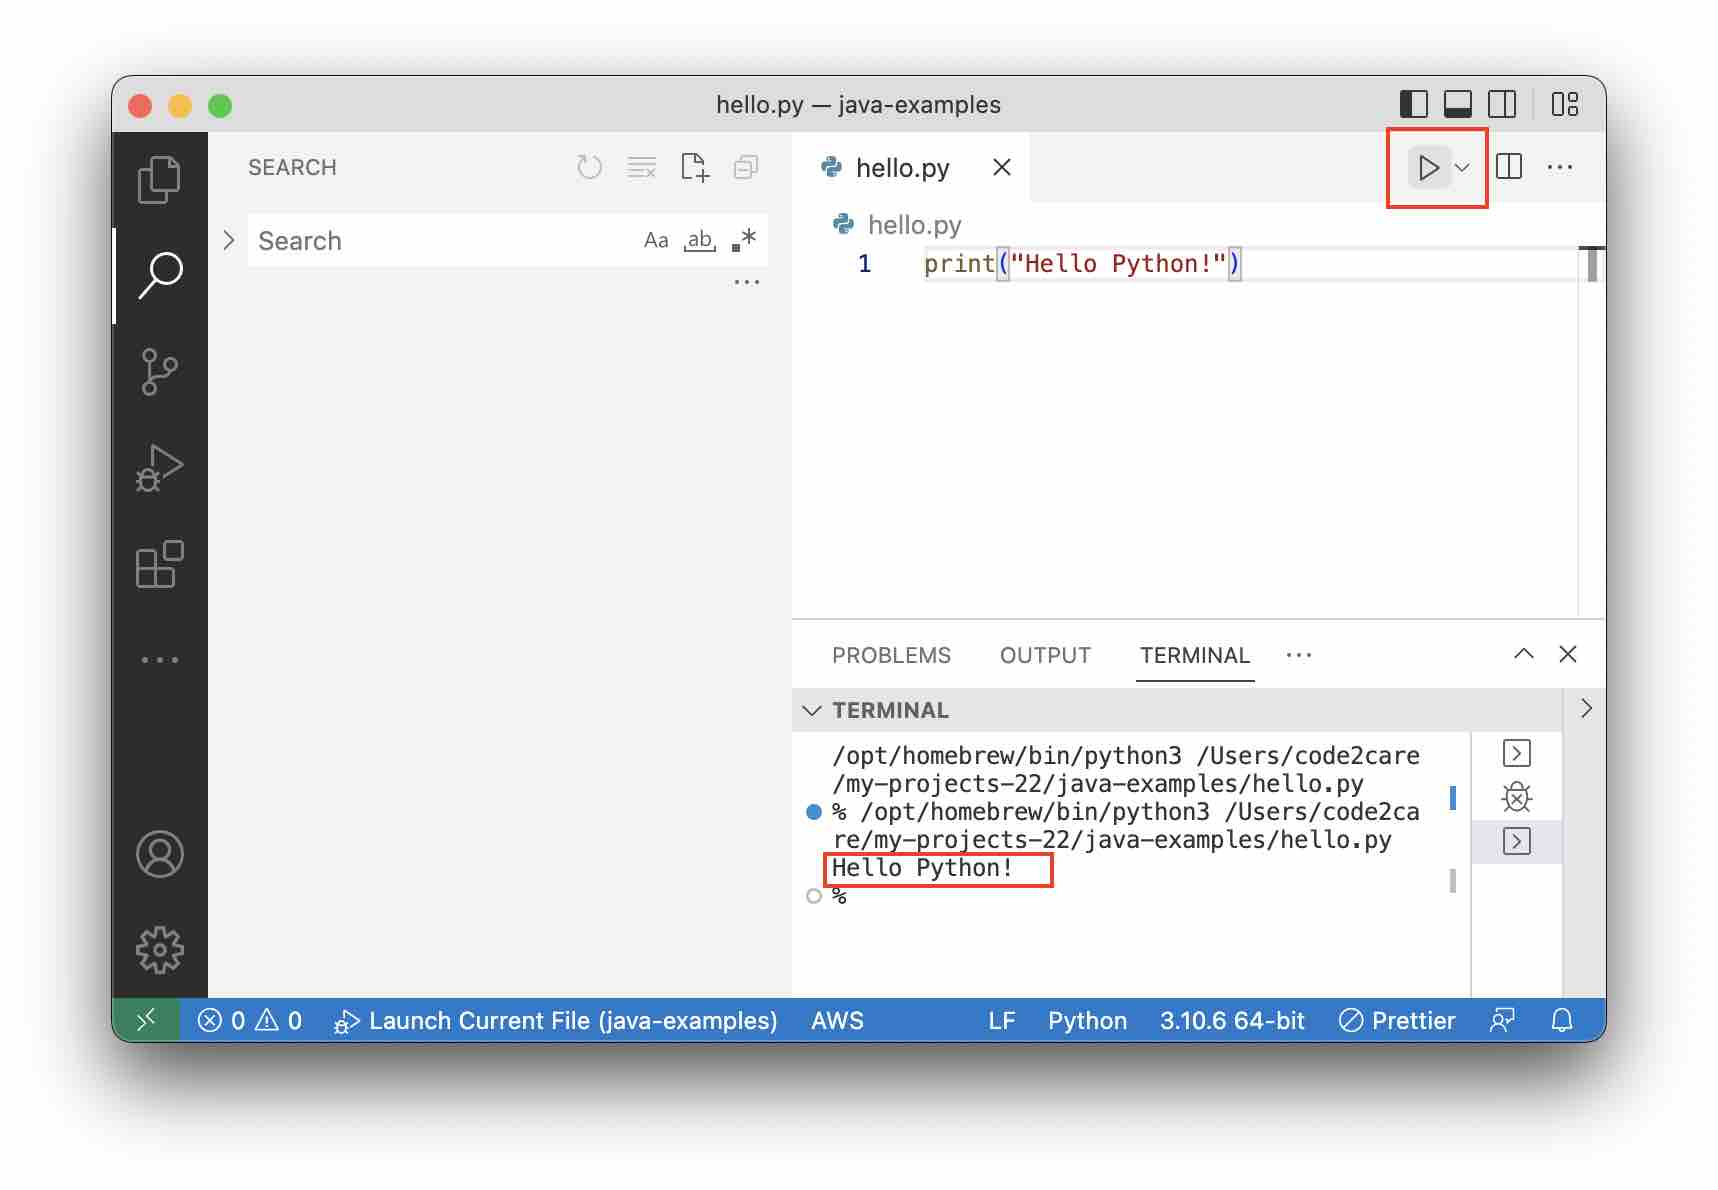
- Wirte print("Hello Python!")
- Save the file as "hello.py"
- You will see an alert "Do you want to install the recommended extensions for Python?" click Install

- Go to your hello.py file and you should see a execute button at the top (as shown in the image), click on it
- You should see Hello Python! on Console!

Facing issues? Have Questions? Post them here! I am happy to answer!
Author Info:
Rakesh (He/Him) has over 14+ years of experience in Web and Application development. He is the author of insightful How-To articles for Code2care.
Follow him on: X
You can also reach out to him via e-mail: rakesh@code2care.org
More Posts related to Python,
- How to convert int to ASCII in Python
- How to make use of SQLite Module in Python?
- Split a String into Sub-string and Parse in Python
- Python: Pandas Rename Columns with List Example
- How to run Python file from Mac Terminal
- How to Exit a Loop in Python Code
- Python: How to Plot a Histogram using Matplotlib and data as list
- MD5 Hashing in Python
- Jupyter: Safari Cant Connect to the Server localhost:8888/tree
- Fix: AttributeError: str object has no attribute decode. Did you mean: encode?[Python]
- How to Read a binary File with Python
- How to add two float numbers in Python
- Python: How to install YAML Package
- Python: How to Save Image from URL
- What is Markdown in Jupyter Notebook with Examples
- How to change the Python Default version
- 33: Python Program to send an email vid GMail
- How to comment code in Python
- How to Fix AttributeError in Python
- Fix: error: Jupyter command `jupyter-nbconvert` not found [VSCode]
- How to comment out a block of code in Python
- List of All 35 Reserved Keywords in Python Programming Language 3.11
- Import Other Python Files Examples
- Python: How to add Progress Bar in Console with Examples
- 3 Ways to convert bytes to String in Python
More Posts:
- How to Run Ollama with Large Language Models Locally Using Docker - Docker
- How to Escape a character in a Bash command String - Bash
- Java JDBC: Insert Java 8 LocalDate and Time using PreparedStatement - Java
- How to Split a String in Python? - Python
- How to Check SSL Certificate Expiration Date using Terminal - Linux
- [Fix] zsh: command not found: nvm - MacOS
- How to kill tomcat server process using Mac Terminal Command - Tomcat
- [Tutorial] Install Python on Visual Studio Code (VS Code) - Python