Below are the steps to install Java 21 JDK on Windows 11 PC.
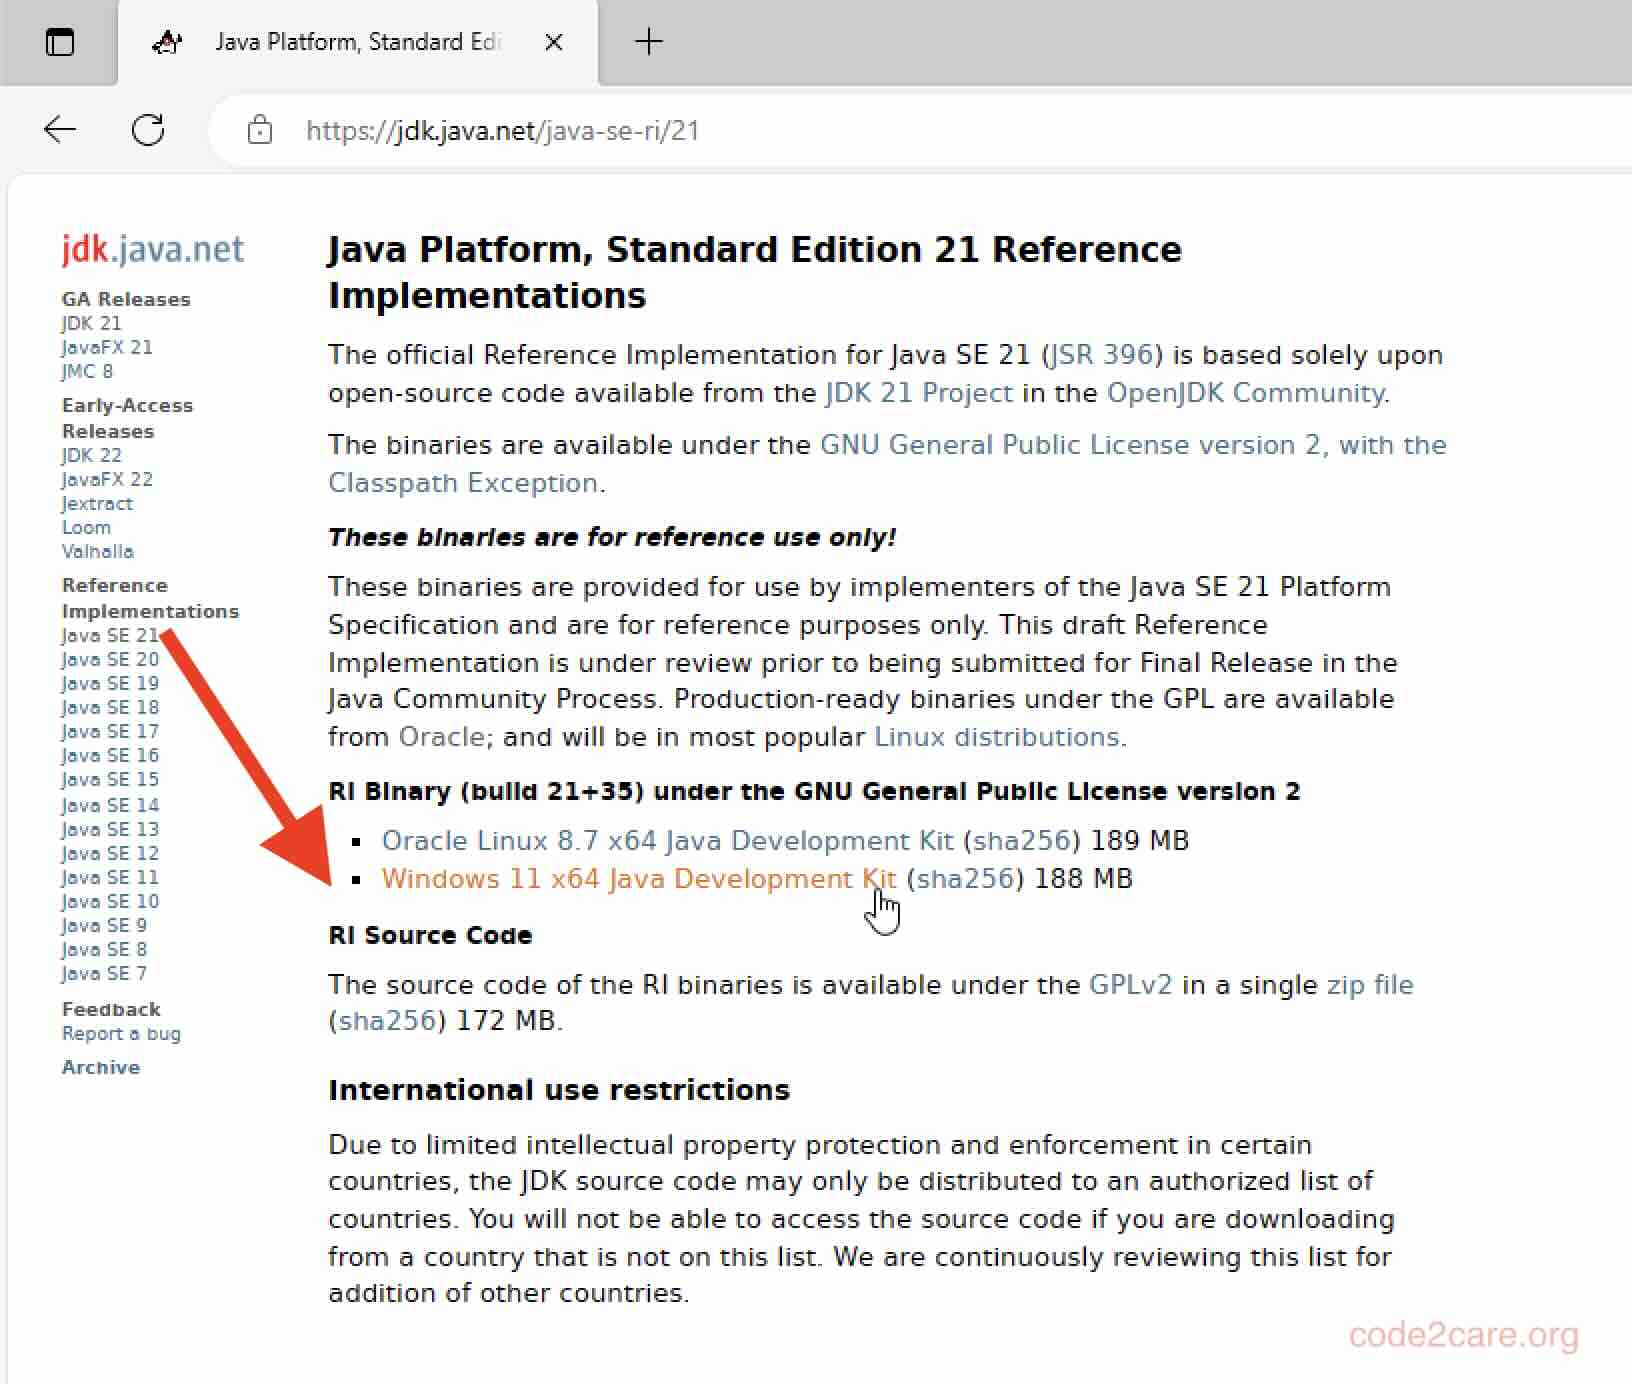
- Go to the official Oracle OpenJDK Download page for Java 21 - https://jdk.java.net/java-se-ri/21
- Download the setup: Windows 11 x64 Java Development Kit. This will download a zip file - openjdk-21_windows-x64_bin.zip

- Now create a Java-21 folder under C:\Program Files and extract the jdk-21 zip file in it.
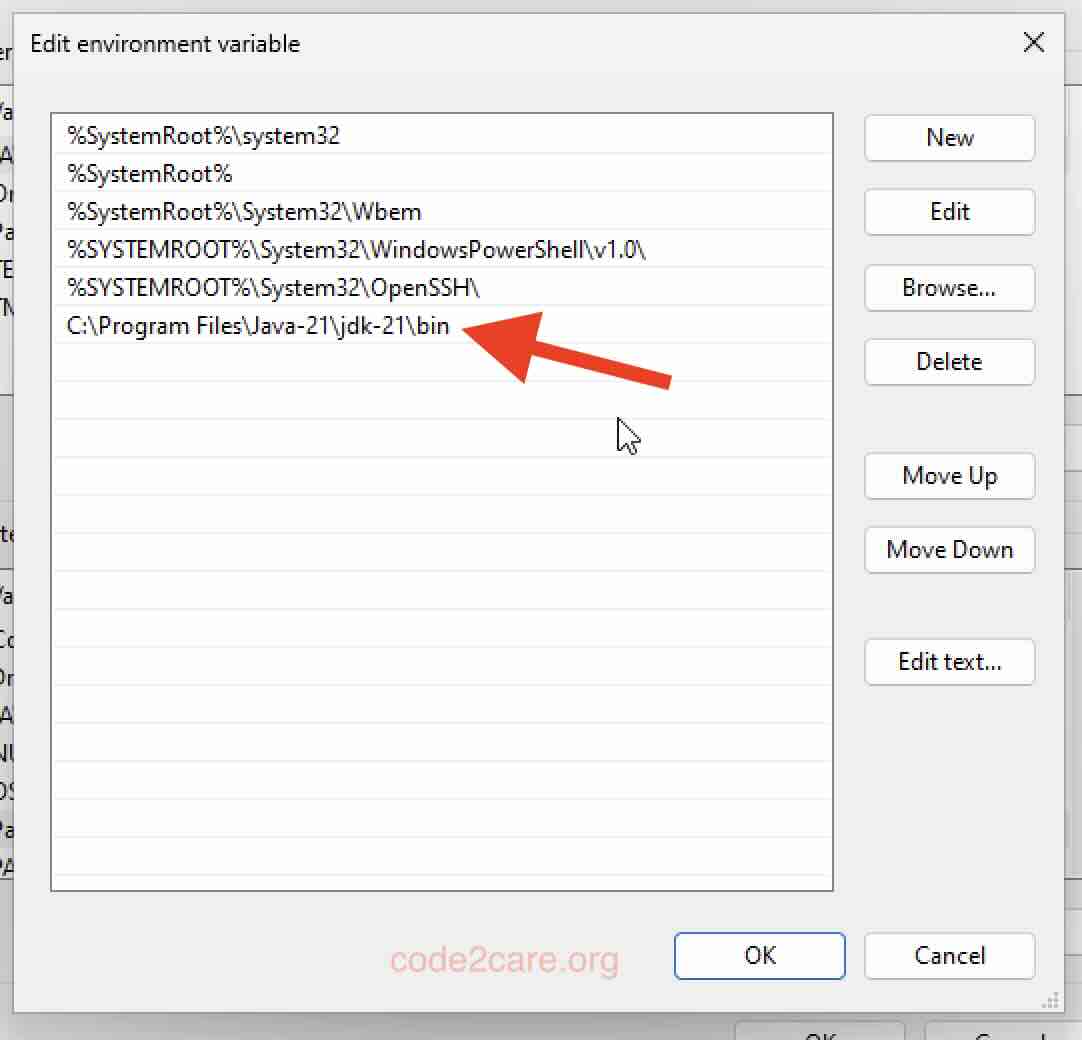
- Now we add the path of the Java 21 bin folder - "C:\Program Files\Java-21\jdk-21\bin" to the PATH variable in environment settings.

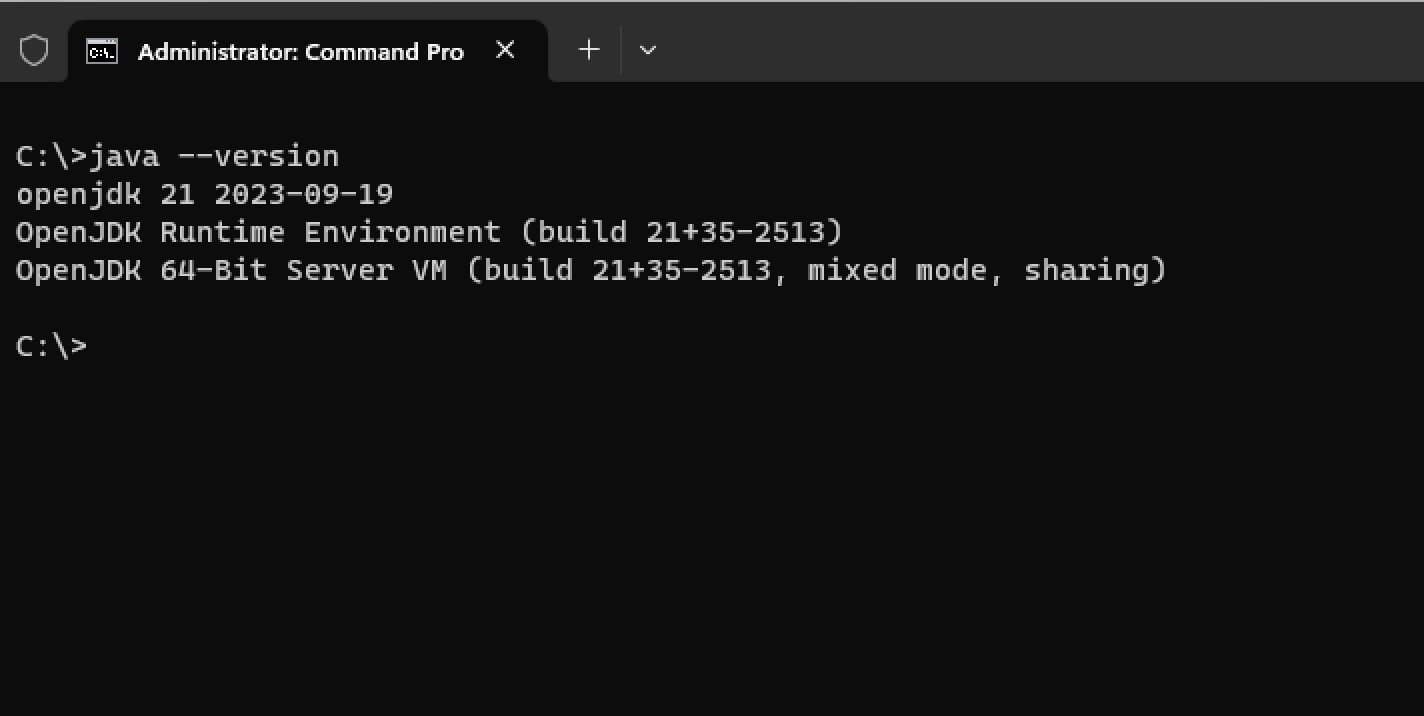
- Open Command Prompt and try out the java --version command.
java --version

openjdk212023-69-19
OpenJDK Runtime Environment (build 21+35-2513)
OpenJDK 64-Bit Server VM (build 21+35-2513, mixed mode, sharing)
Thats all!
Facing issues? Have Questions? Post them here! I am happy to answer!
Author Info:
Rakesh (He/Him) has over 14+ years of experience in Web and Application development. He is the author of insightful How-To articles for Code2care.
Follow him on: X
You can also reach out to him via e-mail: rakesh@code2care.org
More Posts related to Java-JDK-21,
- Installing Java JDK 21 Final Release Candidate
- Steps to Install Java 21 (LTS JDK) on Windows 11
- How to install and Use Java JDK 21 Initial Release Candidate
- How to Enable Java JDK 21 Preview Features on IntelliJ
- Setting Up VS Code with Java JDK 21
- Java JDK 21 LTS Version Release Date (General Availability)
- [JEP 430] Java JDK 21 New Feature - String Templates (Preview)
- How to use Java JDK 21 with IntelliJ
- Java JDK 21: JEP 439 - An Improved Generational Z Garbage Collector (ZGC)
- [JEP 431] Java JDK 21 New Feature - Sequenced Collections
- Java JDK 21 - The Latest LTS Version
- Java JDK 21 - JEP 440 - Record Patterns
- Fix - Unsupported major.minor version 65.0 (Java JDK 21)
More Posts:
- Where does brew install python in macOS - Python
- How to migrate Kaizala to Microsoft Teams - Teams
- Rust: Write and Run Hello World! Program Example - Rust
- Change Android EditText Cursor Height - Android
- The author stylesheet specified in tag script is too long - document contains 21759 bytes whereas the limit is 10000 bytes - Html
- Change Line Endings (Encoding Windows/Mac/Unix CR/LF/CRLF) Sublime Text - Sublime-Text
- Error: Safari quit unexpectedly. Problem Report for Safari - MacOS
- How to Change Bluetooth Name of your iPhone - iOS