In this tutorial we will cover step-by-step how to setup plain JDBC with Spring Boot 3 and Maven and MySQL Database.
Step 1: Downloading the Spring Initializr Project
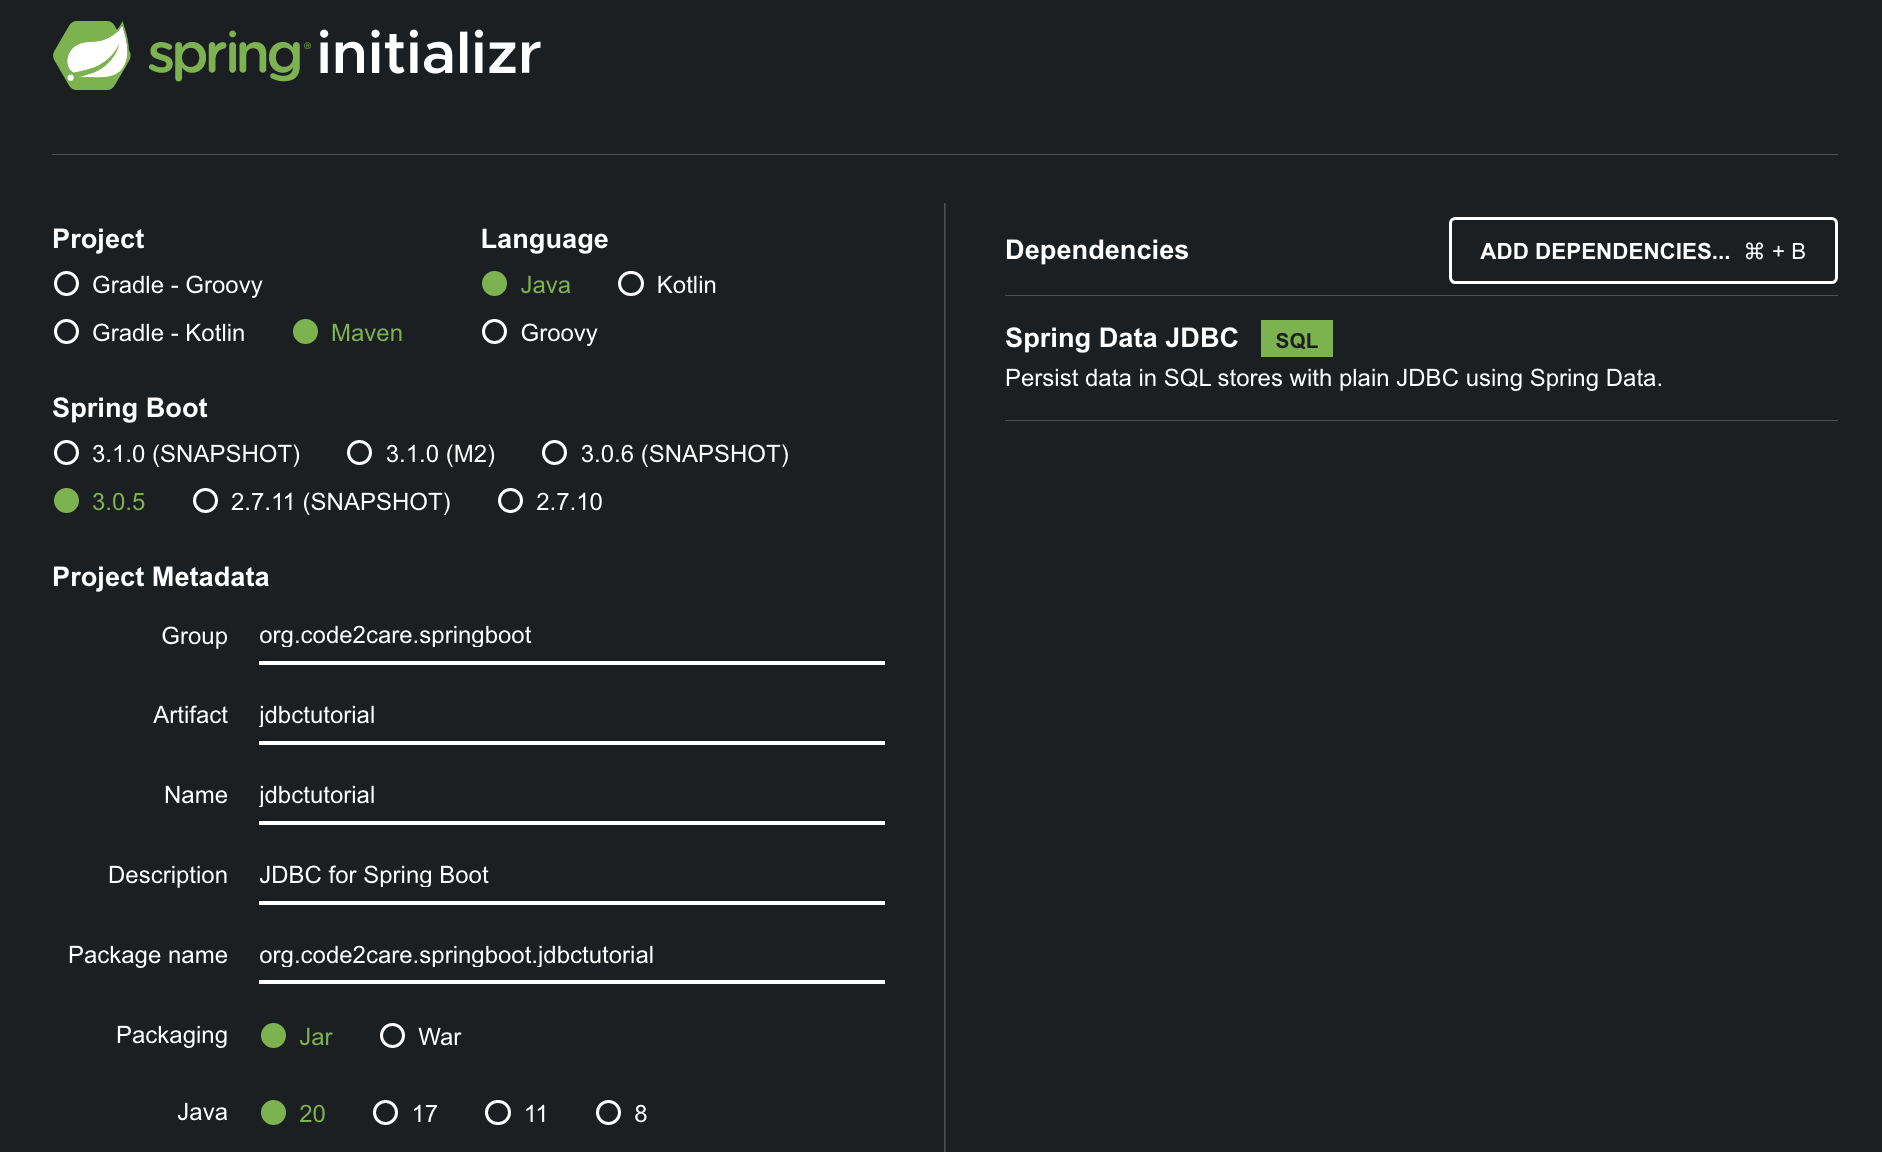
Go to start.spring.io and fill in the following information for to download our JDBC project structure.
Make sure to select Project as Maven and Language as Java, you may choose the latest version of Spring Boot (not Snapshot or Mx versions), for me its 3.0.5
Do select the Packaging as jar and you may choose any version of Java thats available, I am going with the latest thats Java 20.
Make sure to click on "Add Dependencies..." and choose Spring Data JDBC
Once all is set, you can click on, Generate button at the bottom to download the project zip file.
Step 2: Importing the JDBC Project to IDE
Extract the zip project and open your IDE (Eclipse, IntelliJ, NetBeans or VSCode) to import the project, we will demonstrate using IDEA IntelliJ.
Unzip the project file we downloaded at Step 1.
Open IntelliJ IDE.
Go to Menu: File -> New -> Project From Existing Source...
Now select your project folder and click Open
Keep clicking next, and "Please select project SDK" choose your JDK (in my case JDK 20)
Right-click on your project and select Maven -> Download Sources
Quick alternative: you can close the project and be on the Welcome Screen and click on Open and choose your application folder.
Step 3: Setting up MySQL Database.
Make sure you have download and installed MySQL Database. We will first create our test database.
package org.code2care.springboot.jdbctutorial;

public class Message {

    private String message;

    public String getMessage() {
        return message;
    }

    public void setMessage(String message) {
        this.message = message;
    }

    @Override
    public String toString() {
        return "Message{" +
                "message='" + message + '\'' +
                '}';
    }
}
Now we are all set for the final class that we need, we call it JDBCRunner
package org.code2care.springboot.jdbctutorial;

import org.springframework.beans.factory.annotation.Autowired;
import org.springframework.boot.CommandLineRunner;
import org.springframework.jdbc.core.BeanPropertyRowMapper;
import org.springframework.jdbc.core.JdbcTemplate;
import org.springframework.stereotype.Component;

import java.util.List;

@Component
public class JDBCRunner implements CommandLineRunner {

    private String query = "Select * from message";

    @Autowired
    JdbcTemplate jdbcTemplate;

    @Override
    public void run(String... args) throws Exception {

       List<Message> messages = jdbcTemplate.query(query, new BeanPropertyRowMapper<>(Message.class));
        System.out.println(messages.get(0).getMessage());
    }
}
Code Explanation
We have created a Java class named JDBCRunner that implements the CommandLineRunner interface which is marked with the Spring @Component annotation so that it is managed by Spring IoC, so it will be automatically detected and instantiated by the Spring framework during runtime.
The class has a private field named query which is a SQL query to retrieve our "Hello Spring JDBC" message
The @Autowired annotation is used to inject a JdbcTemplate object into the class. This object is a Spring JDBC abstraction that simplifies the use of JDBC and eliminates the need for boilerplate code.
As we have implemented the CommandLineRunner interface, so the run method will be executed when the Spring application is started and execute the SQL query and retrieve a list of Message objects.
Step 6: Running your Hello JDBC Project
Go to the JdbctutorialApplication file and hit run, you should see "Hello Spring JDBC" printed in your IDE Console.
Hello Spring JDBC
Comments & Discussion
Facing issues? Have questions? Post them here! We're happy to help!
Provide Feedback For This Article
We take your feedback seriously and use it to improve our content. Thank you for helping us serve you better!
Thanks for your feedback! If you have time, please provide details by selecting options below.
😊 Thanks for your time, your feedback has been registered!


Comments & Discussion
Facing issues? Have questions? Post them here! We're happy to help!