
Hands-On: Create a Queue in RabbitMQ
Using RabbitMQ Management UI
- Access the Web UI: Open your web browser and go to the RabbitMQ Management Web UI. The default URL is
http://localhost:15672, but this might vary depending on your setup. - Log In: Enter your username and password. The default credentials are often
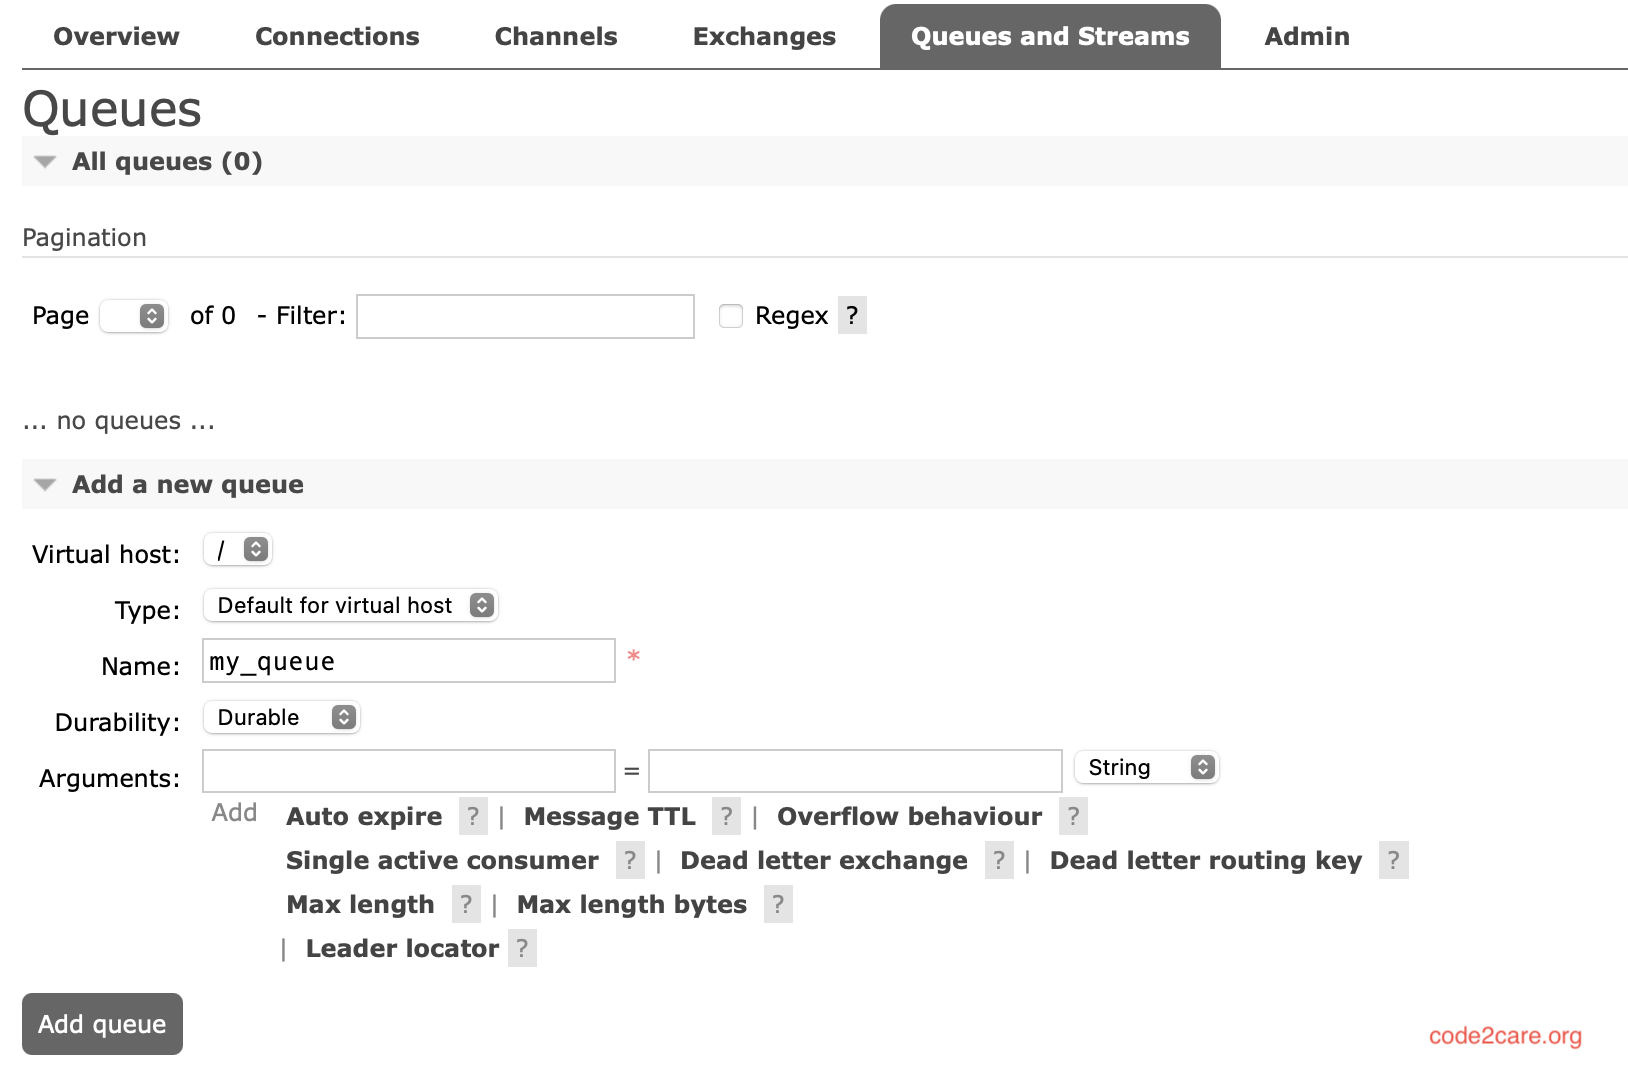
guestfor both fields. - Navigate to the Queues Section: Click on the "Queues and Streams" tab in the top menu.
- Create a New Queue: Expand the "Add a new queue" section.
- Fill in Queue Details:
- Queue Name: Enter a name for your queue.
- Durable: Check this if you want the queue to survive server restarts.
- Auto-delete: Check this if you want the queue to be deleted when no consumers are connected.
- Arguments: You can add additional arguments if needed.
- Create the Queue: Click the "Add Queue" button to create your queue.
Using RabbitMQ Command-Line Tool (rabbitmqctl)
- Open Terminal: Open a terminal or command prompt on the machine where RabbitMQ is installed.
- Run the Create Queue Command: Use the following command to create a queue:
Replacerabbitmqctl add_queue <queue_name> --durable --auto_delete<queue_name>with the name you want for your queue. Add--durableif you want the queue to survive server restarts and--auto_deleteif you want the queue to be deleted when no consumers are connected. Adjust these options as needed. - Verify the Queue: To list all queues and verify your new queue, use:
rabbitmqctl list_queues
Some points to Note:
- Queue Options: Ensure you understand the options you are setting for durability and auto-deletion based on your use case.
- Permissions: Make sure you have the necessary permissions to create queues.
Provide Feedback For This Article
We take your feedback seriously and use it to improve our content. Thank you for helping us serve you better!
😊 Thanks for your time, your feedback has been registered!
Comments & Discussion
Facing issues? Have questions? Post them here! We're happy to help!