Generating Javadoc in Eclipse is essential for developers who want to create documentation for their Java projects. Below are detailed instructions for generating Javadoc in Eclipse on both macOS and Windows.
Generating Javadoc in Eclipse
- Open your project in Eclipse.
- Right-click on the project in the Package Explorer.
- Select Export from the context menu.
- In the Export dialog, expand the Java folder and select Javadoc.
- Click Next to proceed.
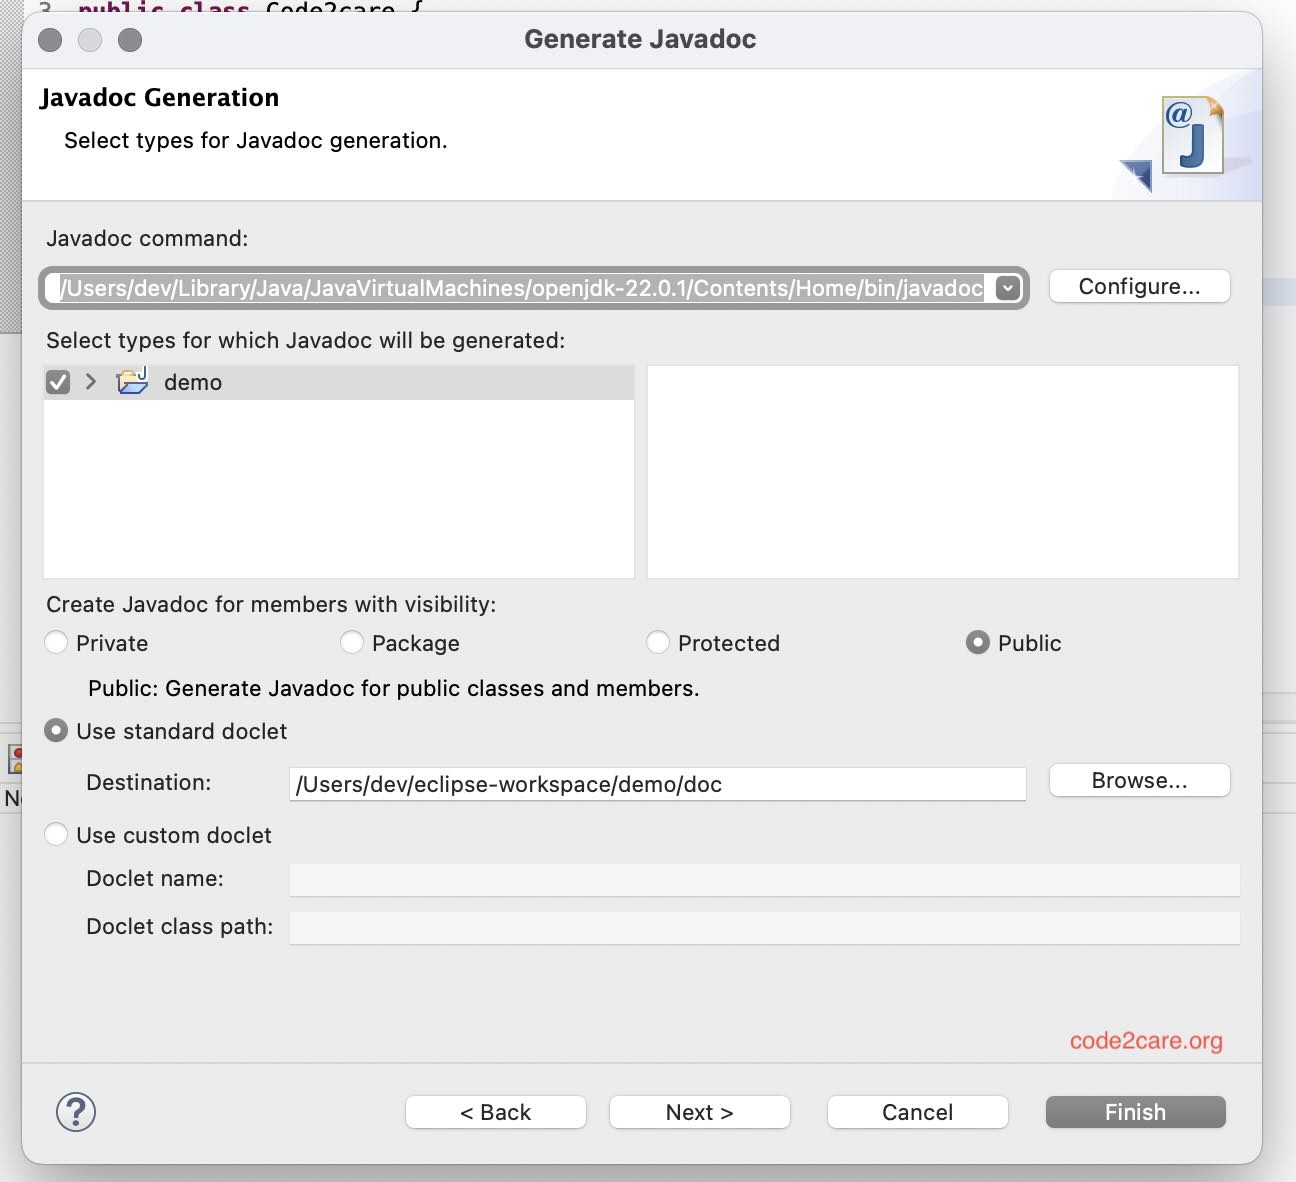
- In the Javadoc Generation dialog, ensure your project is selected in the Select the project section.
- Specify the Javadoc command if necessary (usually, it is set automatically).
- Choose the Destination folder where you want to save the generated Javadoc.
- Configure the Javadoc options as needed, such as adding a title and including private members.
- Click Finish to start the Javadoc generation process.

Example Javadoc Generation Settings
To generate Javadoc for your project, follow these example settings:
- Destination:
path/to/javadoc - Title:
Your Project Title - Include Private Members: Check this box if you want to include private members in the documentation.
- Use Standard Doclet: Ensure this option is selected for standard Javadoc generation.
Make sure to adjust the settings according to your project's requirements.
After generating the Javadoc, you can view it in your web browser by opening the index.html file located in the destination folder. This documentation will help you and others understand your code better.


This is not an AI-generated article but is demonstrated by a human on an M1 Mac running macOS Sonoma 14.0.
Please support independent contributors like Code2care by donating a coffee.
Buy me a coffee!
Comments & Discussion
Facing issues? Have questions? Post them here! We're happy to help!