Prerequisite:
- You must have Git installed on your device.
You might follow:

How to install Git (Git-bash) on Windows
Steps to create a Git Project in Eclipse IDE
- Open your Eclipse Workspace.
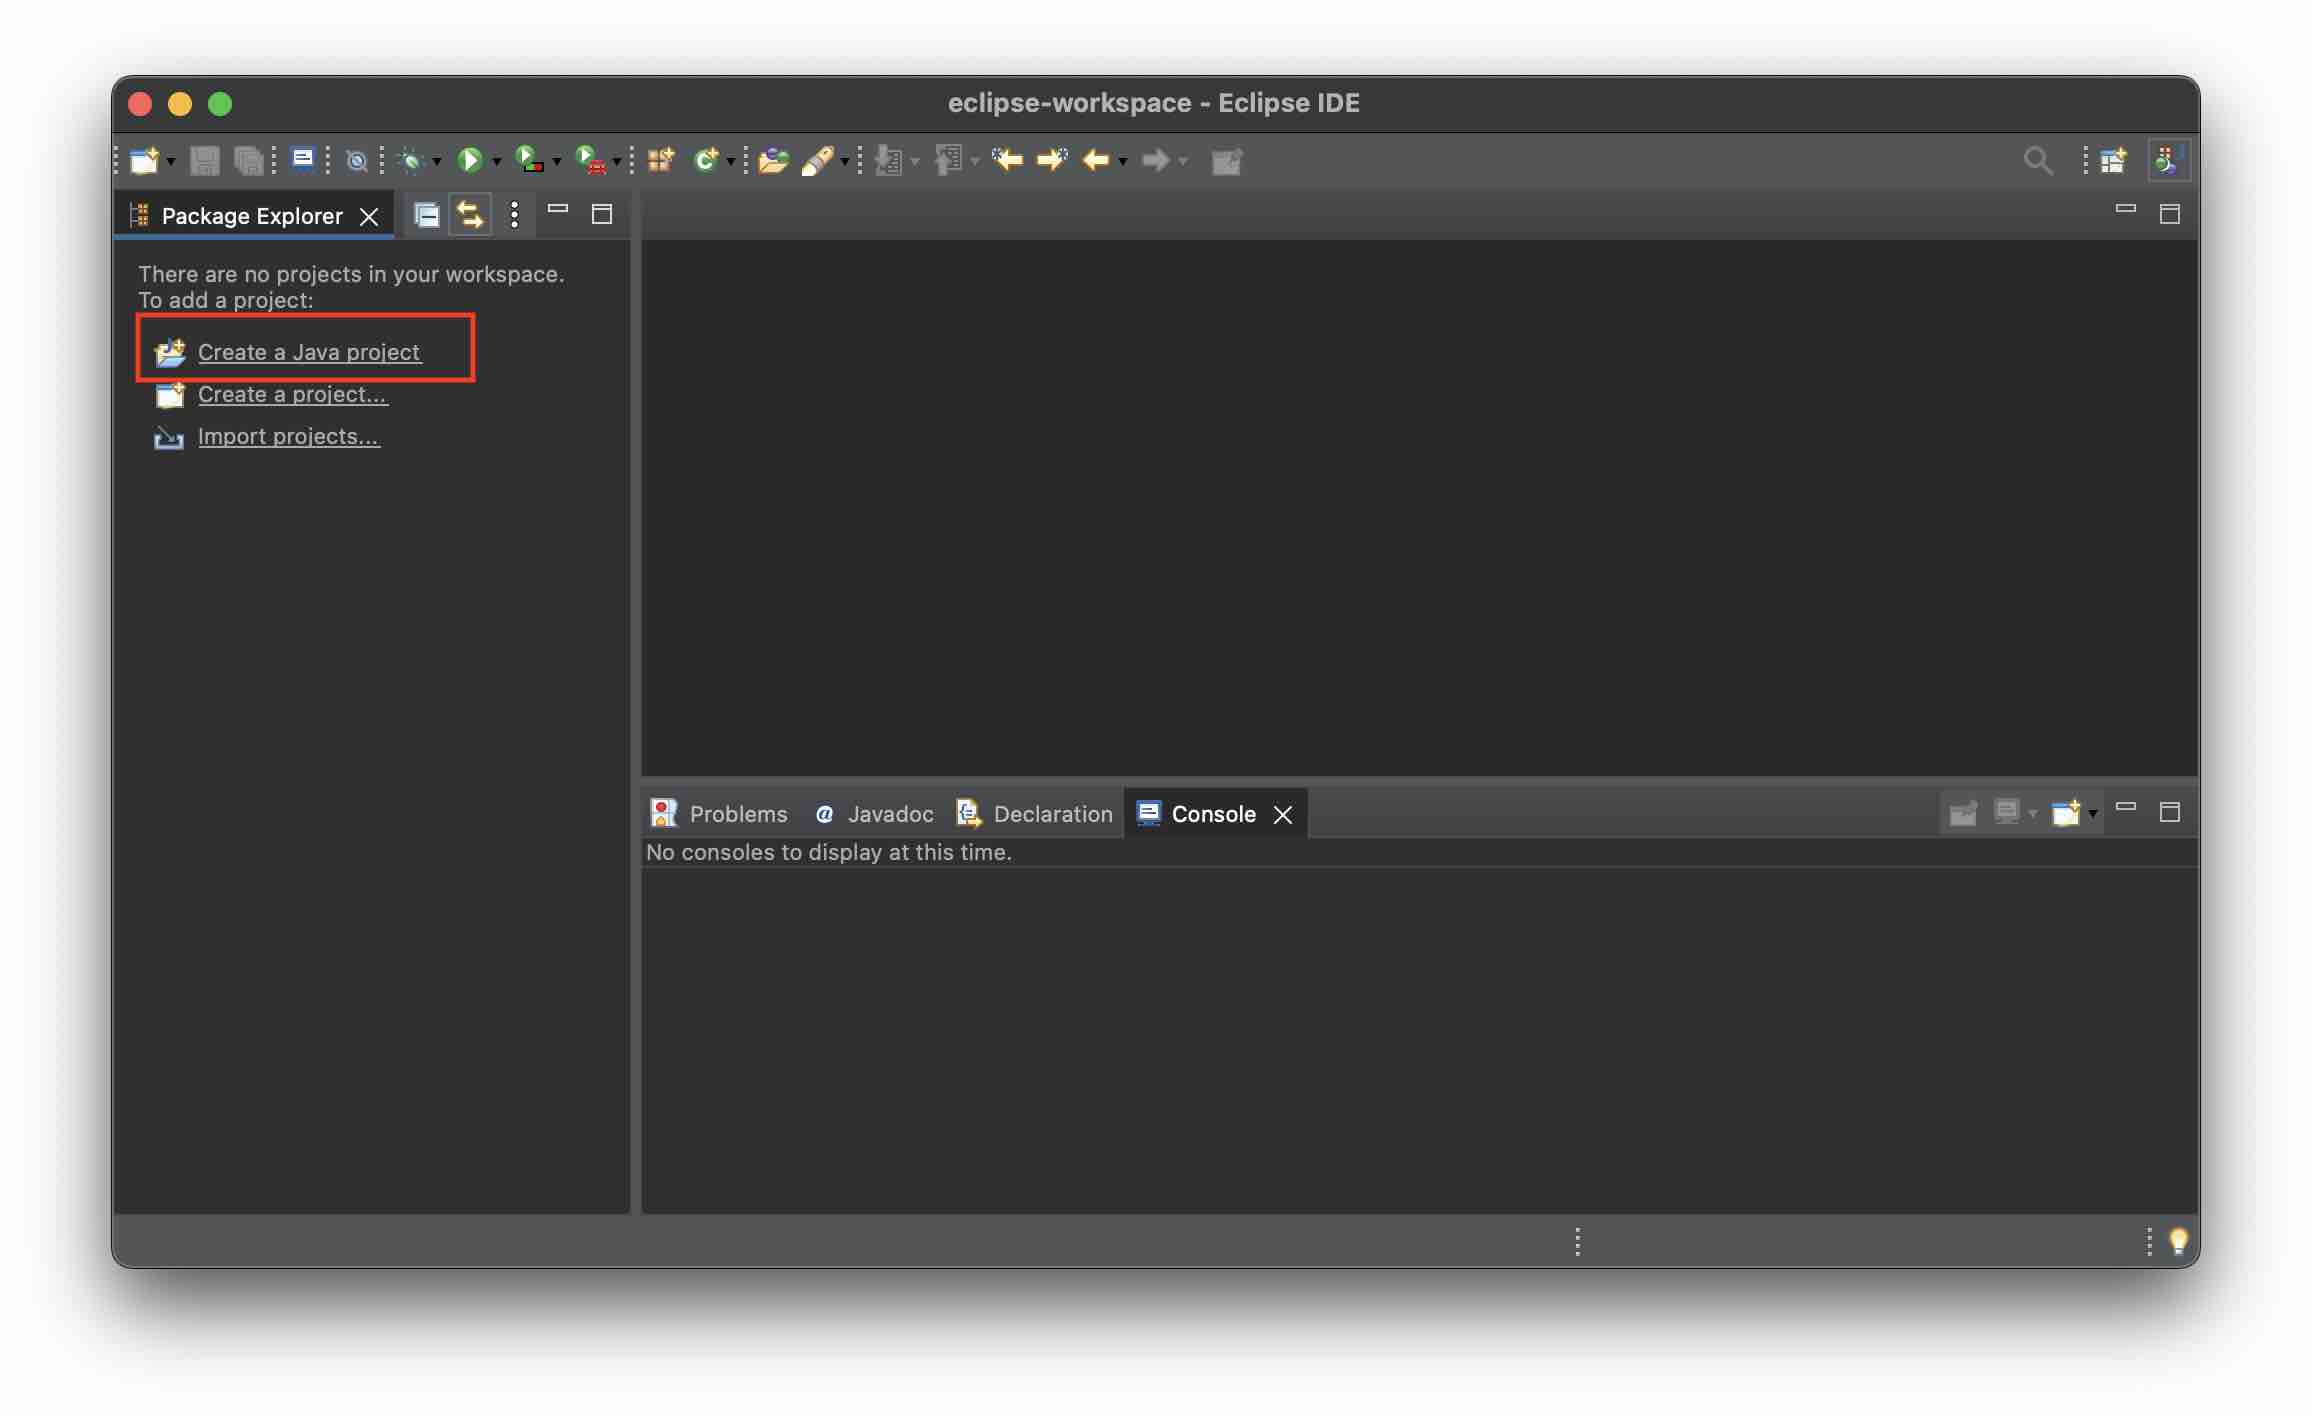
- Create a New Java Project.
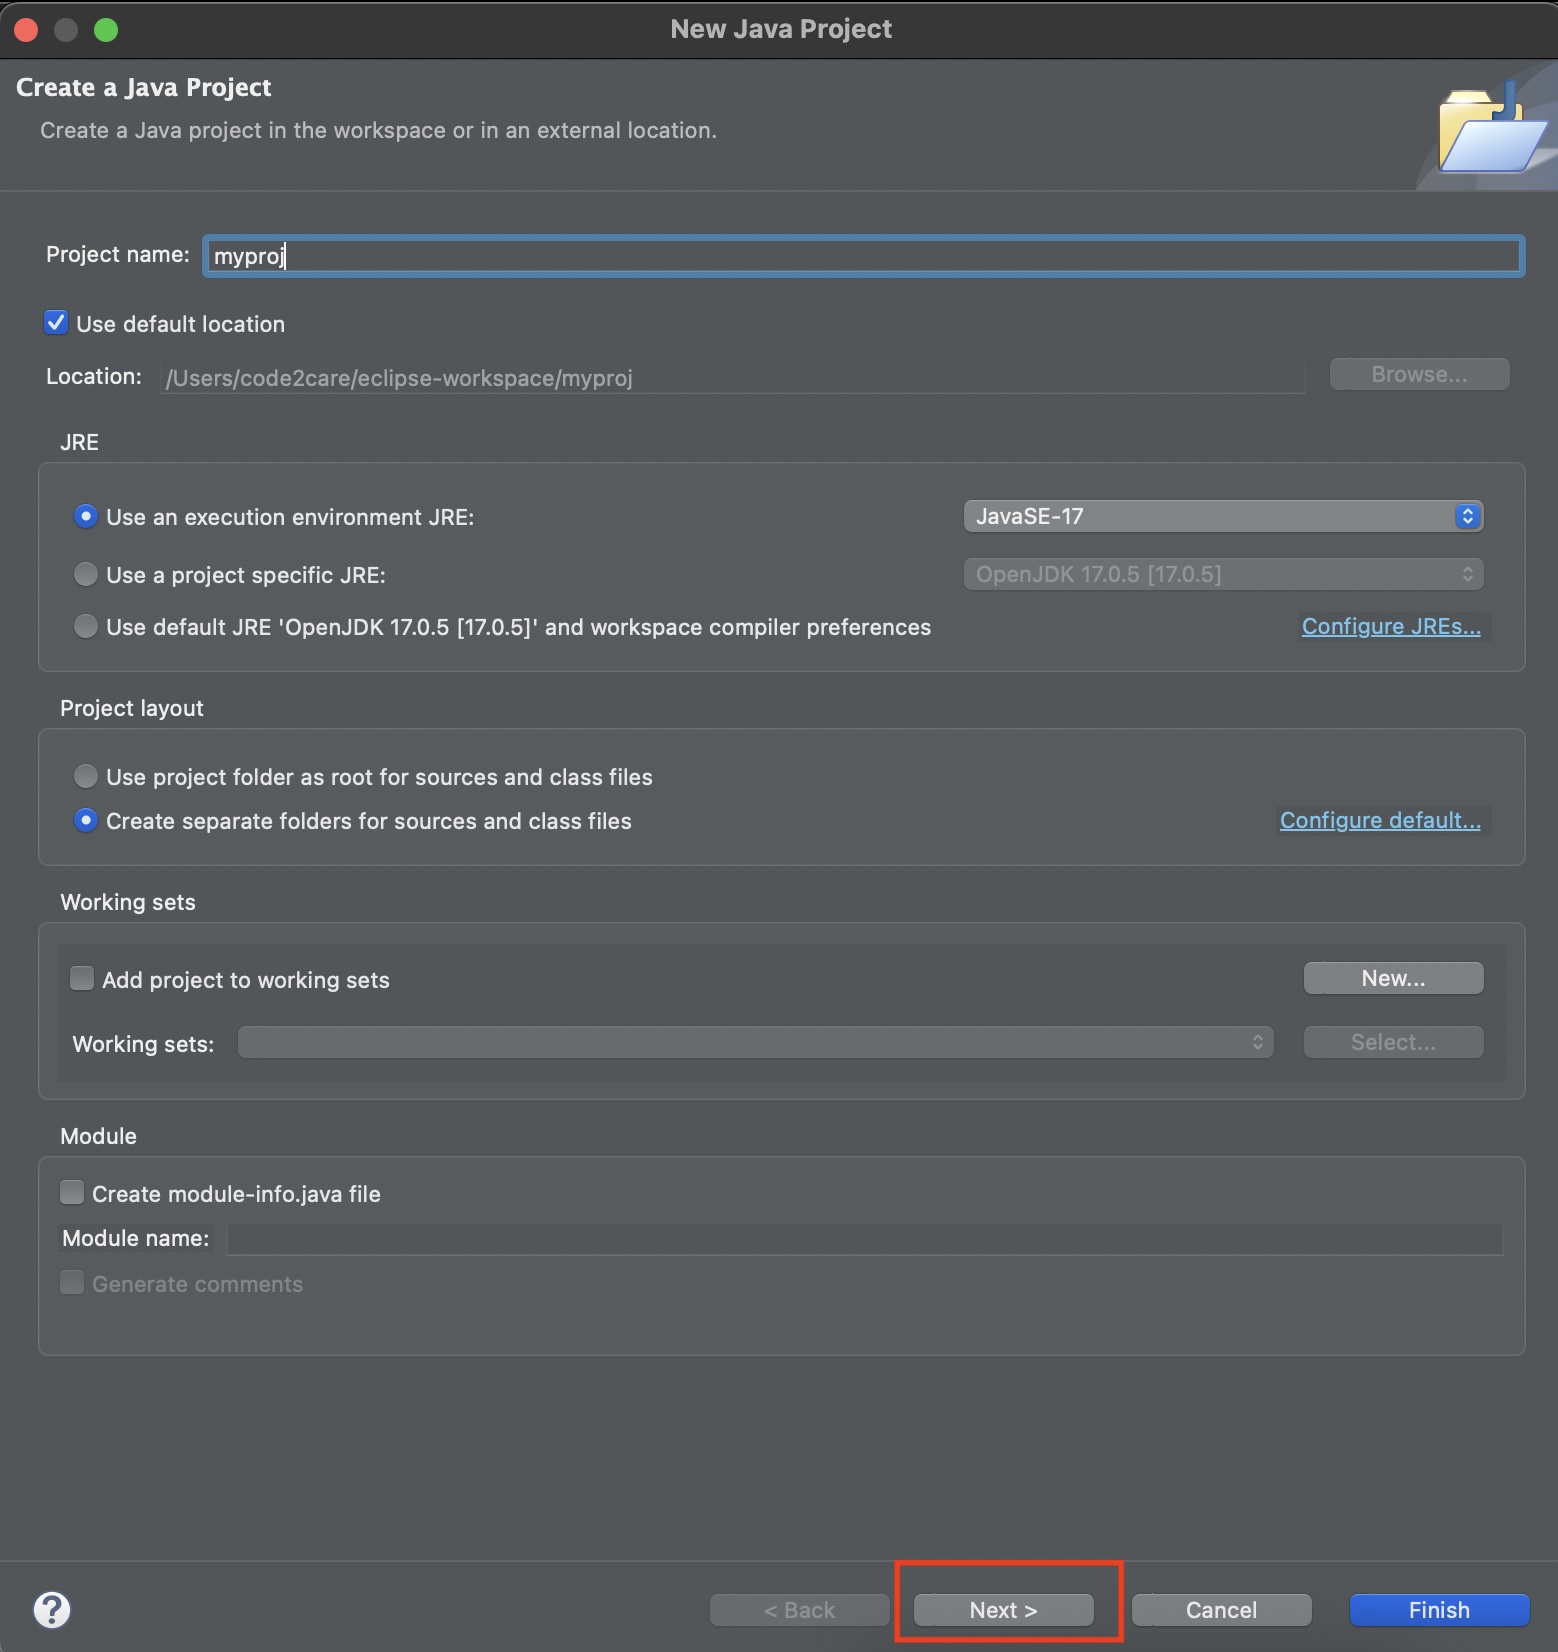
- Add your Project Name and hit next,
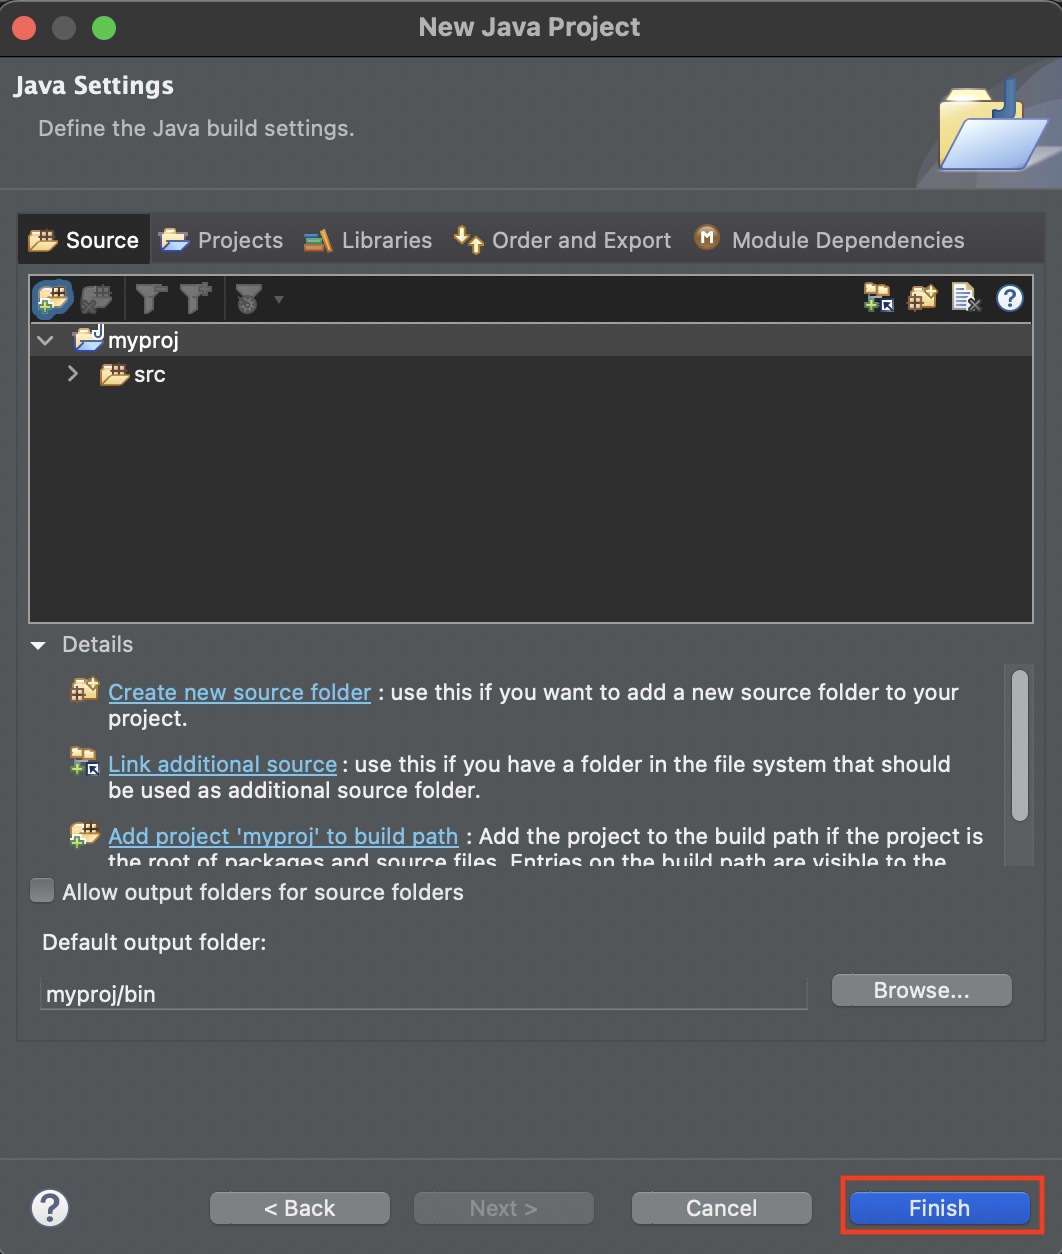
- Click Finish to create the Project,
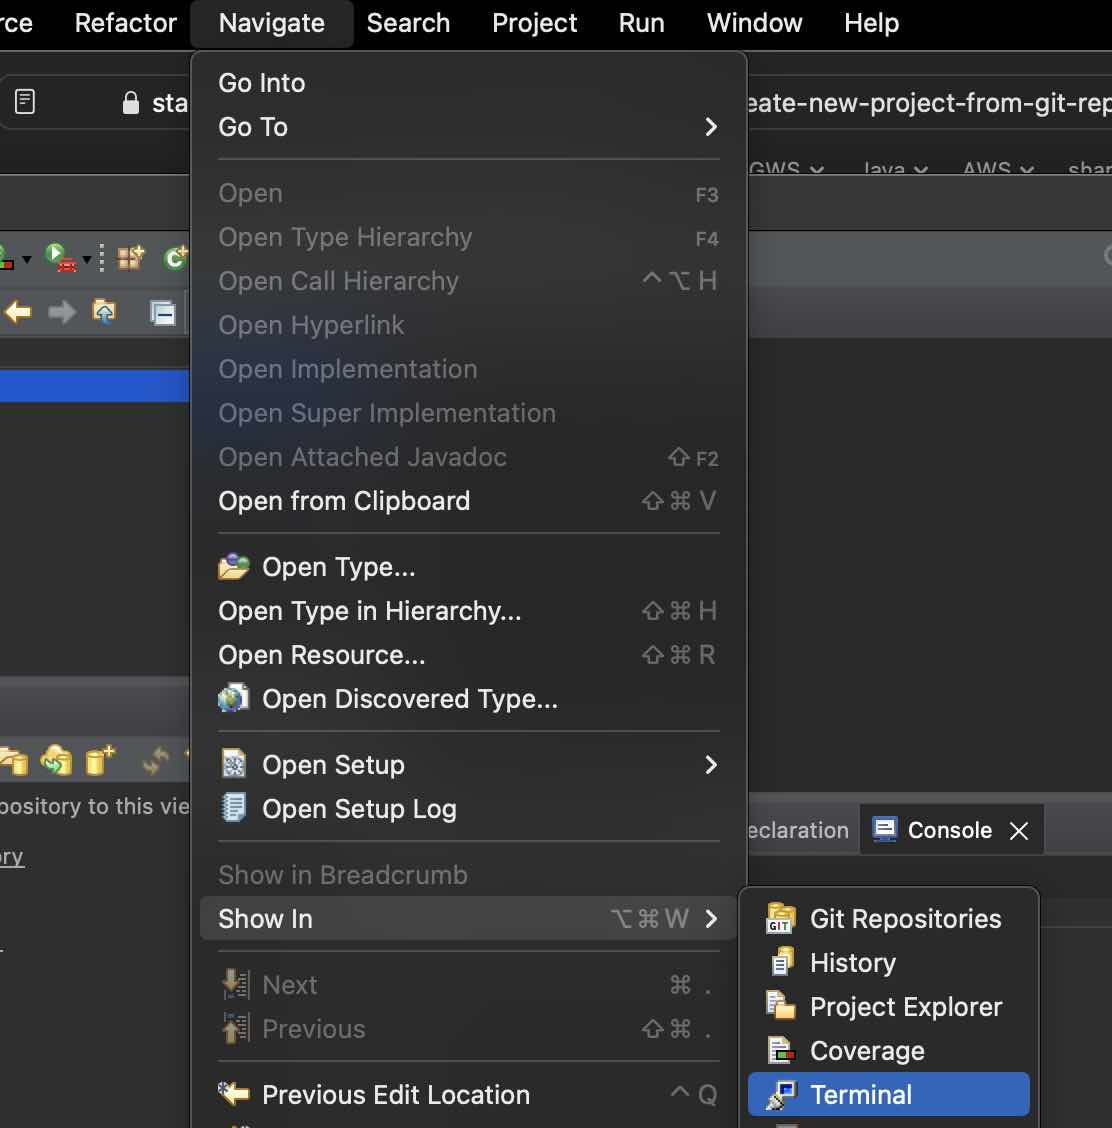
- Now go to Menu -> Navigate -> Show in -> Terminal,
- Now run the git init to create the .git repository locally, make sure to run this command from your project folder,
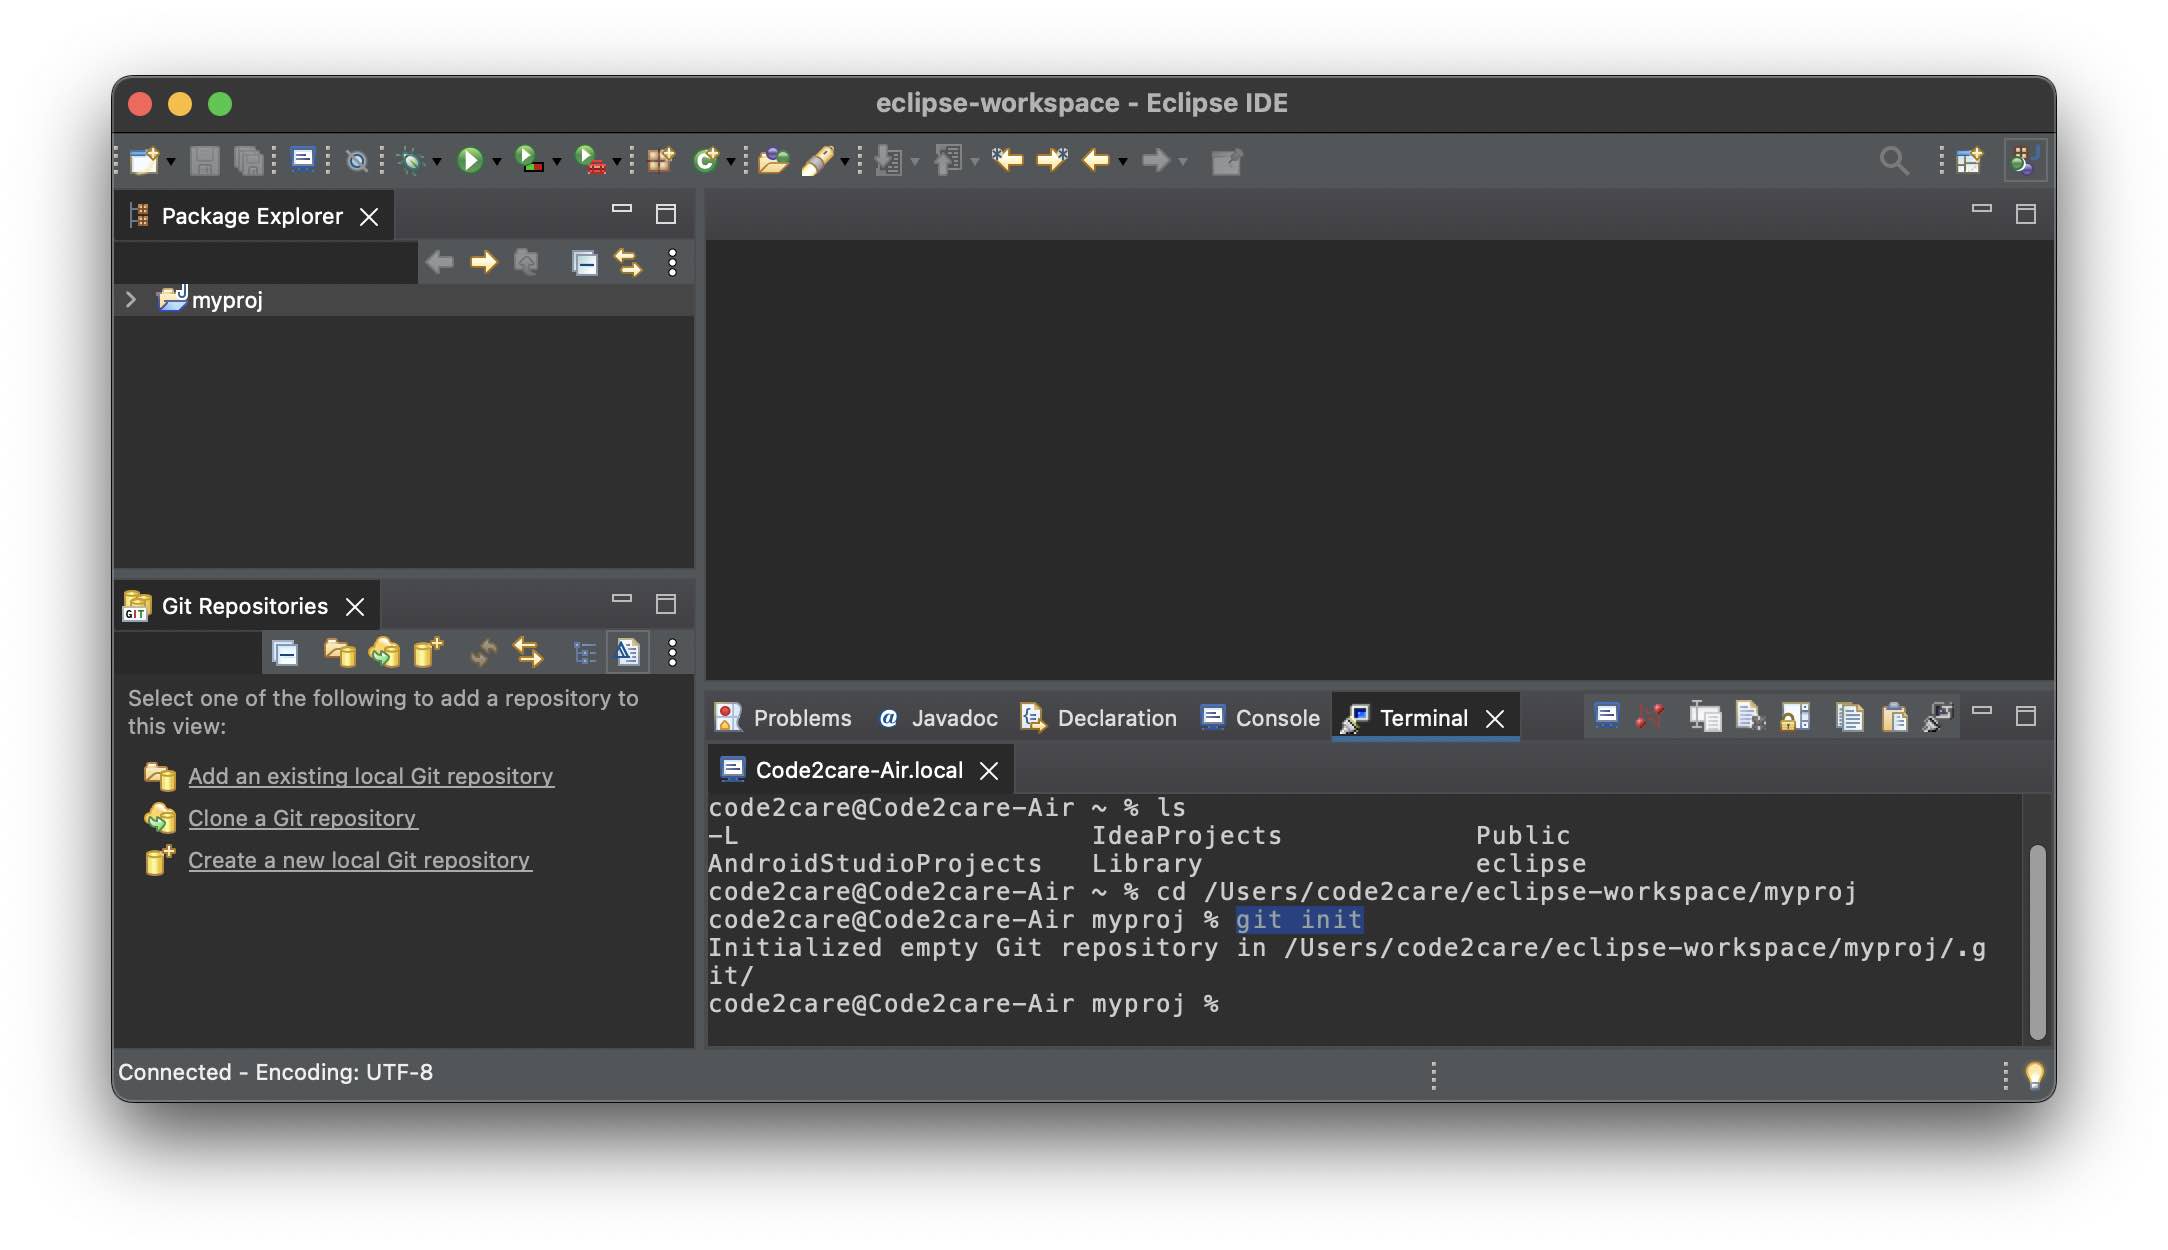
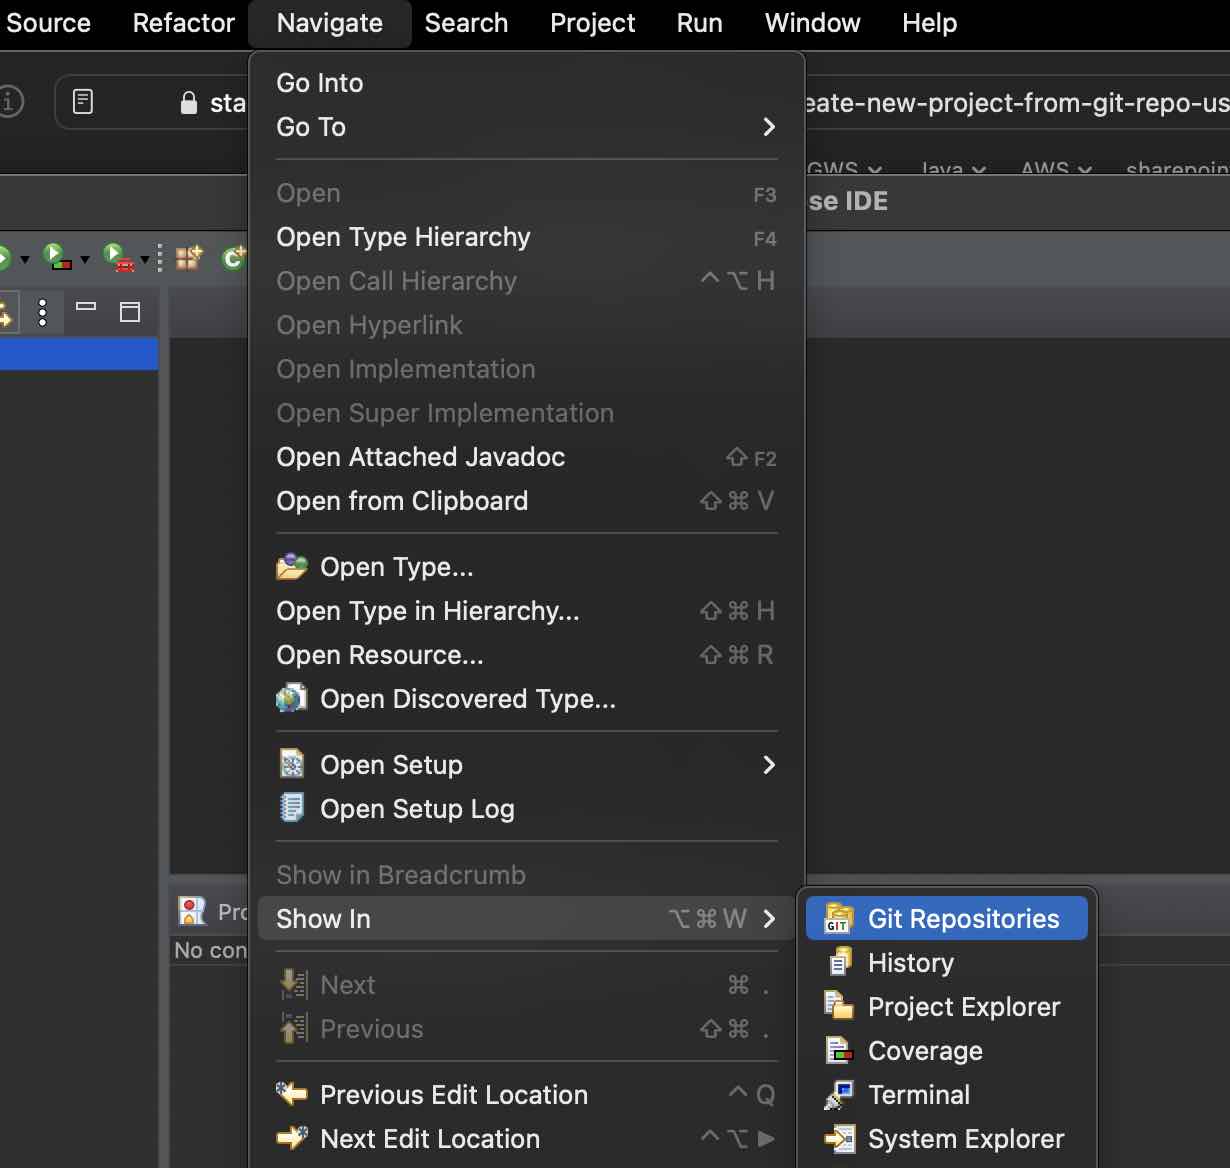
- Now go to Menu -> Navigate -> Show in -> Git Repositories,
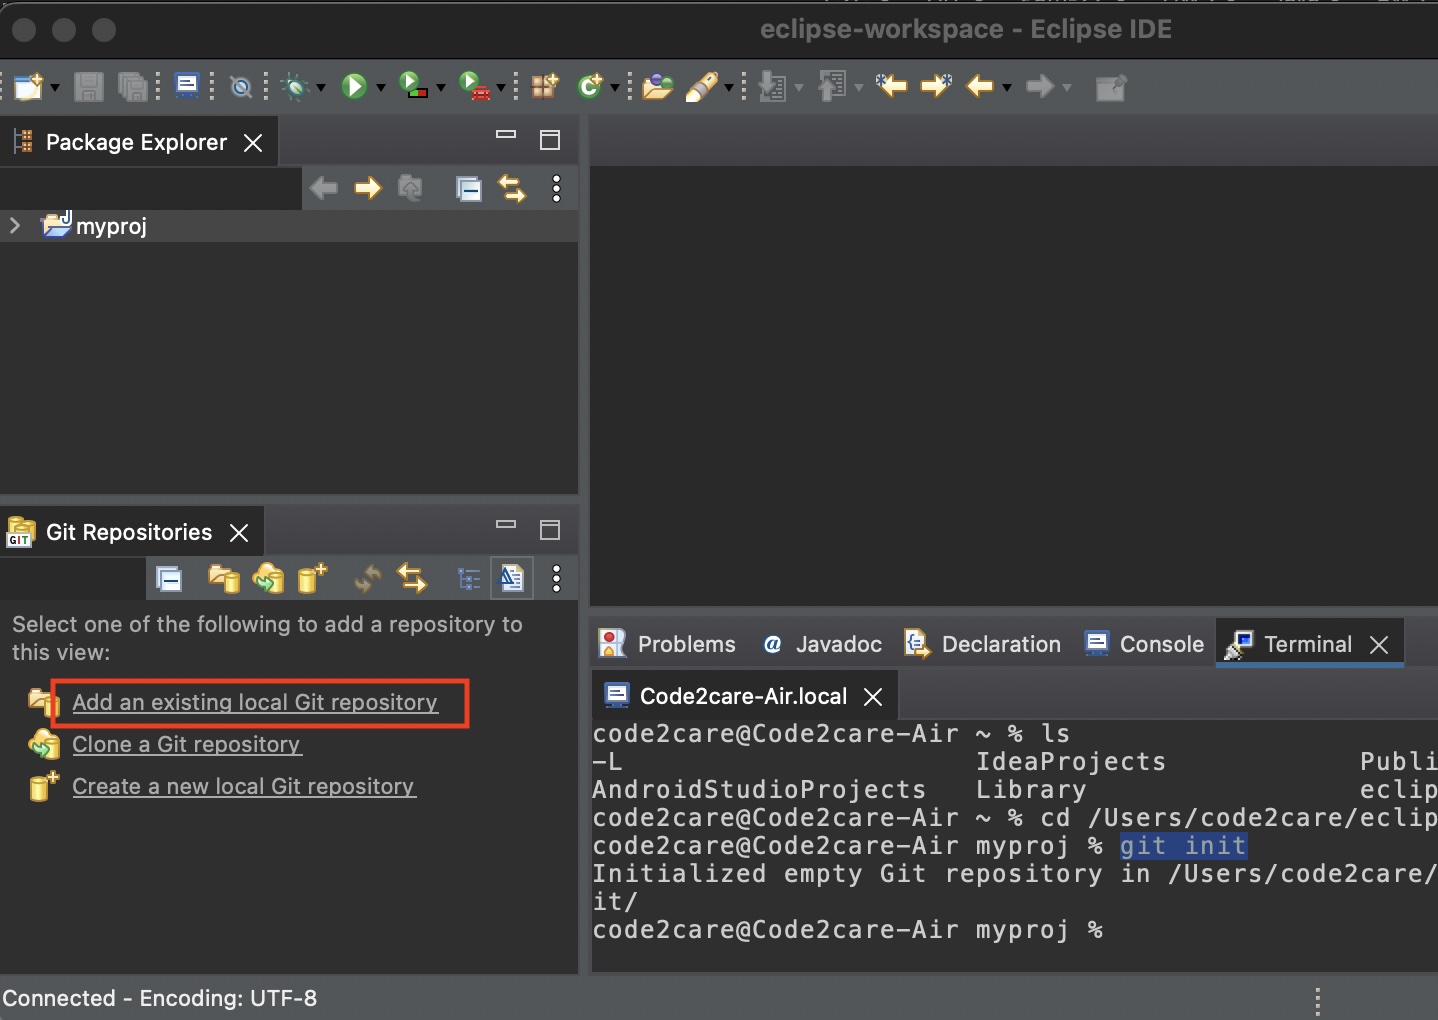
- Select Add to existing local git repository,
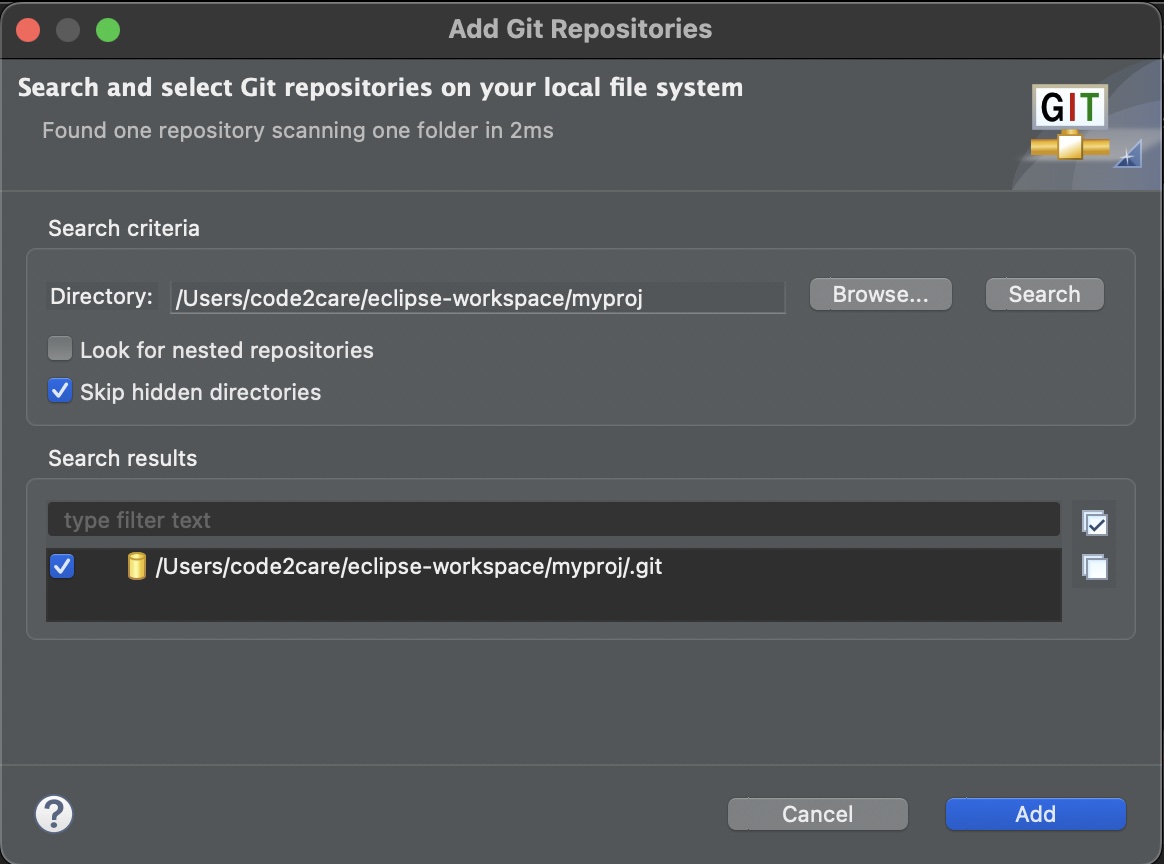
- Search and select the Git repository we just created from your local file system,
- That's it! You should now see that your project is a Git project and have all Git Commands available under Teams
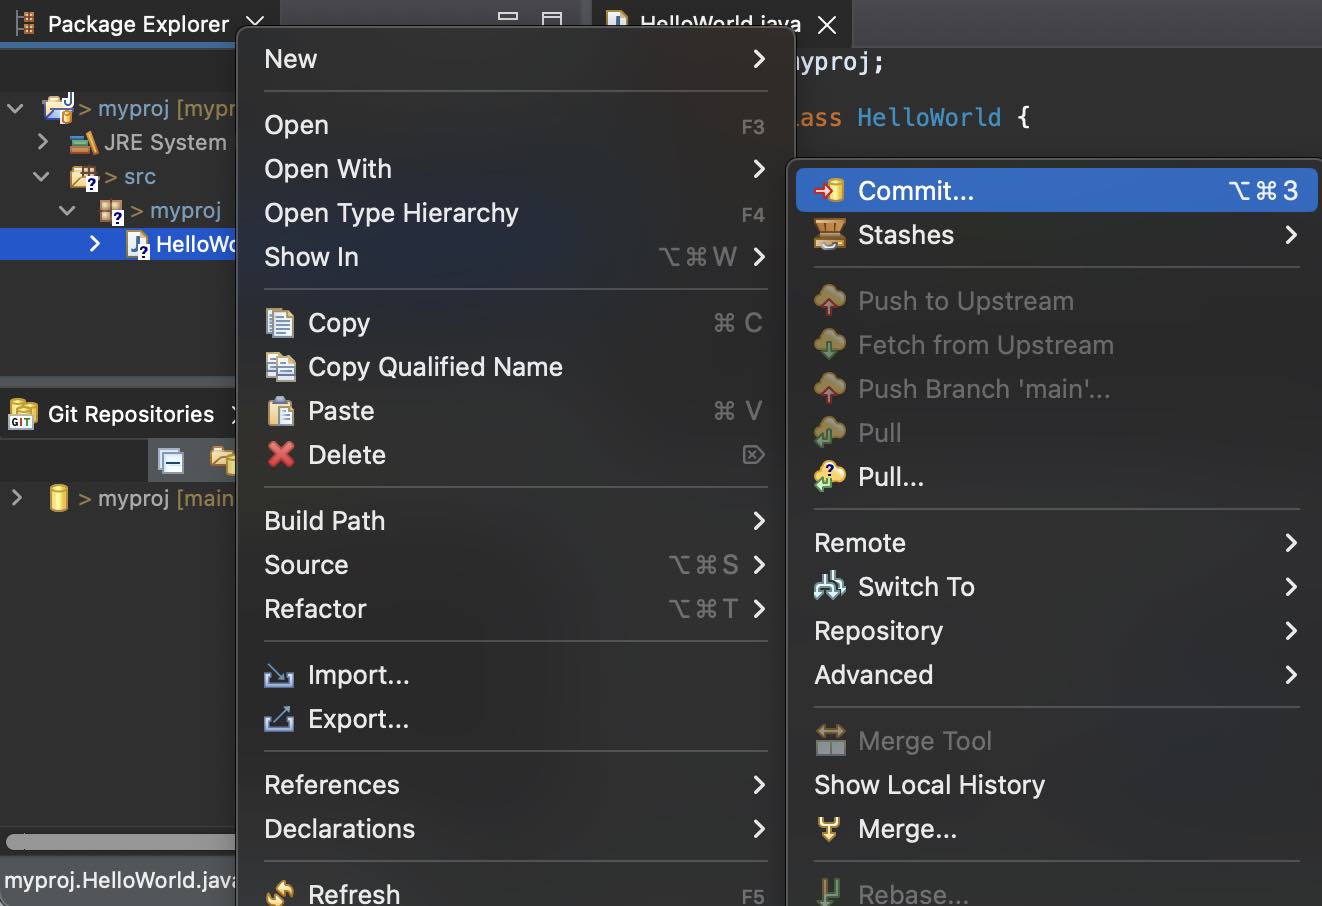
The demo is based on Mac running Eclipse version 2022-12, but this should work on Windows, Linux, and most of the versions.
Do let me know if it worked, or if you know of any other way to do the same more quickly!
Happy Coding!
Facing issues? Have Questions? Post them here! I am happy to answer!
Author Info:
Rakesh (He/Him) has over 14+ years of experience in Web and Application development. He is the author of insightful How-To articles for Code2care.
Follow him on: X
You can also reach out to him via e-mail: rakesh@code2care.org