
We will try and cover all the tips and tricks of taking screenshots with a Trackpad, Mouse, or Keyboard on a Mac.
- How to take a full screen screenshot?
- How to take a cropped screenshot?
- How to take a screenshot of a Window or a Menu?
- Where is the screenshot files saved?
- What is the extension of the screenshot image?
- How to change the default location where Screenshots are saved?
- How to take screenshot using screenshot application?
- How to capture the cursor?
- How to take a screenshot with a delayed timer?
- Change the default screenshot shortcuts key configurations?
- How to take screenshot of touchbar screen?
- How to take with external Keyboard on Mac Mini (non-Apple Mac Keyboard)?
- Summary!
How to take a full-screen screenshot on a Mac?
To take a full-screen screenshot all you need to do is press the keys: ⌘ Command + ⇧ Shift + 3. When you press these three keys together you will hear a sound and a preview at the bottom right side of your screen of the screenshot that you just took of the whole screen.

By default the screenshot will be saved on your desktop with the default name such as - Screen Shot 2021-07-21 at 3.44.39 PM this may vary based on what date format you follow based on your location.
How to take a cropped screenshot on a Mac?
To take a cropped screenshot, you can press the keys: ⌘ Command + ⇧ Shift + 4, when you do that you will see a cross-arrow cursor as shown below with the current position details displayed in numeric form. Move this cross arrow cursor to the position where you want to start your cropped screenshot and drag your mouse keep the button (trackpad) clicked and leave when you want to take the screenshot. Again, once you leave your trackpad or the mouse, you will hear the click sound and the image will be saved on your desktop.
Below is a Gif example where we are trying to take a cropped screenshot of the terminal app.

How to take a screenshot of a Window or a Menu?
This option lets you capture the complete window that you want to capture. Example: Let's say I have two windows open - Safari and Terminal and I want to capture all that I see in the terminal window, then I can make use of the keys: ⌘ Command + ⇧ Shift + 4 + Spacebar

As you can see in the above demo, as I press the Command + ⇧ Shift + 4 + Space keys, a camera icon appears and as I move my cursor between applications it highlights them. When I clicked on the terminal application the click sound was played and the image got saved on the desktop. Note the captured image is stored as a .png file with a nice gradient at the borders of it.
Where are the screenshot files saved?
As we have seen in all three cases the files are stored on the desktop with the name "Screen Shot [date] [time].png"
What is the extension of the screenshot image?
The extension of the screenshot image file is .png in lowercase.
How to change the default location where screenshots are saved?
Yes, you can change the default location where the screenshots taken are saved by going to the "Screenshot App"
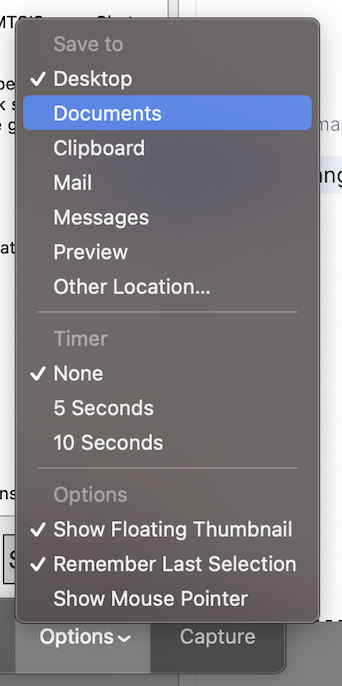
- In Spotlight Search look type: Screenshot and open the App,
- Now you will see Options, click on it,
- You should see options "Save to: Desktop, Documents, Clipboard, Mail, Messages, Preview, Other Location..." to choose from.
- Once you select your choice the default location will get updated.
How to take screenshot using Screenshot Application?
The Screenshot application is similar to the Snipping tool application that you must be familiar with on the Windows 10 and 11 Operating System Ecosystem.
- In Spotlight Search look type: Screenshot and open the App,
- You will see a dotted window that you can adjust using the cursor,
- Click on Capture to take the print screen.
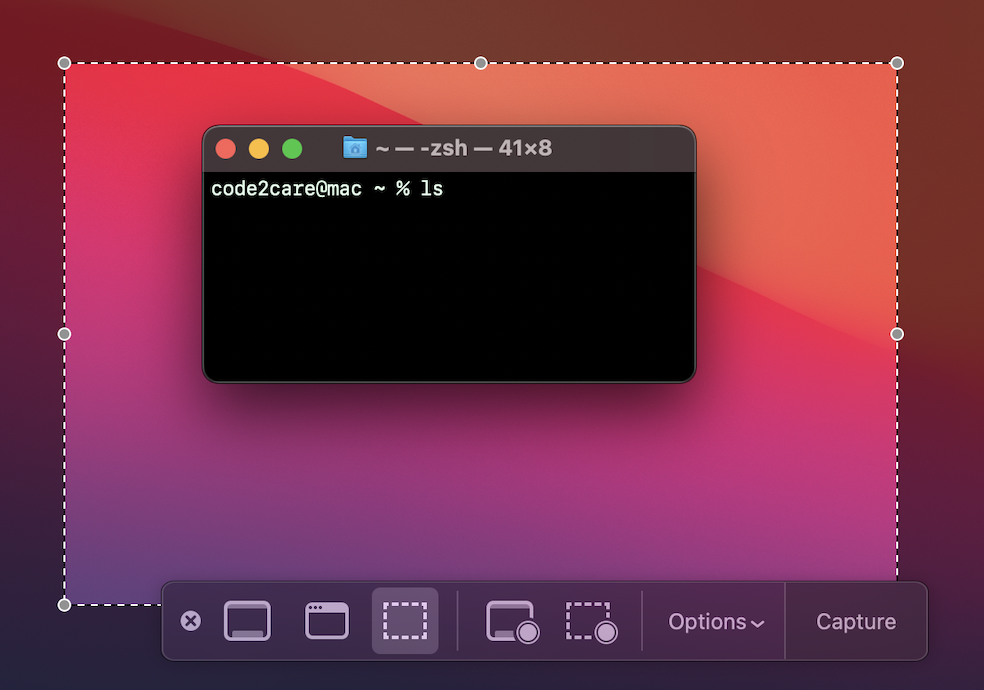
Note: Again as you can see in the above image you get all the various options to take a screengrab,
- Capture Entire Screen
- Capture Selected Window
- Capture Select Portion
- Record Entire Screen
- Record Selected Portion
How to capture the cursor in the screenshot?
Do you have a use case where you want to even capture the cursor in the screen image? you can enable this option by going to the Screenshot app and selecting the option: "Show mouse pointer"

Note: This will only work when you take a full-screen capture. I guess so!
How to take a screenshot with a delayed timer?
If you have followed the points that we have tried to cover then you must have noticed that under the Screenshot app Options, we have even the option to take delayed screenshots based on setting a timer to either 5 or 10 seconds. By default, the timer is set to none.
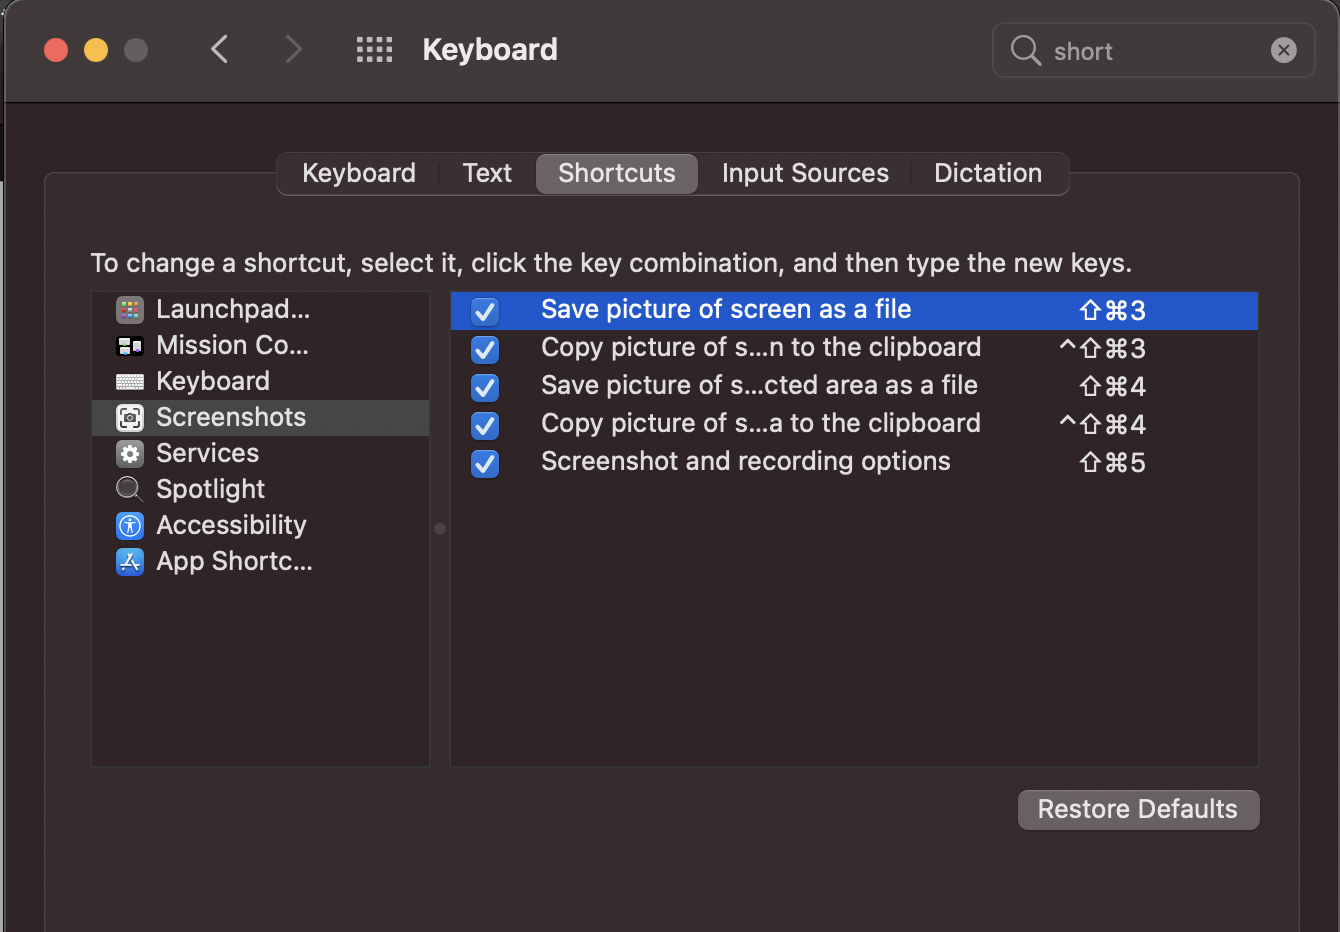
Change the default screenshot shortcuts key configurations?
If you wish to change the default keyboard key combinations to your custom ones, you can do that by clicking on the Apple logo on the Menu bar and selecting System Preferences... (Settings... if on macOS Ventura or later) > Keyboards > Shortcuts > Screenshots
How to take screenshot of touchbar screen?
If you have a Macbook Pro that has a Touchbar, you can take a screenshot of the touch bar screen as well! yes, that's true, just press: ⌘ Command + ⇧ Shift + 6 keys.
How to take with external Keyboard on Mac Mini (non-Apple Mac Keyboard)?
If you have a Mac Mini that does not come with a keyboard and you are using a Windows-compatible keyboard with it, it will work, but there is no ⌘ Command key on it, so either you have to go to Keybaord System Preferences (Settings... for macOS Ventura or later) and do your mappings for the Command Key to the Windows icon key and all the shortcut options should work for you .
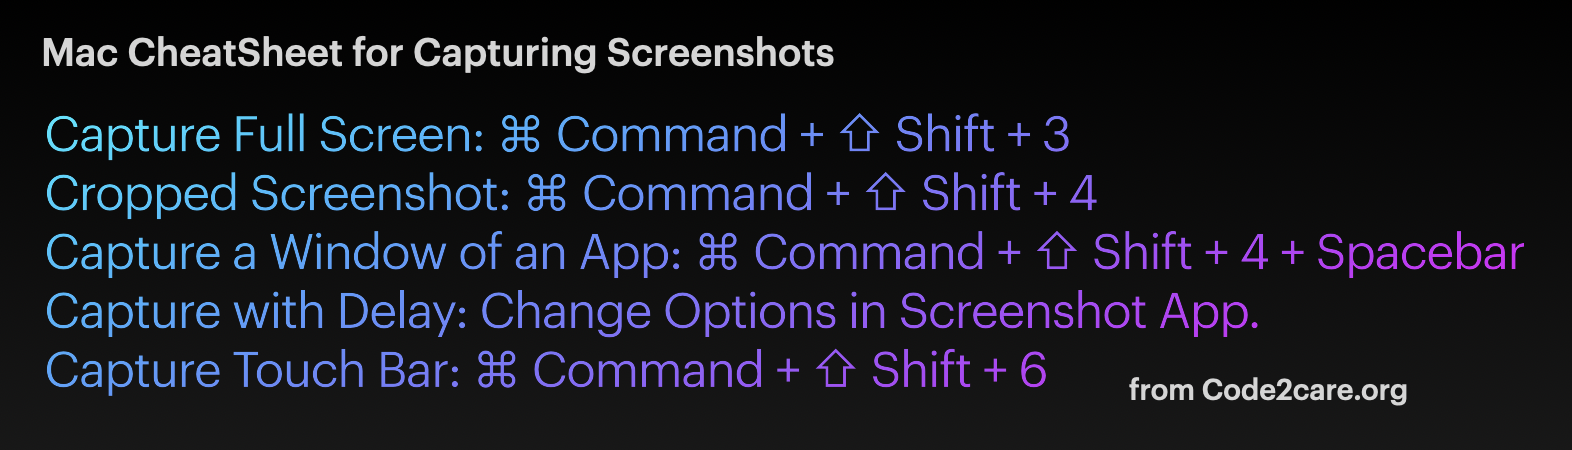
Summary:
- Capture Full Screen: ⌘ Command + ⇧ Shift + 3
- Cropped Screenshot: ⌘ Command + ⇧ Shift + 4
- Capture a Window of an App: ⌘ Command + ⇧ Shift + 4 + Spacebar
- Capture with Delay: Change Options in Screenshot App.
- Capture Touchbar: ⌘ Command + ⇧ Shift + 6
Note: Some features may not work on older macOS, all examples provided in this guide are using M1/M2 Macbook running macOS Ventura 2022).
Provide Feedback For This Article
We take your feedback seriously and use it to improve our content. Thank you for helping us serve you better!
😊 Thanks for your time, your feedback has been registered!
Comments & Discussion
Facing issues? Have questions? Post them here! We're happy to help!