- Step 1: Login to Windows 365 Online Business/School Account on a web browser: https://office.com
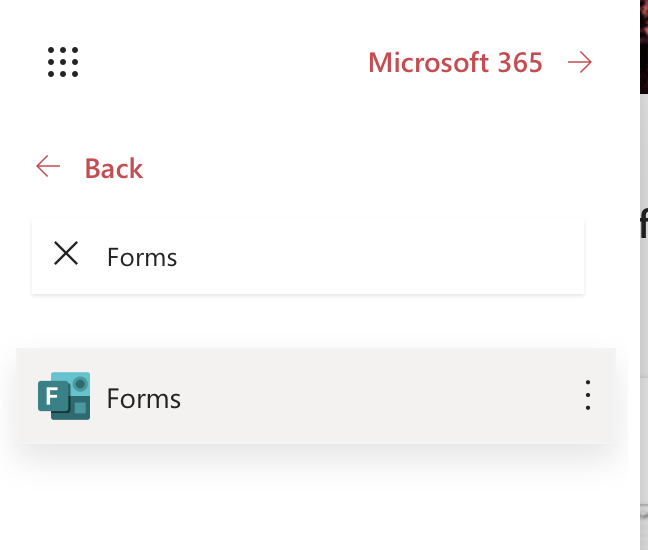
- Step 2: Now click on the App Launcher icon at the top right corner of the page and click on All Apps (may have to scroll)
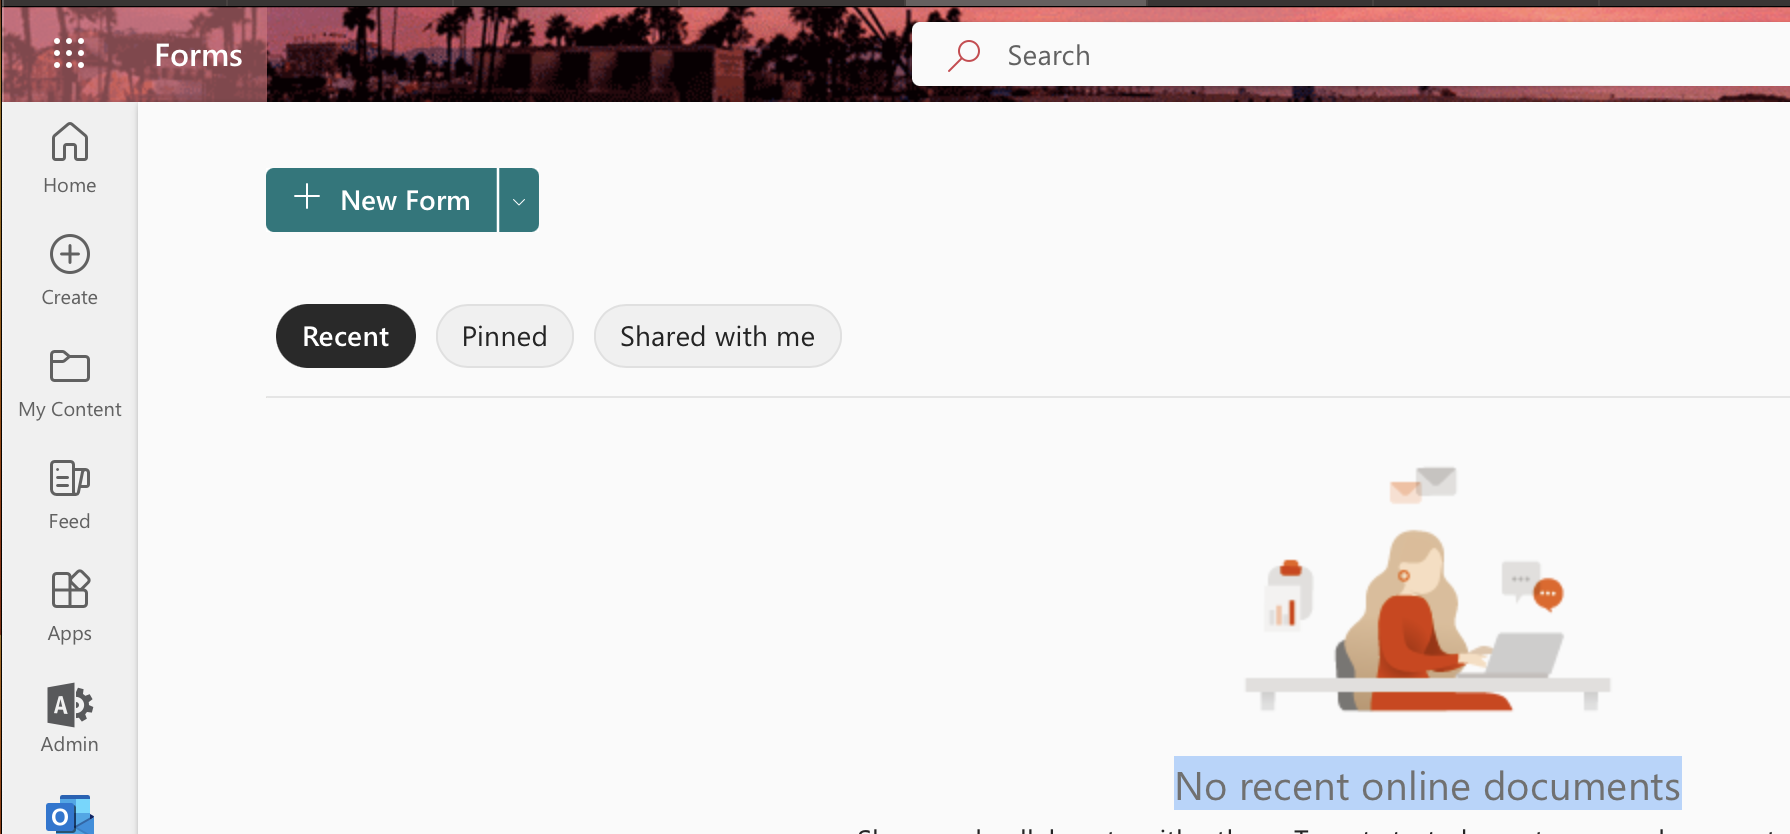
- Step 3: Now search for Forms and click on it, it should open Forms on a new Tab. You would see "No recent online documents" if you are seeing it for the first time.
- Step 4: Now click on the New Form button, you would see it at the top left.
- Step 5: Click on the Untitled form text and you should be able to edit the form name and description.
- Step 6: Click on Add New and you should get an option of what kind of question you want to enter,
- Choice
- Text
- Rating
- Date
- Ranking
- Likert
- Upload File
- Net Promoter Score ®

To keep this example simple we will go with Text.
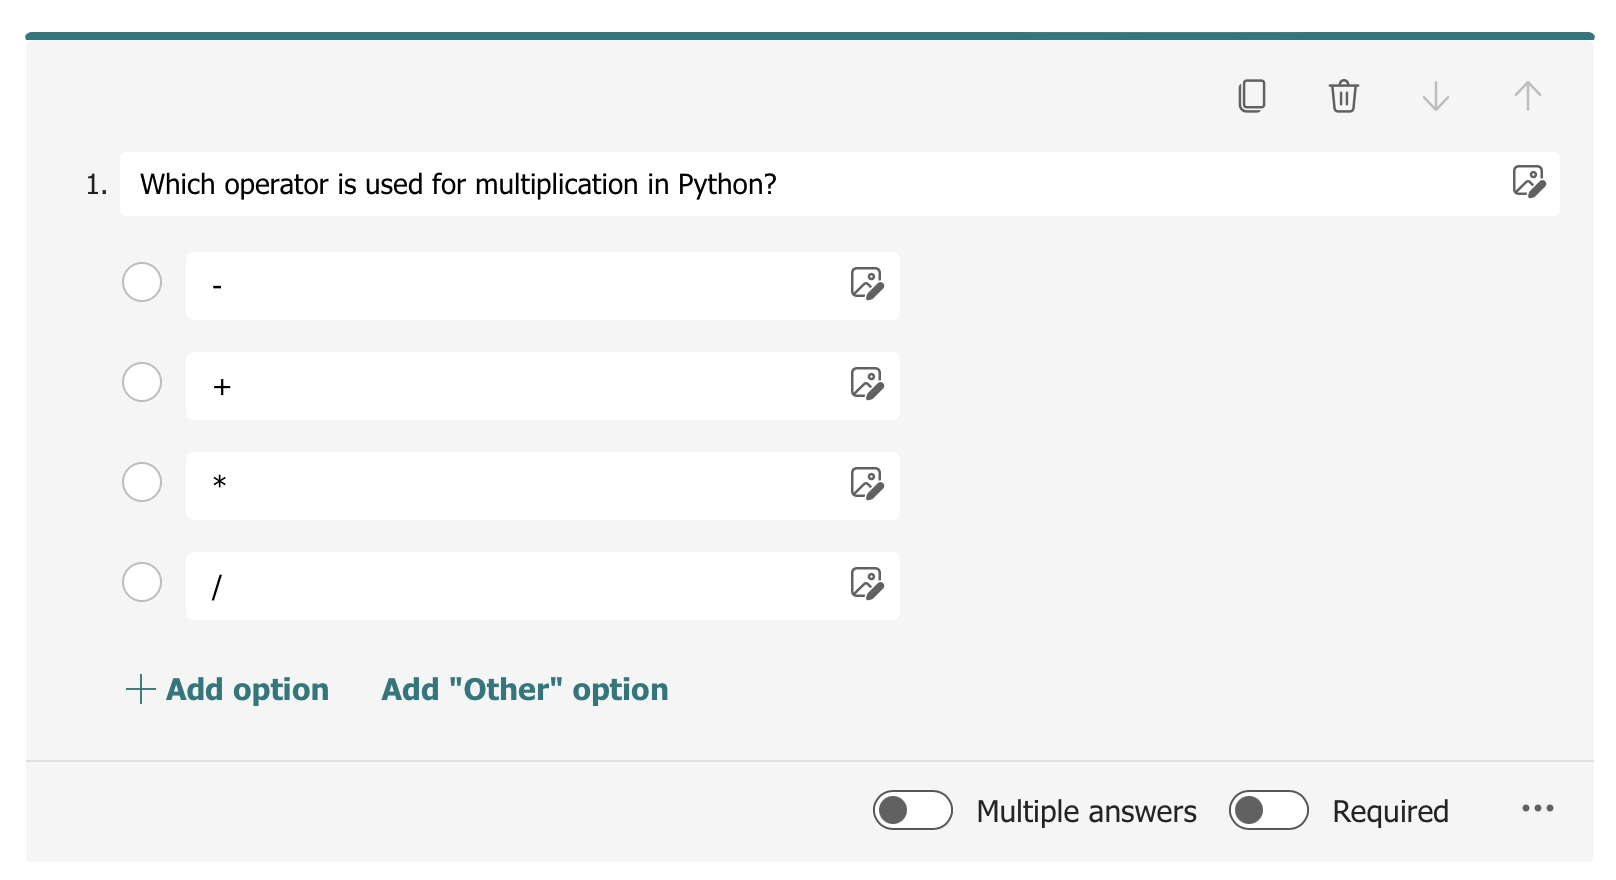
- Step 7: Now click on the Question and you will get a Form in which you can edit and add the quiz question and choices. You can add options, make the question multiple chose and required. You can even upload an image for the options.
Below is a simple example of how my question looks like
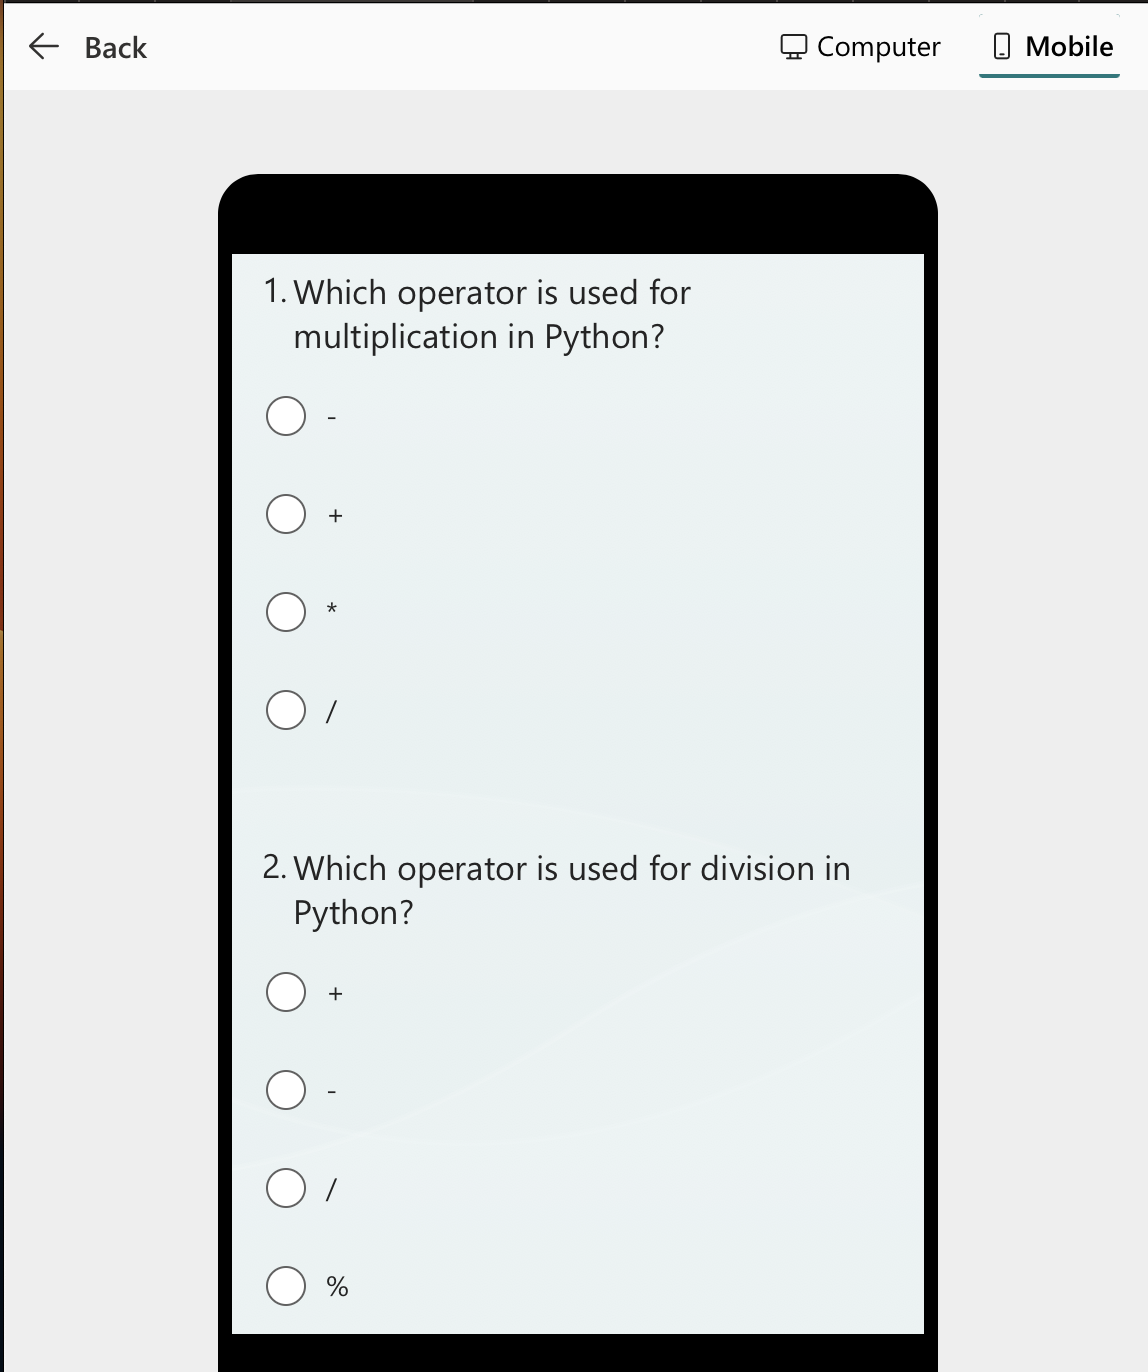
- Step 8: Once you are done, setting up the form you can check out a preview of it by clicking the Preview button. You can even apply themes and see how it looks on a Computer or a Mobile screen. There is an option to add background music as well to make the quiz more fun based on the context.
- Step 9: Once you are good with the Quiz content, you can share the quick by clicking on the 3 dots on the right top side and choosing "Collaborate or Duplicate", this should give you the option to get a link. Click on Share the link to collaborate and view result and copy the link that is provided.
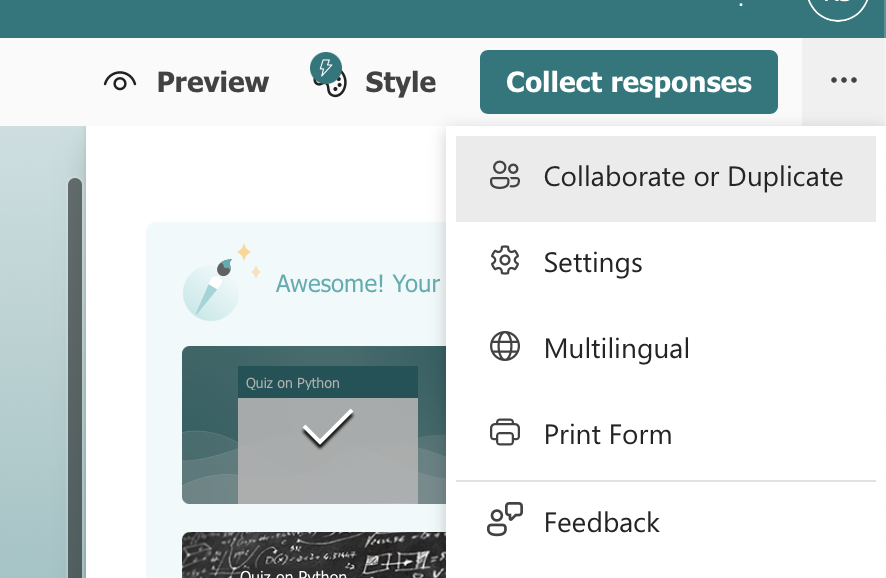
- Step 10: That's it! You are ready with the quiz, you can monitor the responses by clicking on the responses tab.
Author Info:
Rakesh (He/Him) has over 14+ years of experience in Web and Application development. He is the author of insightful How-To articles for Code2care.
Follow him on: X
You can also reach out to him via e-mail: rakesh@code2care.org
More Posts related to Windows,
- Fix Windows Update Error Code: 0x80070643
- How to Create Awesome Quizzes using Windows 365 Forms
- [Fix] Microsoft Windows Store error 0x00000005 (Windows 8/10/11)
- Windows 365: Restore Deleted Distribution Group using Admin Center (Active Directory)
- How to Change Encoding of File from ANSI to UTF-8 in Windows Notepad
- How to Change the Default Shell in Windows Terminal App
- How to Create a Website (Webpage) using HTML on Windows Notepad
- How to Find the Location of Notepad on Windows 11
- How to locate Python Installation on Windows (10/11)
- Top 5 Fonts for Windows Notepad
- Fix: Windows Update Error Code: 0x800f0922
- Office.com downloading zero byte file name prelanding on Safari browser
- How to Search in Notepad Application on Windows
- Cannot access Windows application shortcuts on Start menu and Taskbar
- How to add Solver Add-in in Microsoft Excel on Mac
- How to Freeze Top Row in Excel for Mac
- [Fix] Microsoft Windows OneDrive 0x8007018b Error Code
- Mac: Sign in Required We cant upload or download your changes because your cached credentials have expired [Word Excel]
- Grep Alternative for Windows CMD or PowerShell: findstr
- Fix: Failed in attempting to update the source: winget
- How to lock cells in Microsoft Excel for Mac
- Enable Cloud Based Clipboard for Images and Text on Windows 10/11
- How to update Microsoft Excel on Mac
- How to Make a Windows Notepad File Read-Only
- sudo is not recognized as an internal or external command
More Posts:
- How to do a Print Screen on Windows 11 to Screencapture - Windows
- Where is Maven .m2 local repository located on Mac - HowTos
- Java: Convert String to InputStream - Java
- JSON Nest Objects Example: JSON Tutorial - Json-Tutorial
- How to clear Microsoft Teams Cache on Mac (macOS) - Teams
- Python: How to create a Dictionary of Lists with Examples - Python
- Android Shared Preferences API tutorial - Android
- How to Export a PowerShell Script/Cmdlet Output to a Text File - Powershell