Java Exception Stack Trace:
java.lang.UnsupportedClassVersionError: Main :
 Unsupported major.minor version 63.0
The Unsupported major.minor version error occurs when the Java runtime environment (JRE) is not able to run a Java class file because it was compiled with a higher version of Java than the one currently installed.
In this specific case, the "63.0" version number refers to Java 20, which is not supported by the version of Java installed on the system.
List of Java Major Versions
| Java Version | Major Version |
|---|---|
| * JDK 21 | 65 |
| JDK 20 | 64 |
| JDK 19 | 63 |
| JDK 18 | 62 |
| JDK 17 | 61 |
| JDK 16 | 60 |
| JDK 15 | 59 |
| JDK 14 | 58 |
| JDK 13 | 57 |
| JDK 12 | 56 |
| JDK 11 | 55 |
| JDK 10 | 54 |
| JDK 9 | 53 |
| JDK 8 | 52 |
| JDK 7 | 51 |
| JDK 6 | 50 |
| JDK 5 | 49 |
| JDK 1.4 | 48 |
| JDK 1.3 | 47 |
| JDK 1.2 | 46 |
| JDK 1.1 | 45 |
Java JDK 21 is due to be released in September 2023.
Possible Fixes:
Recompile your source code with a lower version of Java that is supported by the current target system.
Or update the Java JDK version to the version (in our case JDK 20) on your target system.
If you're using an IDE like Eclipse or IntelliJ, make sure you have set the current versions in the module/project configuration.
To fix this issue JDK used to compile the Java code and the Java version is used to run the code must be compatible with the minimum Java version required by your target environment.
Fix the issue in Eclipse
- In Eclipse and navigate to the project that is causing the error
- Right-click on the project in the "Package Explorer" view and select "Properties".
- Click on "Java Build Path" and then select the "Libraries" tab.
- Check the Java version that is being used in the project's classpath.
- In the "Properties" dialog, click on "Java Compiler" and check the "Compiler compliance level" setting. Make sure that it matches the Java version used in the project's classpath.
- If the Java version used in the classpath is higher than the Java version used by the compiler, change the Java version used in the classpath to match the compiler version. To do this, select the Java version in the classpath and click the "Edit" button to change it.
After changing the Java version, clean and rebuild the project to ensure that the code is compiled with the correct version of Java and run the code again and check if the error is resolved.
Fix the issue in IntelliJ
- Open IntelliJ and navigate to the project that is causing the error.
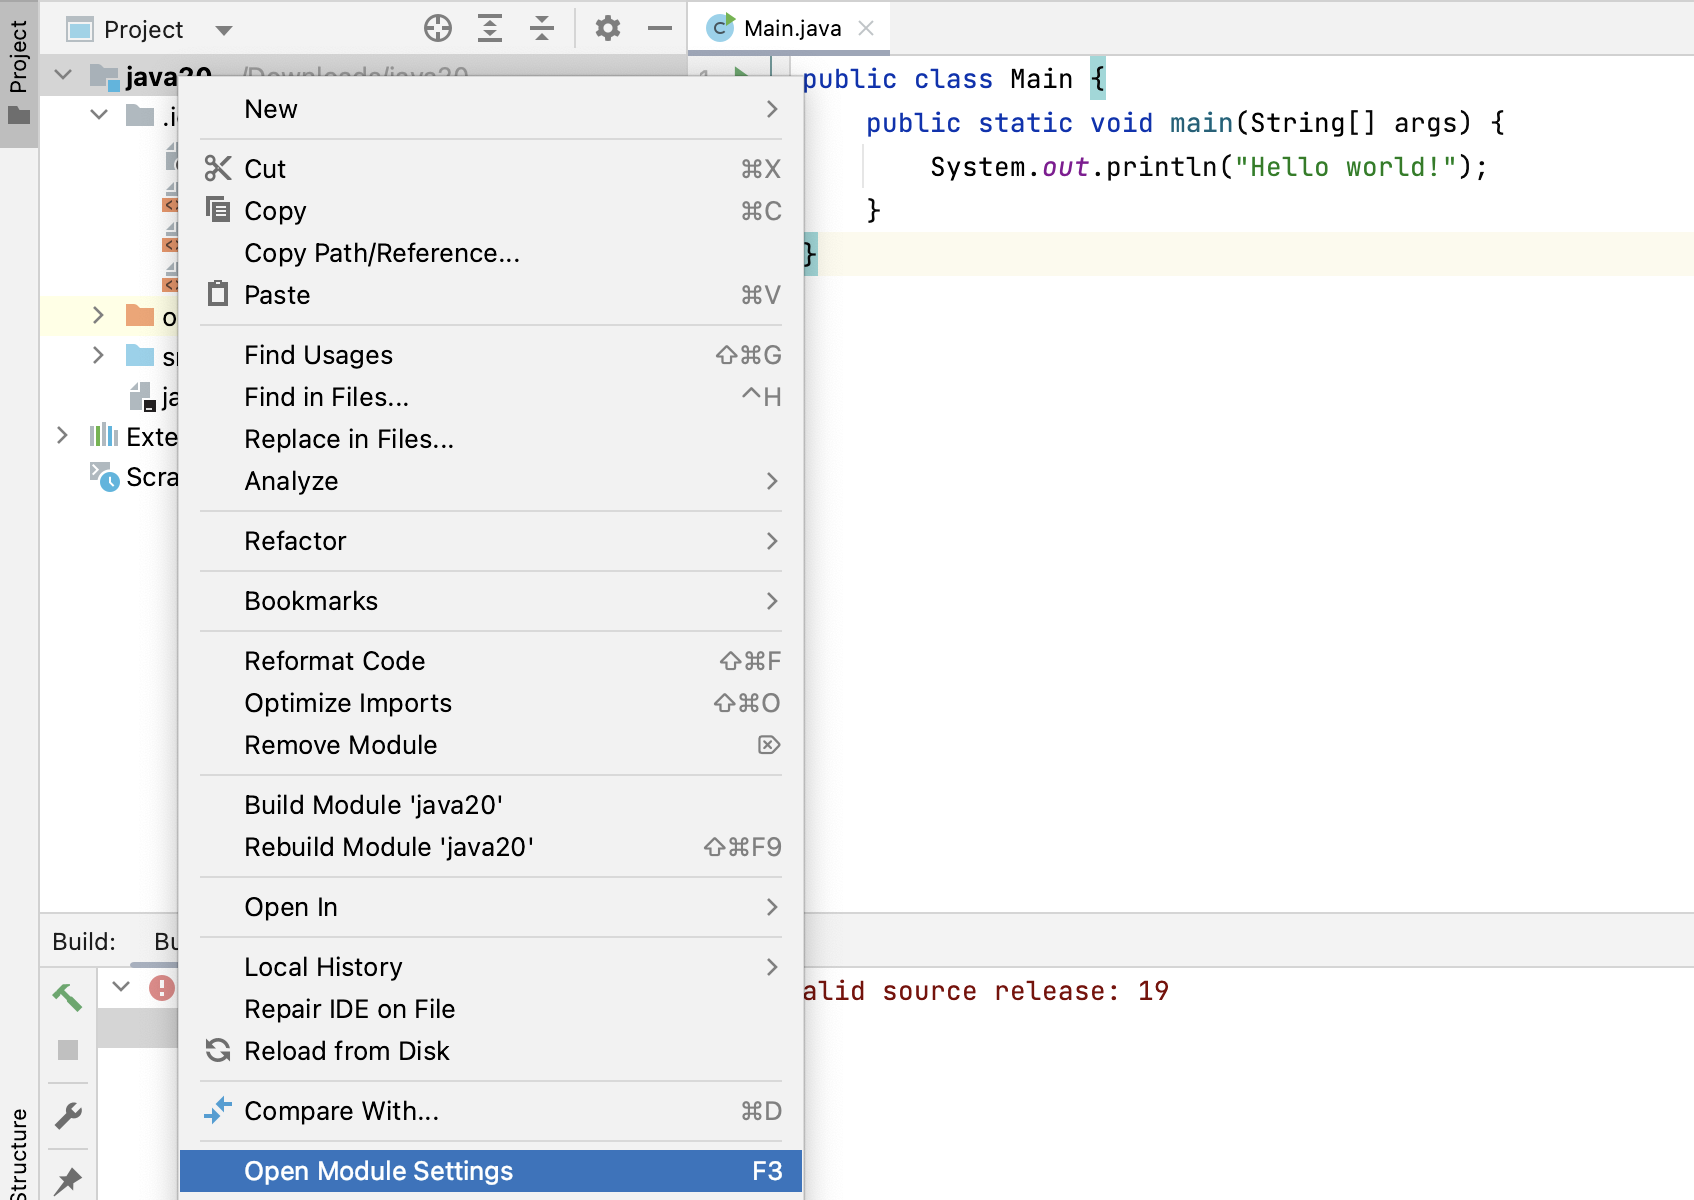
- Right-click on the project in the "Project" view and select "Open Module Settings" (or press keyboard shortcut F3)
- Click on "Project Settings" and then select "Modules" and check the Java version that is being used in the project's module.
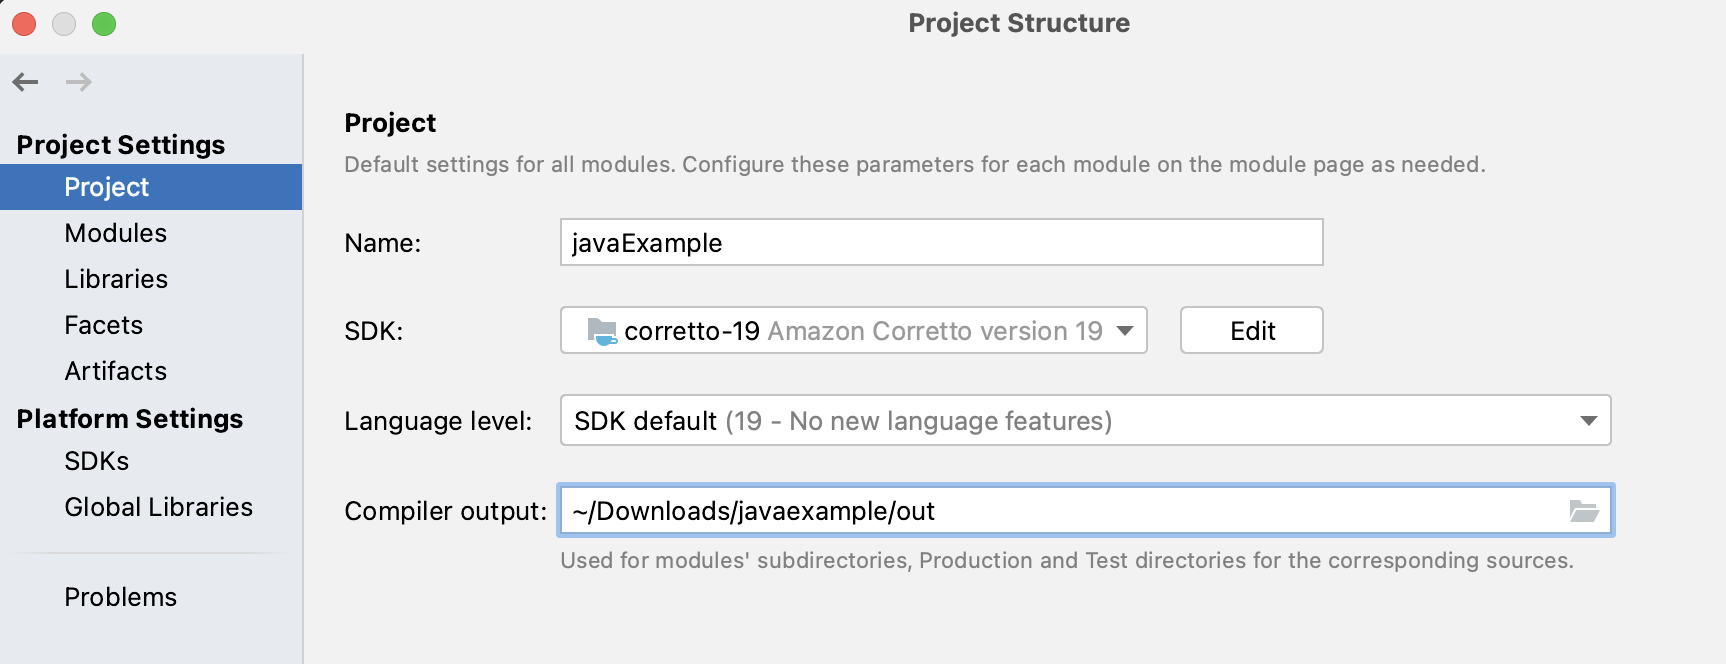
- In the "Project Structure" dialog, click on "Project Settings" and then select "Project".
- Check the "Project SDK" setting and make sure that it matches the Java version used in the project's module.
- If the Java version used in the module is higher than the Java version used by the compiler, change the Java version used in the module to match the compiler version. To do this, select the Java version in the module and click the "Edit" button to change it.
- Open VS Code and navigate to the project that is causing the error.
- Open the "Explorer" view in VS Code and navigate to the project's directory.
- Check the Java version that is used in the project's build settings or configuration files, such as the pom.xml file in a Maven project or the build.gradle file in a Gradle project.
- Open the project's build settings or configuration files and check the Java version used by the compiler.
- If the Java version used in the build settings or configuration files is higher than the Java version used by the compiler, change the Java version used in the build settings or configuration files to match the compiler version.
- Get the current timestamp in Java
- Java Stream with Multiple Filters Example
- Java SE JDBC with Prepared Statement Parameterized Select Example
- Fix: UnsupportedClassVersionError: Unsupported major.minor version 63.0
- [Fix] Java Exception with Lambda - Cannot invoke because object is null
- 7 deadly java.lang.OutOfMemoryError in Java Programming
- How to Calculate the SHA Hash Value of a File in Java
- Java JDBC Connection with Database using SSL (https) URL
- How to Add/Subtract Days to the Current Date in Java
- Create Nested Directories using Java Code
- Spring Boot: JDBCTemplate BatchUpdate Update Query Example
- What is CA FE BA BE 00 00 00 3D in Java Class Bytecode
- Save Java Object as JSON file using Jackson Library
- Adding Custom ASCII Text Banner in Spring Boot Application
- [Fix] Java: Type argument cannot be of primitive type generics
- List of New Features in Java 11 (JEPs)
- Java: How to Add two Maps with example
- Java JDBC Transition Management using PreparedStatement Examples
- Understanding and Handling NullPointerException in Java: Tips and Tricks for Effective Debugging
- Steps of working with Stored Procedures using JDBCTemplate Spring Boot
- Java 8 java.util.Function and BiFunction Examples
- The Motivation Behind Generics in Java Programming
- Get Current Local Date and Time using Java 8 DateTime API
- Java: Convert Char to ASCII
- Deep Dive: Why avoid java.util.Date and Calendar Classes
- How to perform Find and Replace using vim Editor - vi
- How to update Rust on Mac/Linux - Rust
- SharePoint Server 2016 Preview installation error - This Product Key isn't a valid Microsoft Office 2016 Product Key. Check that you've entered it correctly. - SharePoint
- How to Save Eclipse console logs in external log file - Eclipse
- Android Development: Spinners with Example - Android
- MySQL: How to know which Database Schema you are on in Terminal - MySQL
- Get the file location of git config values - Git
- PowerShell For Each Loop Examples - Powershell


After changing the Java version, clean and rebuild the project to ensure that the code is compiled with the correct version of Java and run the code again and check if the error is resolved.
Fix issue in VS Code
After changing the Java version, clean and rebuild the project to ensure that the code is compiled with the correct version of Java and run the code again and check if the error is resolved.
Facing issues? Have Questions? Post them here! I am happy to answer!
Rakesh (He/Him) has over 14+ years of experience in Web and Application development. He is the author of insightful How-To articles for Code2care.
Follow him on: X
You can also reach out to him via e-mail: rakesh@code2care.org