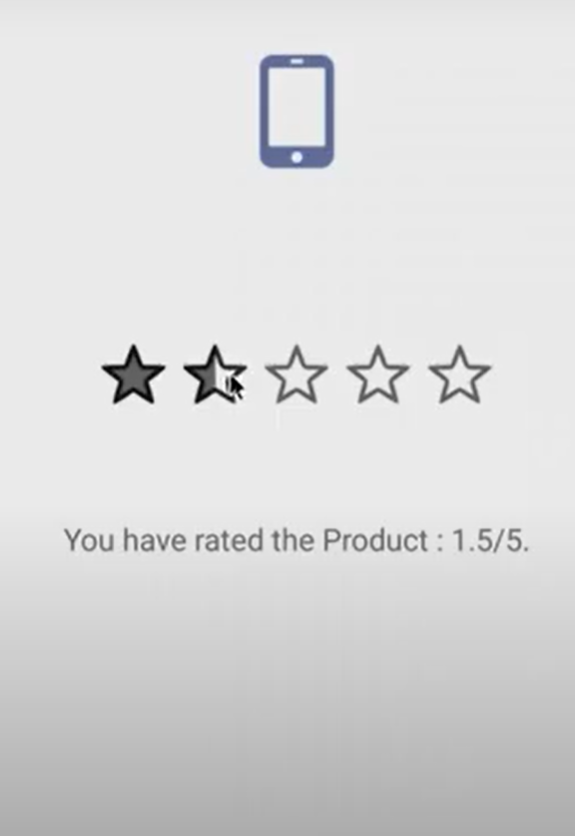
You must be familiar with Rating Start Bar that we see on websites that rate Movies, Music, and Products or for Feedbacks. These are 5 hollow stars that get filled when users select them to set a rating from 1-5 or even odd rankings like 0.5, 1.5, 4.5, and so on. We have this implementation in Android Programming too.
RatingBar in Android is an extension of SeekBar and ProgressBar. User can touch/drag or use arrow keys to set the rating when using the default size RatingBar.
In the Graphical Layout section under the Format Widgets tab you would see the RatingBar: Five Starts with the 1st one darker (as selected), drag it to your layout.xml file.
You would see that tag is added to the XML.
android:id="@+id/ratingBar1"
android:layout_width="wrap_content"
android:layout_height="wrap_content"
Now create an Object of RatingBar in Java class file and map it to this View using R file reference (as we do for any View like Button, TextView, EditText or ImageView e.t.c)
setOnRatingBarChangeListener is the lister that we have to use to get the value set by the user selecting the Stars on screen. We can get the value of the RatingBar by using getRating() method.
Example RatingBar
Layout XML File<RelativeLayout xmlns:android="http://schemas.android.com/apk/res/android"
xmlns:tools="http://schemas.android.com/tools"
android:layout_width="match_parent"
android:layout_height="match_parent"
tools:context="com.code2care.example.ratingbarexample.MainActivity" >
<RatingBar
android:id="@+id/ratingBar"
android:layout_width="wrap_content"
android:layout_height="wrap_content"
android:layout_above="@+id/rateMessage"
android:layout_centerHorizontal="true"
android:layout_marginBottom="52dp" />
<ImageView
android:id="@+id/imageView1"
android:layout_width="wrap_content"
android:layout_height="wrap_content"
android:layout_above="@+id/ratingBar"
android:layout_centerHorizontal="true"
android:layout_marginBottom="97dp"
android:contentDescription="@string/rate"
android:src="@drawable/smartphone" />
<TextView
android:id="@+id/rateMessage"
android:layout_width="wrap_content"
android:layout_height="wrap_content"
android:layout_alignParentBottom="true"
android:layout_centerHorizontal="true"
android:layout_marginBottom="176dp"
android:text="@string/rate"
android:textAppearance="?android:attr/textAppearanceMedium" />
</RelativeLayout>MainActivity.java File
package com.code2care.example.ratingbarexample;

//Button icon form icon8.com

import android.os.Bundle;
import android.support.v7.app.ActionBarActivity;
import android.widget.RatingBar;
import android.widget.RatingBar.OnRatingBarChangeListener;
import android.widget.TextView;

public class MainActivity extends ActionBarActivity {

	RatingBar ratingBar;
	TextView rateMessage;
	String ratedValue;

	@Override
	protected void onCreate(Bundle savedInstanceState) {
		super.onCreate(savedInstanceState);
		setContentView(R.layout.activity_main);

		ratingBar = (RatingBar) findViewById(R.id.ratingBar);
		rateMessage = (TextView) findViewById(R.id.rateMessage);

		ratingBar.setOnRatingBarChangeListener(new OnRatingBarChangeListener() {

			@Override
			public void onRatingChanged(RatingBar ratingBar, float rating,
					boolean fromUser) {

				ratedValue = String.valueOf(ratingBar.getRating());
				rateMessage.setText("You have rated the Product : "
						+ ratedValue + "/5.");

			}
		});

	}

}
You can download this Tutorial from GitHub: https://github.com/code2care/RatingBarExample
Youtube Video Demo: https://www.youtube.com/embed/UcAhtmOUOFU- Increase Android Emulator Timeout time
- Android : Remove ListView Separator/divider programmatically or using xml property
- Error : Invalid key hash.The key hash does not match any stored key hashes
- How to Change Android Toast Position?
- Android Alert Dialog with Checkboxes example
- Android : No Launcher activity found! Error
- Android Development: Spinners with Example
- Failed to sync Gradle project Error:failed to find target android-23
- INSTALL_FAILED_INSUFFICIENT_STORAGE Android Error
- Disable Fading Edges Scroll Effect Android Views
- How to create Toast messages in Android?
- Channel 50 SMSes received every few minutes Android Phones
- Android xml error Attribute is missing the Android namespace prefix [Solution]
- Create Custom Android AlertDialog
- How To Disable Landscape Mode in Android Application
- Android Development - How to switch between two Activities
- incorrect line ending: found carriage return (\r) without corresponding newline (\n)
- Generate Facebook Android SDK keyhash using java code
- Android Error Generating Final Archive - Debug Certificate Expired
- 21 Useful Android Emulator Short-cut Keyboard Keys
- Android RatingBar Example
- 11 Weeks of Android Online Sessions-15-Jun-to-28-Aug-2020
- Download interrupted: Unknown Host dl-ssl.google.com Error Android SDK Manager
- fill_parent vs match_parent vs wrap_content
- Android : Connection with adb was interrupted 0 attempts have been made to reconnect
- Simple Struts 2 Tutorial in eclipse with tomcat 7 server - Java
- BeanDefinitionStoreException IOException parsing XML document from class path resource [spring.xml] - Java
- Difference between Sublime Text vs Visual Studio Code (VS Code) - Sublime-Text
- How to Get Year from a Date in Java - Java
- 9 Ways to Loop Java Map (HashMap) with Code Examples - Java
- Git: Step-by-Step - How to Push Local Brach to GitHub - Git
- Steps to Compare Two files in Sublime Text Side-by-Side - Sublime-Text
- How to access Trash Folder using Mac Terminal Command - MacOS