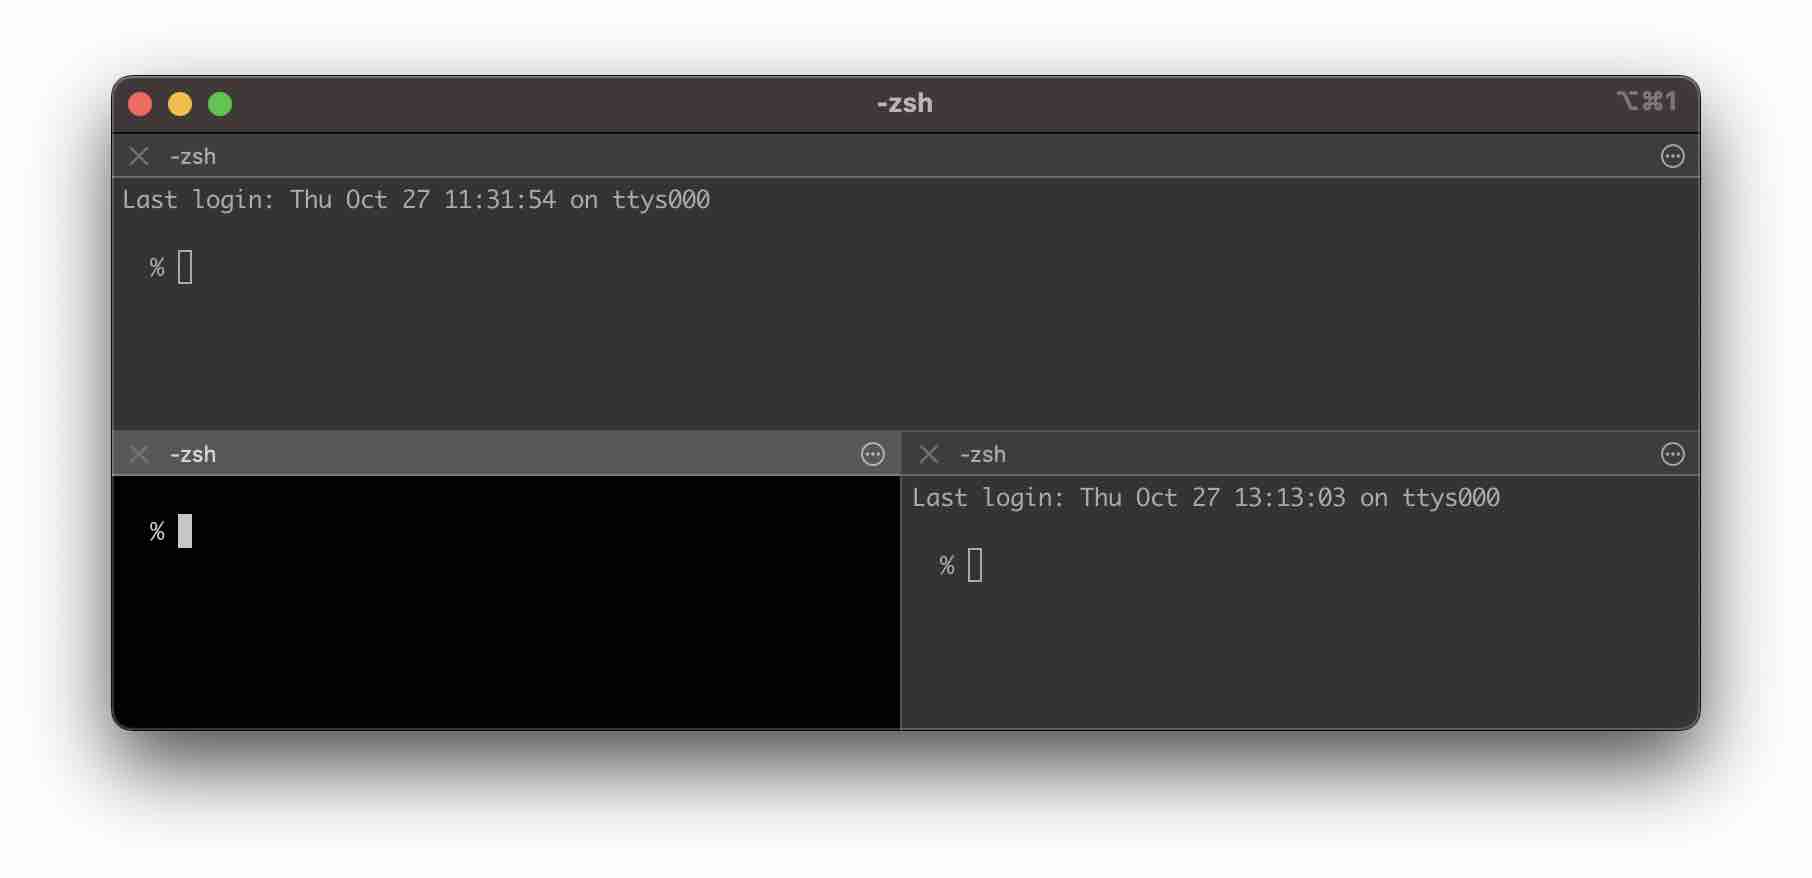
iTerm2 is an alternative or can be called a replacement of the Terminal App on macOS. iTerm2 brings in more features to the Command Line that are not available in the Terminal.
System Requirements
You should be on macOS 10.14 or later
How to install iTerm2
- Open Terminal,
- Type command: brew install --cask iterm2 (make sure homebrew is installed)
- iTerm will get installed under /Applications
- Open iTerm using Spotlight Search or Terminal open command.
Few features of iTerm2
1. Split Panes

Though macOS Terminal does allow to have multiple tabs within the Terminal Window, it does not let you split the panes to work more efficiently, this is one of the much-craved features that iTerm2 adds. You can divide a tab into multiple panes with each having a separate session.
The panes can be sliced both vertically and horizontally and there is no limit to the number of divisions you can have at a time.
2. Autocomplete
Just like IDE's you have autocomplete with iTerm2, as you start typing, the suggestions will appear, and press Command + ; to get the suggestions window.
3. Paste History
You can revisit recently copied or pasted text.
4. Search
iTerm2 has a find-on-page feature, as you search the matches are highlighted. You can even make use of regular expressions.
5. Multi-Lingual
There is internationalization support, including support for Unicode combining marks, full-width characters, Emoji, and many other Unicode features.
See the complete list: https://iterm2.com/features.html
Keyboard Shortcuts
Split Horizontally:Option ⌥  + Shift ⇧ + Command ⌘ + H
Split Vertically:Option ⌥  + Shift ⇧ + Command ⌘ + V


Cycle Tabs Forward: Tab + Right Arrow
Cycle Tabs Backward: Tab + Left Arrow
Scroll One Line Up: Command ⌘ + Up Arrow
Scroll One Line Down: Command ⌘  + Down Arrow
Previous Tab: Command ⌘  + Left Arrow
Move Tab Left: Shift + Command ⌘   + Left Arrow
Next Tab: Command ⌘ + Right Arrow
Move Tab Right: Shift + Command ⌘  + Right Arrow
Scroll To Top: Command ⌘ + Home
Scroll To End: Command ⌘ + End
Scroll One Page Up: Command + Page Up
Scroll One Page Down: Command ⌘ + Page Down
Facing issues? Have Questions? Post them here! I am happy to answer!
Rakesh (He/Him) has over 14+ years of experience in Web and Application development. He is the author of insightful How-To articles for Code2care.
Follow him on: X
You can also reach out to him via e-mail: rakesh@code2care.org
- How to show line numbers in Nano on Mac
- How to install Jupyter Notebook on macOS Sonoma
- How to Disable Remote Management using Mac Terminal
- Test internet speed using macOS Terminal command
- Docker Desktop needs privileged access macOS
- Google Search Hot Trends Screensaver for Mac OS X
- How to do calculations in Mac Terminal
- How to make TextEdit the default text Editor on Mac
- How to Show Full Website Address on Safari for Mac (Ventura/Sonoma)
- The Zsh Shell - Mac Tutorial
- Opening mac Terminal
- How to change the name of your Mac running on macOS Ventura 13
- How to find the Battery Cycle Count on macOS Ventura
- How to set an emoji as Zsh terminal prompt in macOS
- How to access Trash Folder using Mac Terminal Command
- macOS Ventura XCode Command Line Tools Installation
- Hide Bluetooth icon on Mac Menu Bar macOS Ventura 13
- How to run .sh file in Mac Terminal
- Terminal Command to get the list of available shells in macOS
- How to see Storage Information on macOS Ventura
- How to Go To /usr/local/bin on Mac Terminal?
- How to do screen recording on Mac
- How to Find File and Directory Size in Mac Terminal
- Open .bash_profile File in TextEdit using Terminal
- Remove Now Playing icon from macOS Big Sur Menu Bar
- Java code to check Internet Connection on Android Device Programmatically - Android
- How to Open Trash on Mac - MacOS
- How to create a SharePoint list from an existing list with same columns, views, formatting, data - SharePoint
- Install RabbitMQ on Docker - Docker
- Cannot access Windows application shortcuts on Start menu and Taskbar - Windows
- Install Homebrew (brew) on Mac M2 - MacOS
- Clear browsing history in Safari on Mac Ventura 13 - MacOS
- WARNING: pip is being invoked by an old script wrapper. This will fail in a future version of pip. - PIP